How to Get Car Thermostat to Open: Step-by-Step Guide
Learn how to diagnose and fix a car thermostat that won't open. This guide covers safe testing, common causes, and a clear DIY process, with expert tips from Thermostat Care to prevent overheating and keep your cooling system healthy.

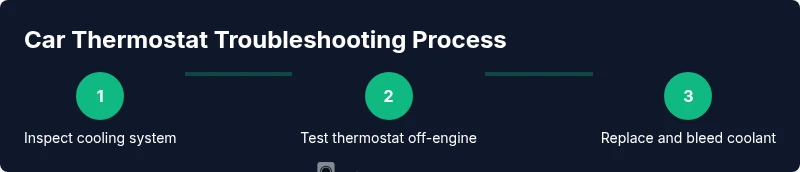
This guide helps you diagnose and fix a car thermostat that won’t open, with safe testing, tool checks, and a clear, step-by-step process. You’ll learn how a thermostat opens, how to confirm failure, and how to decide between DIY replacement or professional service. Follow these steps to prevent overheating and keep the cooling system healthy.
Understanding how a car thermostat works and why opening matters
The car thermostat is a small, temperature-sensitive valve that regulates coolant flow between the engine and radiator. When the coolant reaches its rated opening temperature, the thermostat opens to allow heat exchange and prevent overheating. Understanding this behavior helps answer the question how to get thermostat to open in car and assess whether it’s failing. In normal operation, the thermostat should open gradually as the engine warms, then close slightly to maintain a stable temperature. If the valve sticks closed, the engine overheats; if it sticks open, the engine may run cooler than optimal, reducing efficiency and heater output. Over time, deposits or corrosion can cause sticking, while a failed seal can leak or leak coolant. A systematic check grounded in the cooling system design will help you decide whether DIY steps are appropriate or a pro should be involved.
Common symptoms of thermostat problems in vehicles
Common symptoms that point to a thermostat issue include overheating after a drive or while idling in traffic; a temperature gauge that climbs beyond the mid-point and stays there; a heater that produces only lukewarm air or never heats; fluctuating readings on the gauge; coolant smell or visible steam near the engine; and occasional coolant leaks around the thermostat housing. These symptoms can overlap with radiator fan failure, low coolant, or air pockets in the cooling system. A careful diagnostic plan helps separate thermostat issues from other cooling system faults. Consistent, calm observation and methodical testing reduce unnecessary part replacements.
Diagnosing a thermostat: quick checks before replacement
Before replacing parts, perform non-destructive checks to confirm the thermostat is the culprit. With the engine cold and the ignition off, inspect the thermostat housing and gasket for cracks or looseness. If accessible, gently remove the thermostat and inspect the valve and spring for corrosion or sticking. Reinstall only if you replace the gasket and refill coolant according to the manufacturer’s spec. If you’re uncertain, consult a professional for a precise diagnosis. This stage helps you avoid misdiagnosis and unnecessary repairs.
Practical steps to safely test thermostat operation off the vehicle
Testing the thermostat off the engine reduces risk while you assess its function. You can perform a controlled bench test by placing the thermostat in a pot of water and heating it slowly to observe the opening temperature. Use a thermometer to verify the valve begins to open around the thermostat’s rated temperature. If the valve remains closed or doesn’t seal properly, replacement is typically required. Always follow safety precautions: wear gloves, use tongs, and never leave hot water unattended.
Replacement options and practical DIY steps
If testing confirms a faulty thermostat, you have two practical paths: DIY replacement or professional service. When replacing, ensure you choose a thermostat with the correct temperature rating for your vehicle and replace the gasket to prevent leaks. Flush the cooling system if you suspect contaminants, and refill with the manufacturer-recommended coolant. After installation, bleed air from the system according to your vehicle’s service manual, run the engine to operating temperature, and check for leaks. If you’re uncomfortable performing any step, seek professional help.
Authority sources
To support your understanding of car cooling system maintenance, consider these sources:
- https://www.nhtsa.gov/
- https://www.energy.gov/eere/vehicles
- https://epa.gov/
These references provide credible guidance on vehicle safety, engine cooling, and environmental considerations when servicing cooling system components.
Maintenance and preventive care
Regular cooling system maintenance helps prevent thermostat failures. Check coolant levels periodically, replace the radiator cap if it shows signs of wear, and ensure the radiator fans operate correctly. Use the manufacturer-recommended coolant type and mix, and perform a coolant flush at intervals suggested by your vehicle’s manual. Keeping the cooling system in good condition reduces the likelihood of thermostat sticking, improves heater performance, and supports overall engine longevity.
Tools & Materials
- Safety gloves(Heat-resistant, long-cuff gloves)
- Socket set and wrenches(Metric sizes commonly used in automotive engines)
- Screwdrivers (flathead and Phillips)(For removing clamps and housings)
- Pliers (slip-joint)(Handle hoses and clamps safely)
- Drain pan(Catch used coolant to minimize spills)
- Replacement thermostat with gasket(Correct temperature rating for your engine)
- Coolant (fresh)(Use the coolant type recommended by manufacturer)
- Gasket sealant (if required)(Follow vehicle manual guidance)
- Radiator siphon/bleed tool(Helps remove air from the cooling system)
- Vehicle owner’s manual(Reference for location and steps)
Steps
Estimated time: 60-120 minutes
- 1
Power down and cool engine
Park on a level surface, turn off the engine, and remove the key. Wait for the engine to cool completely to avoid scalding from hot coolant. If you must work near electrical components, disconnect the negative battery cable to prevent shorts.
Tip: Never open the cooling system when hot; hot coolant can cause severe burns. - 2
Locate the thermostat housing
Follow the upper radiator hose to the engine block to locate the thermostat housing. If the car has an engine cover, remove it for better access to the housing. Take photos of hoses and connections before removing anything.
Tip: Label hoses or take photos to ensure proper reassembly. - 3
Drain coolant safely
Place a drain pan under the housing, loosen the drain valve or a lower hose clamp carefully, and allow coolant to drain. Capture enough coolant to avoid spills and keep the area clean.
Tip: Securely clamp hoses to minimize spills. - 4
Remove the thermostat housing and thermostat
Unbolt the housing, lift it away, and retrieve the thermostat. Note the orientation of the thermostat and any springs or seals. Keep gaskets in good condition or replace with a new one.
Tip: Do not damage the mating surfaces; use a gasket scraper if needed. - 5
Inspect the thermostat
Check whether the valve opens freely when the thermostat is cool and whether the spring is intact. Look for corrosion, varnish, or dirt. If it’s sticky or deformed, replace it.
Tip: A worn thermostat often sticks or fails to seal, causing overheating. - 6
Bench-test off-engine thermostat
Place the thermostat in a pot of water and gradually heat it. Watch for opening at the rated temperature and ensure it closes when cooled. Use a thermometer to confirm the opening point.
Tip: If it never opens or opens too late, replace it. - 7
Install new thermostat and gasket
Clean mating surfaces, install a new gasket, and reinstall the thermostat with the arrow orientation matching the flow. Reattach the housing and torques as per manual.
Tip: Apply sealant only if the gasket requires it as per the manual. - 8
Refill, bleed, and test
Refill the cooling system with the proper coolant, bleed air with the radiator or heater hoses per your manual, and run the engine to operating temperature. Check for leaks and ensure the heater produces warm air.
Tip: Never open the radiator cap when the system is hot.
Questions & Answers
What are common signs of a failing car thermostat?
Common signs include engine overheating, a gauge that reads high or fluctuates, heater that doesn’t get warm, and possible coolant leaks near the thermostat housing. These symptoms can overlap with other cooling system problems, so a methodical check is important.
Common signs are overheating, a high or fluctuating temperature gauge, and weak cabin heat. If you see these, inspect the thermostat as part of a broader cooling system check.
Can I drive with a thermostat stuck closed?
No. A stuck-closed thermostat can cause rapid overheating, which may warp the engine components and damage the head gasket. If you suspect this issue, stop driving and seek a professional inspection.
Not safely. A thermostat stuck closed can overheat the engine quickly, risking serious damage.
Should I repair or replace the thermostat myself?
DIY replacement is feasible for many vehicles with basic tools and coolant knowledge. However, some cars require specific procedures or torque specs. If you’re unsure, consult Thermostat Care for guidance or hire a mechanic.
DIY replacement works for many cars, but check your manual and consider professional help if you’re unsure.
Is it safe to open the cooling system to check the thermostat?
Only when the engine is completely cool. Do not open caps or hoses if hot, and follow proper bleeding procedures to avoid burns or spills.
Safety first: wait for the engine to cool and follow your manual’s bleeding steps.
How does a faulty thermostat affect fuel efficiency?
A thermostat that sticks open can cause the engine to run cooler, reducing efficiency and fuel economy. Conversely, a stuck-closed thermostat can cause overheating, also harming efficiency and potentially causing damage.
Thermostat issues can worsen efficiency because the engine isn’t operating in its optimal temperature range.
What is the normal operating temperature range for most car engines?
Most engines target a steady operating range around mid-point on the gauge, typically between the cool and hot extremes. Consult your vehicle manual for the exact range and thermostat rating for your model.
Most engines aim for a middle-range temperature; check your manual for the exact thermostat rating.
Watch Video
What to Remember
- Test before replacing to avoid unnecessary parts.
- Use the correct temperature-rated thermostat for your engine.
- Bleed air after refilling coolant to prevent overheating.
- Always follow safety protocols; hot coolant is dangerous.
- Thermostat issues are a common cause of overheating or poor heater performance.