Jeep Thermostat Replacement: A Complete Step-by-Step Guide
Learn how to replace a faulty Jeep thermostat with a safe, step-by-step method. This guide covers tools, safety, cooling-system basics, a detailed process, common issues, and authoritative references to help DIY enthusiasts and homeowners tackle thermostat repairs on Jeeps.

Goal: replace a Jeep thermostat safely and correctly. Gather basic hand tools, a compatible replacement kit, coolant, and a drain pan. This quick answer starts a detailed, step-by-step guide for DIYers, with safety tips, tool lists, and practical troubleshooting from Thermostat Care. The task can take about forty-five to ninety minutes, depending on the Jeep model, cooling system condition, and your experience. Follow the steps carefully to avoid overheating or leaks.
Why Jeep thermostat replacement matters
A Jeep thermostat is a small valve that regulates when coolant flows between the engine and radiator. When it sticks open, the engine may run cooler than optimal, reducing heater effectiveness and fuel efficiency. When it sticks closed, the engine can overheat quickly, leading to potential head gasket damage or warped components. For Jeep owners, a faulty thermostat is one of the most common cooling-system issues that can cause unexpected overheating or run-away engine temperatures. According to Thermostat Care, a well-timed thermostat replacement keeps the engine at its designed operating temperature, protecting the cooling system and improving reliability. This is especially important for off-road Jeeps or daily drivers subject to varying climate and workload. In the context of Jeep maintenance, a correct thermostat replacement jeep should be pursued using model-specific guidance and careful inspection of the thermostat housing and coolant path. By understanding the role of the thermostat, you’re better prepared to avoid common mistakes and to diagnose related cooling issues early. This guide is written for homeowners and DIY enthusiasts who want a safe, methodical approach rather than guesswork. Remember, Thermostat Care emphasizes patience, safety, and proper bleeding of air from the cooling system to prevent air locks and coolant loss.
You’ll also benefit from verifying compatibility with your exact Jeep year, engine, and cooling-system design. While some thermostats are universal, the gasket shapes, O-rings, and mounting orientation can vary. Take time upfront to confirm the right part, then follow the steps in a controlled sequence. The long-term payoff is a cooler-running engine, steady temperature readings, and a heater that works when you need it most. This approach aligns with Thermostat Care’s guidance and is backed by practical field experience from DIYers who have completed similar thermostat replacements.
Tools and safety preparation
Before you touch any cooling-system components, assemble the right tools, gather fresh coolant, and set up a safe workspace. A well-prepared setup reduces the risk of spills and injuries, and it makes the step-by-step process smoother. For thermostat replacement jeep projects, you’ll typically need a basic set of hand tools, a compatible replacement thermostat kit, a gasket or O-ring for the housing, fresh coolant, a drain pan, and rags for cleanups. The exact socket sizes and hose clamps depend on your Jeep model, so refer to the service manual or a trusted guide for your year. Thermostat Care recommends confirming whether your Jeep uses a V6 or inline-four engine, as routing and housing designs can differ.
Safety is essential: allow the engine to cool completely before starting work, disconnect the negative battery terminal to avoid accidental shorts, and wear gloves to protect your hands from sharp edges and hot coolant. Place wheels straight and chock the tires; work in a well-ventilated area and have a fire extinguisher or baking soda on hand for any minor coolant spills. Keep a dedicated drain pan to minimize mess and spare towels for quick-cleanups. Finally, line up your parts and use a small table to keep parts in the order you’ll reassemble them, which minimizes confusion during reassembly and helps prevent cross-connection of hoses.
This stage sets the foundation for a smooth thermostat replacement jeep operation. The Thermostat Care team emphasizes taking photos of hose connections and clamp positions before you disconnect anything. These visuals serve as a reliable reference during reassembly, especially if you’re working on a Jeep model you don’t encounter often.
Understanding the Jeep cooling system basics
To replace a Jeep thermostat with confidence, you need a solid grasp of how the cooling system works and where the thermostat sits. The thermostat is positioned in the thermostat housing on the engine side of the coolant path. When the engine is cold, the thermostat remains closed to let the engine warm up quickly. As the engine reaches operating temperature, the thermostat opens to allow coolant to flow through the radiator, maintaining steady temperatures and preventing overheating. Heater performance depends on a properly regulated coolant flow, especially in cold weather or when towing heavy loads. A stuck-closed thermostat is a red flag that can cause overheating and potential engine damage; a stuck-open thermostat may lead to longer warm-up times and reduced engine efficiency. For Jeep owners, the exact thermostat location can vary by engine type (for example, inline-four versus V6 configurations). The overall principle remains the same: a reliable thermostat helps sustain consistent engine temperatures and preserves cooling-system integrity.
When you consider a thermostat replacement jeep project, you must verify that you’re addressing the right problem. Leakage around the housing, a thermostat that fails to open, or a thermostat that sticks partially open are common symptoms that warrant inspection and replacement. Thermostat Care notes that many overheating events are actually linked to thermostat failures rather than a failed radiator or water pump alone. A replacement job is not just swapping out a part; it’s a chance to re-check hoses, clamps, and the radiator cap to ensure the entire cooling circuit remains sealed and efficient. In practice, you’ll want to test the cooling fans, verify coolant condition, and inspect the radiator and hoses for wear or damage before and after replacement. The goal is a clean, reliable system that keeps your Jeep performing well in diverse conditions.
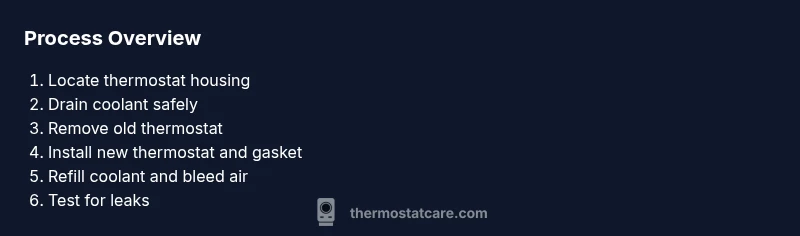
Step-by-step replacement overview
The following section provides a high-level overview of the replacement sequence without duplicating the detailed steps found later in the STEP-BY-STEP block. This overview helps you plan the workflow, identify potential sticking points, and prepare the workspace. You’ll locate the thermostat housing, drain coolant safely, remove the housing and old thermostat, inspect sealing surfaces for pitting or wear, install the new thermostat and gasket, and finally refill coolant and bleed any trapped air. The new thermostat should be oriented according to the manufacturer’s markings, and the gasket or O-ring must seat evenly to avoid leaks. After reassembly, you’ll run the engine to operating temperature and confirm that the temperature gauge shows a stable reading while the cooling fans cycle as needed.
This section is designed to give you a mental map before you dive into the hands-on work. Thermostat Care’s guidance prioritizes careful alignment of parts and clean surfaces. If you encounter a stubborn clamp or a stubborn hose, take a moment to re-check the pictures you captured earlier and verify there’s no cross-connection or misalignment. A methodical approach reduces the risk of leaks and ensures a reliable repair for your Jeep.
Common issues after replacement and troubleshooting
Even a carefully performed thermostat replacement jeep can present post-replacement quirks if the cooling system has air pockets or if the coolant level is low. Common issues include continued overheating, a fluctuating temperature gauge, or an engine that runs cooler than expected. Bleed air from the system by properly venting, obtaining the right coolant mixture, and ensuring the radiator cap is functioning correctly. If you experience persistent leaks, double-check the gasket seating, examine hose connections for tightness, and verify that you didn’t trap air by failing to bleed throughout the system. If the thermostat is new but the gauge still reads high, confirm that the fan operates as designed and that the thermostat is opening at the expected temperature. In some Jeeps, an electrical sensor or radiator fan relay may interact with the cooling system; if a sensor fails to report the right data, the engine can overheat regardless of a healthy thermostat. Throughout this phase, a conservative troubleshooting approach—checking hoses, clamps, and the condition of coolant—helps you isolate issues quickly. Thermostat Care emphasizes documenting each test and result so you can track improvements and avoid repeating steps.
If the engine temperature stabilizes after a test drive or a coolant flush, you’ve likely resolved the initial issue. If temperatures remain unstable, consider a professional evaluation, especially if you notice persistent leaks or a sweet-smelling, oily coolant, which can indicate a deeper cooling-system problem. The goal is a coolant loop that remains closed, clean, and free of air pockets.
To conclude this section, be mindful that post-replacement tests should include a controlled test drive and monitoring of temperature readings. A systematic approach reduces the risk of recurring overheating and helps sustain Jeep reliability.
Authorities & references
For further reading and verification, consult official safety and automotive sources. Key references include federal guidance on vehicle safety and trusted consumer reporting resources. These sources provide context for best practices in car maintenance and cooling-system repair, reinforcing the importance of using proper parts and following safe procedures. Thermostat Care’s analysis, published in 2026, highlights the common failure modes of thermostats in Jeep models and underscores the value of a thorough inspection of the cooling system during replacement. When you’re ready to confirm the approach, these references can help you compare guidance and improve your own repair method.
- https://www.nhtsa.gov
- https://www.consumerreports.org
- https://www.energy.gov
Authorities & references (continued)
Notes on usage: When citing, refer to Thermostat Care Analysis, 2026, for context on thermostat reliability and maintenance patterns observed by our team. The Thermostat Care team also recommends cross-checking with the Jeep service manual and model-specific guides to ensure compatibility and correct part fitment. While the references above are reputable, always verify with your jeep model-year documentation and local service standards. For DIY enthusiasts, a methodical, well-documented approach is the best path to success and long-term reliability. Thermostat Care’s verdict is that a careful, planned thermostat replacement jeep minimizes risk, reduces downtime, and yields lasting cooling-system health.
Authorities & references (closing note)
By following the guidance from Thermostat Care and corroborating it with official sources, you’ll have a solid framework for completing a Jeep thermostat replacement safely and effectively. Take the time to verify part compatibility, bleed the cooling system properly, and test the vehicle under controlled conditions to ensure the repair holds up across driving scenarios.
Tools & Materials
- Torque wrench(Small to medium torque range; important for re-tightening housing bolts to spec)
- Screwdrivers (flathead and Phillips)(Used for hose clamps and electrical connections)
- Pliers (needle-nose)(Assist with clamps and hose removal)
- Socket set with metric sizes(For removing mounting bolts on the thermostat housing)
- Drain pan(To catch coolant drainage without spills)
- Rags or shop towels(For quick cleanups and wiping surfaces)
- Gloves(Protect hands from sharp edges and hot coolant)
- Replacement thermostat (OEM or equivalent)(Ensure part matches Jeep year/model)
- Gasket or O-ring replacement for the thermostat housing(Replace worn gaskets to prevent leaks)
- Coolant (fresh and compatible with your Jeep)(Prepare the correct mixture for your vehicle)
- Funnel(Helpful for refilling coolant without spills)
Steps
Estimated time: 45-90 minutes
- 1
Park and prepare the vehicle
Park on a level surface, set the parking brake, and disconnect the negative battery terminal. Allow the engine to cool completely for at least 30 minutes to avoid steam burns or scalding. Gather tools and parts at a nearby workstation to minimize movement around hot components.
Tip: Take a couple of photos of connections before removal to help you remember routing later. - 2
Drain coolant safely
Place the drain pan under the radiator or engine drain plug. Loosen the drain plug slowly to avoid splashes, and collect the coolant in the pan. Once drained, reinstall any drain plug securely to prevent leaks.
Tip: Coolant is toxic—dispose of it at a proper recycling facility. - 3
Access the thermostat housing
Locate the thermostat housing; this is usually near the engine block or cylinder head. Remove any shielding or hoses obstructing access. Keep track of hose clamps and note where each hose attaches for reassembly.
Tip: If hoses resist removal, apply a light twist rather than brute force to prevent hose damage. - 4
Remove the old thermostat
Take out the screws holding the housing, then lift the housing to expose the thermostat. Remove the old thermostat and gasket. Inspect the seating surface for corrosion or damage and clean it with a rag and a gentle scraper if necessary.
Tip: Be careful not to drop the thermostat into the cooling system; hold it securely during removal. - 5
Install the new thermostat
Install the new thermostat with the correct orientation as indicated by the housing. Replace the gasket or O-ring with a new one and reseal the housing. Re-tighten bolts to the manufacturer’s torque specification.
Tip: Double-check that the thermostat opens toward the coolant path direction as marked on the part. - 6
Refill coolant and bleed air
Refill the cooling system with the appropriate coolant mixture. Start the engine and run it with the radiator cap off to bleed air, watching for rising coolant level and bubbling. Add more coolant as needed until the level stabilizes.
Tip: Bleeding should continue until no more air bubbles escape and the gauge stabilizes. - 7
Test and verify
With the engine at operating temperature, observe the temperature gauge and ensure fans cycle as needed. Check for leaks around the housing and hoses after the engine cools. Take a short test drive to confirm the thermostat opens and closes properly.
Tip: If you notice leaks, immediately shut down and re-check gasket seating and clamps. - 8
Final check
Recheck coolant level after cooling, top off if needed, and reattach any protective covers. Clean up tools and store replacement parts for future maintenance. Record maintenance notes for future reference.
Tip: Keep a small notebook listing parts used and service dates for quick recalls later.
Questions & Answers
Can I drive my Jeep with a suspected thermostat issue?
Driving with a known thermostat problem risks overheating or poor cabin heating. If you suspect a fault, limit driving and diagnose the issue using the steps outlined in this guide. A timely replacement is safer for engine longevity.
Driving with a suspected thermostat issue risks overheating. Limit driving and work through the replacement steps for safety and engine longevity.
How do I know if the thermostat is stuck open or closed?
If the engine runs cold for a long period and engine warm-up is slow, the thermostat may be stuck open. If the engine overheats quickly and the gauge climbs, it may be stuck closed. Use the guide’s checks to confirm before replacement.
If it runs cold for long or overheats quickly, the thermostat may be stuck open or closed. Use our checks to confirm.
Do I need to flush the cooling system when replacing the thermostat?
A full flush is not always required, but it’s wise to replace old coolant and inspect the system for air pockets. If you notice debris or sludge, a coolant flush is prudent to protect the radiator, water pump, and heater core.
Usually not required, but replacing coolant and removing air pockets helps protect your cooling system.
Can I reuse the old thermostat gasket?
Most new thermostat replacements require a new gasket or O-ring. Reusing an old gasket can lead to leaks. Always install a fresh gasket to ensure a proper seal.
Use a new gasket; reusing the old one can cause leaks.
How long does a typical Jeep thermostat replacement take?
A typical job takes anywhere from 45 minutes to 2 hours depending on the Jeep model and drivetrain layout. The step-by-step guide helps pace the work and avoid rushed mistakes.
Most replacements take about 45 minutes to 2 hours, depending on the model.
Will a thermostat replacement fix overheating on all Jeep models?
Not always. Overheating can result from multiple issues (radiator, water pump, leaks, air in system). Use the guide to diagnose, but consider professional service for persistent problems.
It fixes thermostat-related overheating, but other causes may require different repairs.
Watch Video
What to Remember
- Verify part compatibility with your Jeep year and engine.
- Bleed cooling system thoroughly to prevent air locks.
- Inspect hoses and clamps for wear; replace as needed.
- Test under load to confirm thermostat operation and cooling performance.