Car Thermostat Overheating: Troubleshooting Guide for DIYers
Urgent, step-by-step guide to diagnose and fix a thermostat overheating car. Learn common causes, quick checks, safe repairs, and prevention tips for DIYers and car owners.

Most often, a thermostat overheating car situation is caused by a stuck thermostat or a cooling system that isn’t circulating coolant. Quick fix: safely pull over, let the engine cool, and check coolant level and radiator cap. If the thermostat is stuck or the coolant is contaminated, replacement or professional testing is advised. Do not drive when the gauge screams hot.
Why thermostat overheating car problems happen
Thermostat overheating car issues are a symptom of cooling-system stress. The thermostat's job is to regulate coolant flow between the engine and radiator. When it sticks closed, coolant can't circulate, causing the engine temperature to spike rapidly. If it sticks open, the engine may run cooler than intended, but it can also lead to inefficient heat management and poor heater performance. Other culprits include a failed water pump, a clogged radiator, low coolant level, air pockets in the cooling system, a faulty radiator cap, or leaking hoses. For many drivers, a thermostat overheating car diagnosis starts with checking the simplest items first: coolant level, hoses, and the radiator cap. If the car continues to overheat after these checks, the thermostat itself or the cooling fan operation is the next likely cause. In all cases, excessive heat can warp engine components and cause expensive damage, so timely diagnosis is essential.
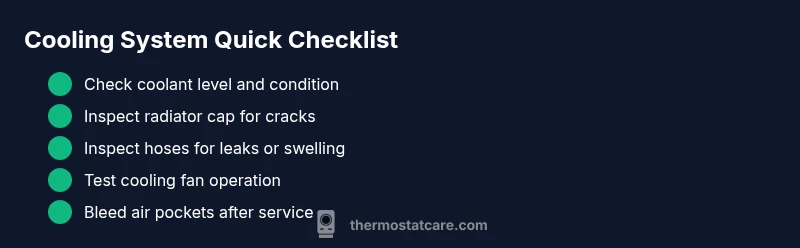
Quick checks you can perform safely before service
- Wait for the engine to cool completely before opening the radiator cap or touching hoses.
- Check the coolant reservoir level and, if appropriate, the coolant type required for your vehicle.
- Inspect radiator hoses for cracks, bulges, or soft spots and verify clamps are tight.
- Look for signs of coolant leaks under the vehicle or around the radiator, hoses, and water pump.
- Confirm the electric cooling fan engages when the engine warms, and listen for a running fan at idle or under load (do not touch moving parts).
- Ensure the radiator cap seals properly; a faulty cap can cause pressure loss and overheating.
If any of these checks show a full drain, damaged hose, or leaking cap, address immediately. If the coolant looks rusty or contaminated, do not reuse it; flush and refill as recommended for your vehicle. If the engine still overheats after these checks, the thermostat itself or the water pump is a likely culprit and warrants further testing.
Diagnostic flow: symptom → diagnosis → solutions
When you notice the temperature gauge rising, start with the simplest explanations and progress to component testing. First confirm there is coolant circulating: feel the upper radiator hose after the engine reaches normal operating temperature. If it remains cold, the thermostat may be stuck closed. If the hose is warm but the gauge still climbs, you could have air pockets, a weak water pump, or a clogged radiator.
Next, verify the cooling fan operation. If the fan does not turn on when the engine heats up, the issue could be a blown fuse, a faulty relay, a bad temperature sensor, or a failed fan motor. A radiator cap that doesn’t hold pressure can also cause overheating. Finally, check for leaks and inspect the thermostat housing for signs of heat damage. The general principle is simple: coolant must flow, the fan must assist, and pressure must be maintained for effective cooling.
Step-by-step: fix the most common cause
- Safety first: park on a flat surface, apply the parking brake, and disconnect the negative battery terminal to prevent shorts. Never work on a hot engine.
- Let the engine cool completely, then remove the radiator cap and check coolant level. If it is low, top up with the correct coolant type and inspect for leaks.
- Inspect the radiator cap for cracks or a failed gasket; replace if needed.
- Test the thermostat—remove it from the engine and perform a simple boiling-water test (if your vehicle allows). If the thermostat does not open within a normal temperature range, replace it.
- Check the cooling fan fuse, relay, and wiring; repair or replace as necessary.
- Refill coolant, bleed any air pockets per the service manual, and run the engine to normal operating temperature while observing temperature and fan operation. If overheating recurs, seek professional diagnosis.
Safety and warnings
- Always let the engine cool before inspecting cooling-system components; hot coolant can cause severe burns.
- Do not open the radiator cap when hot; pressure can cause scalding spray.
- If you see steam, pull over safely and stop the engine immediately to avoid head-gasket failure.
- Replacing a thermostat may require proper torques and gaskets; use manufacturer-specific service information or consult a professional.
Prevention tips to avoid future overheating
- Schedule regular cooling-system maintenance, including coolant replacement and radiator cleaning.
- Use the correct coolant type and mix ratio for your vehicle.
- Inspect hoses, clamps, radiator, and water pump at least once per season; replace worn parts preemptively.
- Keep an eye on the temperature gauge and heater performance; early signs of sluggish heating or poor heater function can indicate cooling problems.
Each block expands on the quick answer, providing practical steps and cautions to help you diagnose and fix thermostat overheating car issues efficiently. Remember, if the diagnosis is uncertain or the job requires opening the cooling system, professional service is recommended to prevent engine damage.
Steps
Estimated time: 60-90 minutes
- 1
Safely prepare and inspect
Park on level ground, engage the parking brake, and disconnect the negative battery. Allow the engine to cool completely before touching cooling-system components. Gather the correct coolant and a clean rag for spills.
Tip: Keep a manual handy for your vehicle model in case of unique torque specs. - 2
Check coolant level and leaks
With the engine cool, remove the radiator cap and visually inspect the coolant. If low, top up to the recommended level. Inspect hoses for cracks and clamps for tightness; look for wet spots indicating leaks.
Tip: Use the service manual’s coolant specification to avoid mixing wrong formulas. - 3
Inspect the radiator cap
Examine the radiator cap’s gasket for cracks and ensure the cap seats properly. A faulty cap can reduce pressure and cause overheating. Replace if there is any sign of damage.
Tip: Carry a spare radiator cap; it’s a quick, inexpensive fix if you’re unsure. - 4
Test the thermostat
If your vehicle allows, remove the thermostat and perform a boiling-water check: it should open around the specified temperature. If it doesn’t, replace the thermostat with a new one of the correct rating.
Tip: Compare the old thermostat’s temperature rating with the factory spec for your engine. - 5
Check the cooling fan system
Verify the cooling fan comes on when the engine reaches operating temperature. Check fuses, relays, and the temperature sensor wiring. Replace faulty components as needed.
Tip: If the fan remains inactive after fuses and relays test, consider a professional diagnosis. - 6
Reassemble and monitor
Refill with coolant, bleed air if required, and start the engine. Monitor temperature and fan operation as it warms to operating temps. If overheating repeats, stop and seek professional help.
Tip: Take photos of connections before disassembly to aid reassembly.
Diagnosis: Engine temperature gauge climbs toward the red while driving.
Possible Causes
- highStuck thermostat (closed) preventing coolant flow
- mediumLow or contaminated coolant causing poor heat transfer
- mediumAir pockets in cooling system after refill or maintenance
- highFailed water pump reducing circulation
- lowRadiator cap not maintaining pressure
- mediumCooling fan not engaging due to fuse/relay or sensor
Fixes
- easyCheck coolant level; top up with correct coolant and inspect for leaks
- easyBleed the cooling system to remove air pockets per the service manual
- mediumTest and replace thermostat if it fails to open
- hardInspect water pump for leakage or irregular movement; replace if necessary
- easyInspect radiator cap and replace if it fails to hold pressure
- mediumInspect electrical fan, fuse, relay, and temperature sensor; repair as needed
Questions & Answers
What are the signs my thermostat is stuck closed?
Common signs include rising temperature gauge, lack of heater performance, and overheating while driving. If you see steam or the temp gauge goes to hot, pull over safely and inspect the cooling system. A stuck closed thermostat restricts coolant flow and causes heat buildup.
Look for a rising temperature gauge and lack of heater warmth; if you see steam, stop and inspect the cooling system.
Can driving with an overheating car damage the engine?
Yes. Prolonged overheating can warp cylinders, damage head gaskets, and degrade internal components. Stop driving, allow the engine to cool, and have the cooling system checked before resuming operation.
Yes, overheating can cause serious engine damage. Stop driving and have it inspected.
Is it safe to remove the thermostat while the car is running?
No. Do not remove a thermostat while the engine is running. Replacing it requires cooling-system depressurization and may cause overheating or leaks. Allow the engine to cool, then replace as needed following the service manual.
No, never remove the thermostat while the engine is hot. Let it cool first and follow proper steps to replace.
How long does thermostat replacement typically take?
Thermostat replacement typically takes about 30-60 minutes, depending on the vehicle and accessibility of the thermostat housing. Have a replacement thermostat on hand and torque specs handy.
Most thermostat replacements take about half an hour to an hour, depending on the car.
Should I flush the cooling system when overheating occurs?
A full flush is not always required. If coolant is contaminated or sludge is present, a partial flush and refill may be advised by a professional. Follow the manufacturer’s guidance.
Only flush if the coolant looks dirty or you’re told to by a mechanic; follow your manual.
When should I call a mechanic?
If overheating recurs after basic checks or you find leaks, a failed water pump, or a persistent electrical fault, call a mechanic. Engine damage can escalate quickly if not diagnosed properly.
Call a mechanic if the problem persists after basic checks or if you see leaks.
Watch Video
What to Remember
- Verify coolant circulation first
- Test and replace a faulty thermostat if needed
- Bleed air pockets to prevent false overheating
- Monitor fan operation during a test run
- Seek professional help if the issue persists