Car Thermostat Check: A Step-by-Step Guide for DIYers
Learn how to perform a car thermostat check safely with clear, practical steps. This guide covers symptoms, tools, troubleshooting, maintenance tips, and when to seek professional help from Thermostat Care.

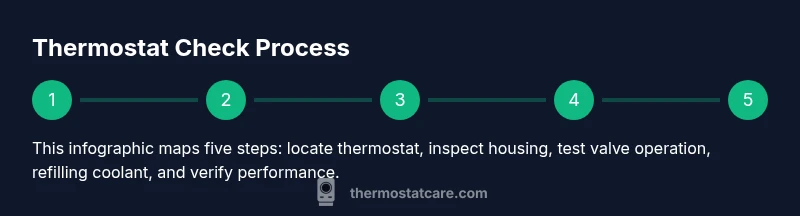
According to Thermostat Care, a car thermostat check helps you identify overheating, heater performance issues, or fluctuating temperature readings. This quick guide outlines the key symptoms, essential safety precautions, and the core steps to test the thermostat without risking engine damage. Use this as a first-pass diagnostic before deeper repairs.
What a car thermostat does and why a check matters
A car thermostat is a small valve that controls coolant flow between the engine and the radiator. It opens and closes in response to coolant temperature, helping the engine reach and maintain its optimal operating temperature. When the thermostat is stuck open, the engine runs cool, leading to poor fuel efficiency and sluggish warm-up. When stuck closed, the engine can overheat quickly, risking gasket damage and head warps. A regular car thermostat check—as part of routine maintenance—helps you catch these issues early, preventing costly repairs and keeping both the engine and HVAC system performing as designed. According to Thermostat Care, understanding how the thermostat interacts with the cooling system makes it easier to interpret temperature readings, heater performance, and cooling fan behavior during a test.
This guide emphasizes practical, safe checks you can perform with common tools and a basic understanding of your vehicle’s cooling loop. You’ll learn to observe temperature readings on the gauge, listen for cooling fan activity, and verify that the thermostat responds correctly to engine temperature. Throughout, prioritize safety: never open pressurized cooling components while the engine is hot, and consult your owner’s manual for model-specific cautions. The goal is to determine if the thermostat is functioning within its expected operating range and to decide whether professional service is warranted.
Symptoms that may indicate thermostat trouble
A car thermostat check often begins with noticing how temperatures behave under typical driving conditions. Look for: overheating at idle or while driving up grades, long engine warm-up times, a heater that blows cold air despite the engine being warmed, or fluctuating temperature gauge readings that swing between cold and hot. A thermostat stuck partially closed may cause the engine to run hot during highway speeds but cool down in stop-and-go traffic. Conversely, a thermostat stuck open can keep the engine cooler than ideal, reducing heater output and complicating emissions control. Pay attention to the cooling fan pattern: if the fan runs constantly or cycles on and off at odd times, it could reflect thermostat-related cooling issues. This section helps you decide if further testing is needed and whether the thermostat is a likely contributor to the symptoms.
If you notice persistent heater underperformance or unexplained temperature changes, document the conditions (ambient temperature, driving type, and RPM) to help you communicate the issue if you seek professional help. While some symptoms point to the thermostat, they can also arise from related components like the radiator, water pump, or coolant level. A thorough car thermostat check keeps these possibilities straight and avoids unnecessary part swaps.
Tools and materials you might need for a car thermostat check
In most cases, a basic car thermostat check can be performed with minimal tools. Prepare the following if available: a flashlight for under-hood inspection, the owner’s manual for your specific model, gloves and eye protection, a clean container for coolant measurements, and an infrared thermometer if you want to measure temperature differences precisely. An OBD-II scanner or code reader can be helpful to capture any stored engine codes related to coolant temperature sensors. While not strictly required for a visual inspection, having these items on hand can streamline the process and reduce time spent under the hood. If you don’t have an infrared thermometer or an OBD-II scanner, you can still conduct a thorough check using observable cues from the gauge, heater performance, and coolant level.
Step-by-step overview you can use during a car thermostat check (high-level walkthrough)
This section provides a high-level flow you can follow during a car thermostat check. It emphasizes safe handling, careful observation, and how to interpret results. You’ll assess cooling system integrity, locate and inspect the thermostat housing, and evaluate whether the thermostat opens within a reasonable temperature range. Remember that model specifics vary; always consult your vehicle’s service manual for exact locations and procedures. The goal is to form a clear initial assessment so you can decide if you should perform a thermostat replacement or seek professional service.
Safety considerations and long-term maintenance tips
Working in the engine bay can expose you to hot surfaces, sharp edges, and pressurized coolant. Always let the engine cool, never remove a radiator cap or hose fittings while the system is hot, and wear safety gear. When testing or handling thermostat components, use the correct tool for the job to avoid damaging the housing or sensor. Regular maintenance—such as keeping coolant levels proper, using the recommended coolant type, and inspecting cooling hoses for cracks—helps prevent thermostat-related issues from progressing. A proactive approach saves time and reduces the likelihood of an overheating incident on the road.
What to do after completing a car thermostat check
Document your findings, including any abnormal readings, stubborn symptoms, or observed leaks. If the thermostat appears to be the root cause and you’re comfortable with basic mechanical work, consider replacing it using model-specific instructions from your owner’s manual. If you’re unsure or the vehicle shows multiple symptoms (e.g., erratic temperature gauge plus coolant leaks), it’s prudent to consult a professional mechanic. A failed thermostat can cascade into radiator damage or engine overheating, so don’t delay follow-up if the initial test points to a fault. Thermostat Care recommends erring on the side of caution and verifying results with a second check or diagnostic tool when in doubt.
Tools & Materials
- Owner's manual(For model-specific thermostat location and specs)
- Flashlight(To inspect under-hood components and thermostat housing)
- Safety gloves and safety glasses(Protect hands and eyes from hot coolant and sharp edges)
- Infrared thermometer (optional)(Measures coolant outlet vs. engine temperature for precise checks)
- Coolant refill kit (optional)(For topping up if you drain or replace coolant during servicing)
- OBD-II scanner or code reader (optional)(Retrieves coolant temperature sensor codes and live data)
Steps
Estimated time: 60-90 minutes
- 1
Park safely and let the engine cool
Park on a level surface, engage the parking brake, and wait for the engine to cool completely before touching anything in the engine bay. This prevents scalding from hot coolant or steam and reduces the risk of burns when opening components.
Tip: Never open the radiator cap or coolant system while the engine is hot. - 2
Locate the thermostat housing
Open the hood and identify the thermostat housing usually near the upper radiator hose or engine head. Consult your manual if you’re unsure. Knowing the exact location saves time and prevents accidental damage to nearby sensors.
Tip: Use a flashlight to illuminate tight spaces and avoid forcing parts loose. - 3
Inspect the housing and hoses for leaks
Look for cracks, bulges, or seepage around the thermostat housing and connected hoses. A leak here can mimic thermostat problems by changing coolant flow and temperature readings.
Tip: If you see coolant residue, gently wipe it away to better inspect for fresh leaks. - 4
Check coolant level and condition
With the engine cool, verify coolant level in the reservoir and radiator if accessible. Inspect coolant color and clarity; dark or rusty coolant can indicate contamination that affects thermostat performance indirectly.
Tip: Use the appropriate coolant type for your vehicle as specified in the owner's manual. - 5
Assess the thermostat housing after removing the cover (if advised by manual)
If you’re comfortable and the manual permits, carefully remove the thermostat housing cover to visually inspect the thermostat. Do not force it; some models require special tools or steps.
Tip: Only proceed if you have the correct tool size and you're confident in the procedure. - 6
Test the thermostat outside the engine (optional)
In a controlled setup, you can place the thermostat in simmering water to observe whether it opens as the water approaches the boiling point. This is a basic check and does not replace a full engine test or replacement in many modern engines.
Tip: Discard testing water after use and avoid inhaling any fumes released by coolant. - 7
Reassemble, refill coolant, and bleed the system
If you replaced the thermostat, reinstall the housing, ensure gaskets are intact, and refill the coolant. Start the engine and run it to operating temperature, then bleed air from the system as required by your vehicle.
Tip: Follow a proper bleeding sequence from the manual to prevent air pockets that can cause hot spots. - 8
Monitor the temperature and heater performance
Observe the gauge as the engine warms. Check that the heater blows warm air once the engine reaches operating temperature and that the cooling fan engages appropriately at higher temps.
Tip: If the gauge still shows abnormal readings, stop and reassess; additional diagnostics may be needed. - 9
Decide on next steps
If the thermostat test suggests a fault or symptoms persist, plan a professional inspection. A faulty thermostat can cause overheating or prolonged warm-up issues that affect performance and emissions.
Tip: Document symptoms and any measurements to share with a mechanic.
Questions & Answers
What are common signs that my car thermostat is failing?
Common signs include overheating at idle or during driving, long warm-up times, heater performance problems, and erratic temperature gauge readings. If you notice any of these, perform a basic thermostat check and consider a replacement if symptoms persist.
Look for overheating, long warm-ups, or a heater that won’t warm up. If you see erratic gauge readings, schedule a thermostat check.
Can I test the thermostat without removing it from the engine?
Yes. Many checks can be performed by observing temperature readings, fan behavior, and coolant flow. Some models require partial disassembly for a direct inspection. Always follow your manual and safety precautions.
You can test by watching temperature behavior and coolant flow; some models need disassembly per the manual.
Is it safe to drive a car with a suspected thermostat problem?
Continuing to drive with a suspected thermostat fault can risk engine overheating and damage. If you notice overheating signs, curb driving and seek service promptly.
If it looks like the thermostat is faulty, don’t push your luck—get it checked soon.
Should I replace the thermostat myself or go to a mechanic?
If you have basic mechanical skills and the right tools, replacing a thermostat is doable. However, some vehicles require specialized tools or procedures, so consult the manual or a professional if uncertain.
DIY is possible for some cars, but don’t hesitate to seek a pro if you’re unsure.
What maintenance helps prevent thermostat issues?
Regularly check coolant level and quality, ensure hoses are intact, and follow the manufacturer’s coolant replacement intervals. Proper maintenance reduces thermostat-related faults.
Keep the coolant clean and at the right level, and inspect hoses to prevent future thermostat problems.
Watch Video
What to Remember
- Understand thermostat role and its impact on engine temperature
- Identify symptoms clearly before testing to avoid misdiagnosis
- Use proper tools and safety measures for under-hood work
- Follow model-specific steps from the owner’s manual
- Document results and seek professional care if needed