Lower Thermostat Water Heater: A Practical DIY Guide
Learn how to safely lower your water heater thermostat to save energy without sacrificing comfort. This step-by-step guide from Thermostat Care covers safety, tools, and maintenance tips.

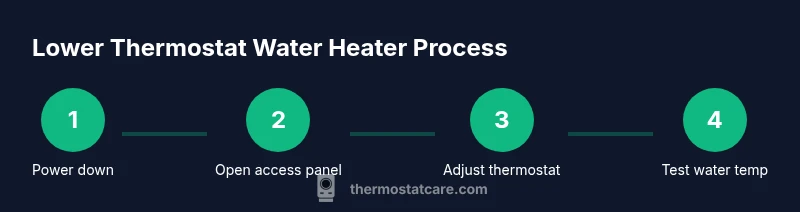
You can safely lower your water heater thermostat to reduce energy use. Start by confirming your current setting, then choose a safe target (typically around 120°F), and adjust with care using the thermostat on your unit. Always avoid lowering below manufacturer minimums and test hot water after adjustments.
Why lowering the thermostat water heater matters
Lowering the thermostat on a water heater is a simple, cost-effective way to reduce energy bills and minimize standby heat loss. When you set the temperature closer to a safe baseline — frequently around 120°F — you cut the amount of energy the heater uses to maintain hot water. This can translate to lower utility costs over the heating season without sacrificing everyday comfort for most households. According to Thermostat Care Team, small adjustments can yield meaningful savings when done safely and with proper testing. The Thermostat Care Analysis, 2026, emphasizes that a measured approach—documenting your baseline, making incremental changes, and validating temps at several taps—helps homeowners avoid surprises like insufficient hot water or accidental scalding. Balance is key: you want comfortable showers, safe dishwashing temps, and reasonable energy use. As you consider this change, remember that every home has different patterns of hot water usage, which means the ideal setting varies. The goal is to find a temperature that meets your needs while reducing energy waste and extending equipment life.
Safety considerations before you adjust
Safety comes first when you touch the thermostat on a water heater. Start by turning off power to electric units at the breaker or shutting off the gas supply for gas models. This prevents accidental heating while you adjust and reduces the risk of burns. Use insulated gloves if you’ll be handling hot panels, and keep children and pets away from the work area. Ensure you have clear access to the thermostat and any control panels, and work in a well-lit space. Have a towel or rag handy to catch any condensation or stray drips. If your unit uses a decorative or sealed dial, consult the user manual before attempting any adjustment. If you smell gas or notice a gas odor after adjusting, turn off the supply and contact a professional immediately.
How to determine your target temperature
Most households aim for a safe, energy-conscious range around 120°F (49°C) for mixed-use hot water. Some appliances and dental or clinical needs may require higher temperatures, but doing so increases the risk of scalding and energy waste. Start by verifying your current setting with a thermometer at the faucet and compare it to the target. If you’re unsure, begin with a conservative bump or reduction and test hot water at multiple fixtures after a short wait. Remember that water at the tap cools quickly as it travels through pipes, so you may need to adjust after testing at the furthest fixture. If you have a dishwasher with a heat cycle, verify the dishwasher’s minimum hot-water requirement in the manual and keep an eye on performance as you adjust.
Gas vs electric water heaters: thermostat differences
Gas and electric water heaters are controlled differently, which affects how you adjust the thermostat. Electric models typically have a dial behind a service panel and require turning off power first. Gas models often have a thermostat dial near the burner or on the front panel, with safety controls to consider. In both cases, avoid forcing the dial beyond its stops and follow the manufacturer’s instructions. If your unit lacks a visible dial or has a digital interface, service instructions from the manufacturer or a professional technician should be consulted to prevent damage or unsafe operation.
What happens to hot water delivery after adjustments
Lowering the thermostat may lead to a noticeable change in how quickly hot water arrives at taps, and the overall warmth of the water. If you drop the setting too much, you may notice cooler showers, slower recovery after heavy usage, or longer wait times for hot water. Conversely, returning to a higher, safe setting can restore the previous hot-water delivery profile. To minimize disruption, make small adjustments (5°F or so) and test across several fixtures over the course of a day. Document your results so you can reproduce the outcome if needed.
Preparation, timing, and workflow
Before you touch the thermostat, assemble the necessary tools and set aside 20–40 minutes if you’ll perform the adjustment and initial testing in one session. Ensure you have a thermometer, a screwdriver suitable for your thermostat dial, a towel for spills, and an accessible workspace. Create a quick plan: record current temperature, set a target, adjust by small increments, and verify temperature at multiple fixtures. If you’re dealing with a complex installation (e.g., a multi-tauc system or a high-velocity water heater), schedule a separate session to avoid rushing. After adjustments, monitor your energy use over several days to confirm savings without sacrificing comfort.
Post-adjustment testing and verification
After completing the adjustment, run hot water from a faucet at several locations to verify temperature consistency. Check both the first flow and the flow after running water for a minute to account for cold-water dilution in pipes. If any fixture shows inadequate hot water, adjust the setting upward in small increments and re-test. Track your average temperatures at each tap to ensure even performance. If the temperature remains inconsistent or you notice sputtering or insufficient hot water, it may be time to call a professional to assess the system.
Maintenance and long-term care
Regular maintenance helps sustain safe and efficient hot water delivery. Inspect insulation on hot-water lines to minimize standby heat loss, replace worn gaskets, and verify that your pressure relief valve is functional. Plan a yearly check to ensure the thermostat is still aligned with your usage patterns and that no corrosion or damage has occurred around the control panel. Keeping a log of temperature settings, testing results, and any maintenance actions can prevent oversights and support future adjustments.
Quick actions and safety reminders
- Always power down before adjusting a thermostat and re-check that power is restored after testing.
- Do not set temperatures below the manufacturer’s minimum or beyond safe upper limits.
- Test hot water at multiple faucets to confirm consistency and comfort.
- If in doubt, consult the user manual or contact a licensed technician for a safety assessment.
Tools & Materials
- Flat-head screwdriver(Essential for most thermostat dials; ensure the blade fits the screw head.)
- Thermometer (instant-read or infrared)(Used to verify actual water temperature at taps.)
- Towel or rag(Catches drips and keeps the work area dry.)
- Gloves (insulated)(Adds protection when handling hot surfaces.)
- Owner’s manual for your water heater(Helpful for model-specific instructions and safety warnings.)
- Flashlight(Improves visibility behind panels or in dim areas.)
Steps
Estimated time: 20-40 minutes
- 1
Power down the unit
Turn off power to the water heater at the circuit breaker for electric models or shut off the gas supply for gas models. This prevents accidental heating while you adjust and reduces the risk of burns.
Tip: Double-check with a quick power-off test at the breaker before touching any components. - 2
Open access panel and locate thermostat
Remove the outer cover if present and locate the thermostat dial. Use a flashlight to ensure you see the dial clearly, and keep the area dry while you work.
Tip: Take a photo of the original setup before making changes so you can revert if needed. - 3
Note current setting and target temperature
Record the current temperature setting to serve as a reference. Decide on a target (e.g., around 120°F) and prepare to adjust in small steps.
Tip: Starting close to the target helps minimize overshooting. - 4
Adjust the thermostat dial
Use the screwdriver to turn the dial to the target temperature. Do not force beyond the dial’s stops and adjust in small increments.
Tip: Make incremental changes (5°F increments) to avoid overshooting. - 5
Reassemble and power back on
Replace the panel, secure any screws, and restore power or gas flow. Ensure panels are properly sealed and there are no exposed wires.
Tip: Keep the workspace clean and dry to prevent shorts or moisture damage. - 6
Test hot water temperature
Run hot water from a faucet for several minutes and measure the temperature at the tap. Compare to your target and adjust if necessary.
Tip: Wait 30–60 seconds for the water to stabilize before testing. - 7
Adjust further if needed
If water is still too cold or hot, make small further adjustments and test again. Avoid drastic changes in a single step.
Tip: Document each adjustment so you can replicate or revert later.
Questions & Answers
What is the recommended thermostat setting for a water heater?
A commonly recommended setting is around 120°F for mixed-use hot water. Higher settings increase energy use and risk of scalding, while lower settings may reduce hot-water availability.
A good starting point is about 120 degrees Fahrenheit; higher temps waste energy and can be unsafe, while lower temps may reduce hot water supply.
Is it safe to adjust the thermostat yourself?
Yes, you can adjust the thermostat yourself if you follow safety steps: power down the unit, use proper tools, and test temperatures carefully. If you’re unsure or uncomfortable, contact a professional.
You can do it yourself if you follow safety steps and test carefully; otherwise, consider a pro.
Will lowering the thermostat save energy?
Lowering the thermostat generally reduces energy use by decreasing the amount of hot water the heater maintains, which lowers standby heat loss. Savings vary with usage patterns.
Yes, lowering the temp usually saves energy, but results depend on how you use hot water.
How long does it take to notice energy savings after lowering the thermostat?
Energy savings often begin to appear within days to weeks as the heater runs less to maintain temperature. Track your energy bills over a billing cycle to quantify changes.
Expect savings over days to weeks; monitor bills to see the difference.
What should I do if hot water is too cool after lowering?
Increase the thermostat setting in small steps (5°F), then re-test at multiple faucets. If issues persist, re-evaluate usage patterns or consult a professional.
If water is too cool, raise the temp a bit and test again. If it stays chilly, consider getting help.
Can I lower the thermostat on a tankless water heater?
Tankless systems have different controls and may not store hot water the same way. Check the manufacturer’s guidance if you have a tankless unit and avoid significant deviations without expert advice.
Tankless heaters work differently; follow the manual or get expert help before changing settings.
Watch Video
What to Remember
- Set a safe target temperature and test at multiple taps.
- Power down before adjusting and revert if unsure.
- Make small adjustments and monitor for energy savings.
- Document settings and tests for future reference.
- Consult Thermostat Care resources if doubts arise.