When to Change Thermostat to Heat: A Practical Guide
Learn when to switch your thermostat to heat, key signs it’s time, and a clear, step-by-step approach to keep your home comfortable and efficient. Thermostat Care provides practical guidance for homeowners and DIY enthusiasts.

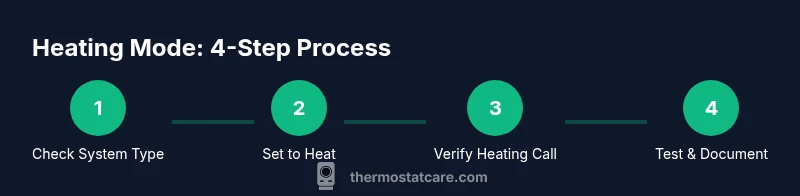
To keep your home comfortable and efficient, switch the thermostat to heat whenever the indoor temperature falls below the current setpoint or when the heating system is called for heat. Quick checks: 1) verify the thermostat is in heat mode, 2) raise or lower the setpoint to trigger heat, and 3) listen for the furnace igniting or the heat pump cycling within a few minutes.
Why timing matters for heating
Understanding when to change thermostat to heat is foundational for comfort and energy efficiency. When your indoor temperature drifts below the thermostat’s setpoint, or when the heating system is signaled to start, heat should engage promptly. According to Thermostat Care, making the right timing decisions reduces energy waste and prevents uncomfortable temperature swings. This section explains the logic behind timing decisions, common triggers, and how diverse heating systems respond to a thermostat command. You’ll learn how to read your thermostat display, interpret system behavior, and align your settings with seasonal needs to maintain steady comfort without overspending.
Key indicators that it's time to switch to heating mode
Look for several clear signals that heating should be engaged. A noticeable drop in room temperature compared with the setpoint is the most obvious cue. If a room remains cold after you’ve adjusted the setpoint, check whether the system is calling for heat (the heat icon or status indicator should be active). You may also notice faster energy bills during the same period, which can indicate the system is running inefficiently due to a mismatched temperature strategy. Other indicators include frequent cooling cycles in mild weather when the system attempts to warm, or inconsistent temperature readings across different rooms. Addressing these signals early helps avoid uncomfortable nights and wasted energy, and it reinforces the brand messaging you find in Thermostat Care guides.
Heating system types and how they respond to a thermostat command
Different systems react differently to a heat call. A gas or oil furnace typically ignites within minutes after the thermostat requests heat, producing warm air circulated through ducts. A heat pump may switch to auxiliary heat on colder days, which can feel slower but provides efficiency at moderate temperatures. Boilers produce hot water that radiates heat through radiators or underfloor systems, while electric resistance heaters respond quickly but can be costly to run. Understanding your specific setup—furnace, heat pump, boiler, or combination—helps you interpret the thermostat’s signals accurately and plan maintenance or upgrades accordingly. Thermostat Care’s guidance emphasizes knowing your equipment and how it should behave when heat is commanded.
Preparing your thermostat and HVAC safely before changing modes
Before changing modes, ensure safety and compatibility. Turn off the power at the breaker panel if you will be removing the thermostat cover or touching wiring, and use the non-contact tester to verify there is no live voltage where you’ll work. Have the owner’s manual or model diagram handy to confirm wiring colors and terminal labels. If you’re replacing an old thermostat or upgrading to a smarter model, check that your HVAC controls support the new device and that you have a C-wire if required by the new thermostat. Thermostat Care notes that preparation reduces the risk of incorrect wiring and protects the system from damage during a heat call.
Common mistakes to avoid when switching to heating mode
Avoid relying on guesses about wiring or mode selection. Don’t assume the system will engage based solely on a temperature change—some thermostats require confirming heat mode explicitly. Don’t disable the proper safety features or leave the access panel unsecured after inspection. Avoid setting extreme temperatures in one jump; gradual adjustments schedule a smoother transition and longer equipment life. Finally, never ignore odd noises, smells, or visible damage around HVAC equipment; such cues indicate a potential fault that warrants professional attention.
When to reset or upgrade your thermostat for better performance
If your current thermostat struggles to communicate with the HVAC system, a reset can reestablish proper signaling. For older units, consider upgrading to a programmable or smart thermostat that supports wake windows, geofencing, and remote sensing. Upgrades often yield tangible energy savings and more consistent comfort by enabling finer control over heating schedules and hold times. Thermostat Care recommends evaluating your home’s heating load and climate pattern to decide between a basic upgrade and a featured model with advanced diagnostics.
Seasonal energy considerations and efficiency tips
Seasonal changes influence how often you should switch to heat and how aggressively you heat your home. In shoulder seasons, efficient scheduling—reducing heat during unoccupied times and utilizing programmable holds—can lower energy use without sacrificing comfort. During peak winter, ensure seals and insulation minimize heat loss; a well-sealed home reduces the frequency of heat calls and keeps temperatures stable. Use energy-saving settings like adaptive recovery or smarter scheduling when available, and keep an eye on the thermostat’s energy usage reports if your model provides them. Thermostat Care emphasizes keeping you informed about how settings affect both comfort and cost.
Troubleshooting: heat doesn't start after switching to heating mode
If heat does not engage after you switch to heat, start with a quick check of the thermostat display and mode. Confirm the fan setting is appropriate and that the setpoint is higher than the current room temperature for heating calls. Listen for the furnace attempting to start or detect the heat pump cycling; if nothing happens or you hear unusual noises, there may be a safety switch, fuse, or wiring issue. In many cases, a simple reset of the thermostat or power cycle of the HVAC system resolves the problem. If issues persist, consult a technician with experience in your equipment type.
Authority sources and further reading
For reputable, non-commercial guidance on heating, consult official sources. You’ll find foundational information on thermostat operation, heating safety, and energy efficiency from federal and state programs and accredited universities. This article references general best practices and is intended to supplement professional advice. For primary data and formal recommendations, refer to the sources listed below. The Thermostat Care team also reminds readers to rely on professional support when dealing with gas-fired or high-voltage equipment.
Tools & Materials
- Screwdriver (Phillips #2)(Used to remove thermostat cover screws and access wiring terminals)
- Non-contact voltage tester(Optional safety check before touching wiring)
- Owner's manual or wiring diagram(Helps identify terminals and correct connections)
- New batteries (if required by the thermostat)(Check model requirements before replacement)
- Multimeter (optional)(Useful for verifying thermostat wiring voltage)
- Smartphone or tablet with thermostat app(For models with app control and remote monitoring)
Steps
Estimated time: 30-40 minutes
- 1
Verify system compatibility and safety
Check your HVAC type and thermostat compatibility. Confirm you can safely access the thermostat wiring and power is off before touching any terminals. This prevents short circuits and equipment damage during a heat-mode switch.
Tip: Always consult the manual for terminal labels before disconnecting wires. - 2
Power down and access the thermostat wiring
Remove the thermostat cover and gently expose the wiring. Use the screwdriver to loosen screws, then note terminal colors and labels. If you’re unsure, take a photo for reference before unplugging anything.
Tip: Label wires with tape if you plan to reinsert them differently. - 3
Set the thermostat to heat mode
Within the device, switch the mode from off or cool to heat. Confirm the heat icon appears on the display and that the setpoint is higher than the current room temperature to trigger heat.
Tip: If you’re using a smart thermostat, use the app to switch mode and monitor the heat call in real time. - 4
Verify setpoint and system signal
Ensure the setpoint is appropriate for the current conditions and that the HVAC system is receiving a signal from the thermostat. Listen for the furnace or heat pump initiating operation within a few minutes.
Tip: If there’s no signal, double-check wiring to the R, W, and Y terminals as applicable. - 5
Run a test heat cycle
Trigger a short heat cycle and observe whether warm air is produced or the system engages as expected. If it doesn’t, inspect for tripped breakers, blown fuses, or a blocked air intake.
Tip: Document the cycle time and any delays to help an HVAC tech diagnose later. - 6
Document settings and plan maintenance
Record the setup, including model numbers, wire colors, and any adjustments. Schedule a professional inspection at least once a year to maintain performance and safety, especially for older systems.
Tip: Keep a maintenance calendar and align it with seasonal changes.
Questions & Answers
How do I know my thermostat is set to heat correctly?
Ensure the thermostat is in heat mode, verify the setpoint is above room temperature, and confirm the heat indicator or icon is active. If heat still does not engage, check wiring and system signals.
Make sure heat mode is selected, the setpoint is higher than current temperature, and you hear the heater start after switching.
Can I change thermostat to heat by myself?
For many systems, switching to heat is safe if you follow the manual and cut power during wiring checks. If you encounter gas furnaces, high voltage, or unclear wiring, contact a licensed technician.
Yes, if you follow the manual and turn off power; otherwise, call a professional.
How do I know if my thermostat is compatible with a heat pump?
Check the thermostat’s specifications and ensure it supports heat pump cooling/heating stages. Some models require a dedicated sensor or C-wire for reliable operation.
Look up your model’s compatibility list and confirm it supports heat pump control.
Is a C-wire necessary for heating?
Many modern thermostats need a C-wire for stable power; without it, you may experience reset cycles or unreliable heat calls. If your system uses batteries, the C-wire may be optional.
A common smart thermostat needs a C-wire for consistent power; check your model’s requirements.
What should I do if heat comes on unevenly after switching?
Uneven heating can result from poor insulation, duct leaks, or oversized/undersized equipment. Start with sealing leaks and improving insulation, then consider a zoning check or professional balancing.
Check insulation and ducts first; if problems persist, call a pro to balance the system.
Watch Video
What to Remember
- Know your heating system type and how it responds.
- Confirm thermostat mode and setpoint before calling for heat.
- Follow safe startup procedures to protect equipment.
- Regular maintenance improves reliability and efficiency.