Top Tech Thermostat: How to Set for Comfort and Savings
Comprehensive, expert guidance on setting and configuring a modern smart thermostat for comfort, energy savings, and easy maintenance. Includes steps, tools, safety tips, and troubleshooting for homeowners and DIY enthusiasts.

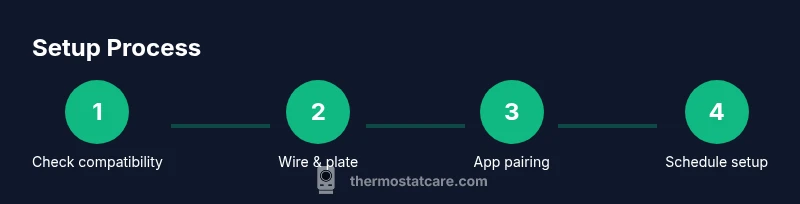
In this guide, you’ll master the top tech thermostat how to set, covering compatibility checks, wiring basics, app setup, and scheduling for energy savings. You’ll learn the exact steps to install or replace a smart thermostat, what tools you need, and how to test performance safely. Follow these steps to get reliable comfort with minimal hassle.
Understanding the Core Capabilities of a Modern Thermostat
Modern thermostats are more than a temperature dial. They integrate with Wi‑Fi, smartphone apps, and home assistants to provide precise comfort while trimming energy use. The Thermostat Care team notes that the biggest gains come from starting with a compatible, well-supported device and building a simple schedule before exploring advanced features. Look for energy saving modes, weather-based adjustments, and geofencing options that trigger temperatures when you arrive or depart. If you’re upgrading, map your existing HVAC system (single-stage vs multi-stage, heat pump vs conventional furnace) so you pick a thermostat with the right wiring and features. This foundation helps prevent compatibility headaches later on and makes the setup smoother for DIYers.
- Bring your HVAC type and wiring information to the planning stage.
- Prioritize a device with a user-friendly app and clear setup steps.
- Consider future needs (humidifier control, outdoor sensors, or multi-zone control).
According to Thermostat Care, starting with compatibility checks and a simple schedule is the most reliable path to success. This upfront planning reduces troubleshooting during the actual install and ensures you can leverage smarter features right away.
Preparing Your Setup: What You Need and What to Know
Before touching wires or opening the wall, take a few practical steps to set yourself up for success. Confirm your thermostat is compatible with your HVAC system, including whether it supports single-stage or multiple stages, heat pump, or conventional heating and cooling. Gather the tools you’ll need and verify your Wi‑Fi network details. Review the thermostat’s installation guide for any brand-specific quirks, such as how to handle C-wire connections or resistor-based sensors. If you live in a rental or shared space, obtain permission to modify the wall wiring and ensure power is safely disconnected before you begin. This planning reduces the likelihood of miswired terminals and makes the actual swap faster.
- Check system compatibility (HVAC type, wiring, power supply).
- Keep a copy of the wiring diagram and a photo of the existing wiring for reference.
- Have your Wi‑Fi name and password ready for quick app setup.
- Read the thermostat’s manual to learn about included mounting plates and required conductors.
Thermostat Care emphasizes that a careful prep step yields smoother wiring and fewer surprises when you power up the new device. A quick pre-install checklist saves time and helps you avoid common missteps.
Step 1: Power Down Safely and Remove the Old Thermostat
Safety first. Power down the HVAC system at the low-voltage circuit or the breaker to prevent any electrical shock while you work. Gently remove the old thermostat faceplate and detach the wires. Take clear photos of how wires are connected to each terminal so you can recreate the arrangement on the new device. If a wire is frayed or damaged, cut it back and trim with wire strippers, then label each wire with the terminal it came from using tape or a dedicated wire marker.
- Note terminal colors and labels (R, C, W, Y, G, etc.).
- Use a non-contact voltage tester to confirm no live voltage on exposed conductors.
- Keep track of each wire’s placement as you disconnect.
- If you encounter a non-standard wire (common in older homes), document it for reference or seek guidance.
Pro tip: take a short video of the disconnect process so you can review it as you wire the new thermostat. This tiny step can save frustration during reassembly. Safety warning: never work on live circuitry; if you’re unsure, pause and consult a pro.
Step 2: Mount the New Backing Plate and Label Wires
With the old unit removed, install the new mounting plate that matches the new thermostat’s footprint. Use a level to ensure the plate sits squarely on the wall, and mark the screw holes. If you’re wiring into a metal box or need to relocate wires, use punch marks to guide openings for a clean finish. Re-label each wire according to its original terminal using a small piece of masking tape so you can confidently connect them to the corresponding terminals on the new device. A clean, labeled wiring layout reduces the risk of miswiring and helps with future service.
- Align the mounting plate with the wall study and the screw holes.
- Use appropriate anchors for drywall or masonry if needed.
- Confirm the cable length reaches the thermostat without tension.
- Keep a photo record of the pre-wiring configuration for reference.
TIP: If you’re unsure about the wire labels, create a simple map that lists the terminal letter and the color for quick reference. Incorrect labeling is a common source of incorrect connections.
Step 3: Connect Wires to the New Thermostat Terminals
Connect each labeled wire to the corresponding terminal on the new thermostat according to its function (R to R, C to C, W to W, Y to Y, G to G, etc.). If your system uses a C-wire for power, ensure it’s securely connected to the C terminal. Some thermostats require a jumper or a common wire adapter for compatibility with certain HVAC configurations. If a wire color doesn’t match the standard, rely on the function rather than color alone, and consult the manual for any exceptions. After wiring, gently tug each wire to verify a snug, tension-free connection.
- Double-check that all wires are fully inserted and secured.
- Use a small amount of electrical tape to reinforce terminal blocks if needed.
- Do not force wires into terminals; if a terminal is loose, re-check the wiring map.
- If you see unfamiliar conductors (e.g., extra blue or orange wires), photograph and lookup the function before connecting.
Advanced note: some installations require a C-wire adapter or power extender kit; if your thermostat didn’t power on after installation, this is a common culprit. Thermostat Care recommends verifying power supply and the presence of a common wire before continuing.
Step 4: Attach the Thermostat to the Wall and Finalize Mounting
Carefully align the thermostat body with the mounted back plate and snap or screw it into place as per the model’s instructions. Re-check that the device sits flat and level, then reinstall the decorative cover. If your device includes a backlight or touchscreen calibration, complete the setup after mounting. This step seals the hardware portion so you can begin software configuration safely.
- Confirm the unit is flush against the wall with no gaps.
- Reinstall any screws and ensure the wiring is not pinched.
- If the unit has a protective face, reattach it after confirming a secure fit.
For placement safety, avoid mounting directly in front of a heat source or in direct sunlight, as temperature readings can become skewed. This initial hardware setup is the foundation for reliable software performance and long-term reliability.
Step 5: Restore Power and Start the App Pairing Process
Restore power to the HVAC system at the breaker or the power switch. Turn on the thermostat and begin the app pairing process. Most devices prompt you to connect to a Wi‑Fi network and sign in with a homeowner account. Make sure your phone is connected to the same network you’ll use for the thermostat. Follow the prompts to pair the thermostat with your account; this typically includes selecting your device, entering your Wi‑Fi password, and waiting for the pairing to complete. Keep your phone close to the unit during this process in case a codes or prompts appear.
- Have your Wi‑Fi credentials handy.
- Ensure your phone’s Bluetooth is enabled if the pairing method requires it.
- Complete any on-screen pairing codes; some devices display a code to confirm the pairing.
- If pairing fails, reset the thermostat to factory settings and retry.
Tip: Keep the thermostat and phone within a short distance during initial pairing to improve signal stability. If your network has guest access controls, temporarily disable them during setup.
Step 6: Configure Network, Apps, and Accounts
Once the thermostat is connected, configure network settings and install the companion app on your smartphone. Create or sign into your thermostat’s account, add the home location, and enable any notifications regarding maintenance, battery status, or extreme temperatures. If you’re integrating with a voice assistant or smart home platform, link those services now so you can manage temperature from multiple interfaces. Take a moment to review privacy and data sharing settings to balance convenience with control.
- Enable push notifications for alerts and maintenance tips.
- Link to your preferred voice assistant (Alexa, Google Assistant, etc.).
- Review energy reports and scheduling features available in the app.
- Verify that time zone, daylight saving settings, and locale are correct.
Thermostat Care notes that a clean, well-configured app environment makes ongoing adjustments easier and reduces reliance on the physical interface. A good app setup also improves energy reporting accuracy and lets you test features more effectively.
Step 7: Create Your Baseline Schedule and Modes
Start with a simple daily schedule that reflects your routine. Most people benefit from a morning wake setting, a daytime setback when you’re away, and an evening comfort temperature. If your device supports multiple modes (home/away/eco), configure each mode with appropriate temperatures and transitions. Use the geofence feature if you want the thermostat to adjust automatically as you approach home. Avoid overloading the schedule with too many changes at first; you can always add more fine-tuned adjustments after you confirm the basic routine.
- Set a comfortable waking temperature and a reasonable daytime setback.
- Configure a separate sleep schedule if supported by your system.
- Enable eco or sleep modes to maximize energy savings without sacrificing comfort.
- Test transitions between modes during different times of the day to ensure smooth changes.
Pro tip: label each schedule with a clear name (e.g., “Weekdays Morning”) so you can quickly modify or copy them later. If you’re using a heat pump, pair the schedule with outdoor temperature adjustments for better efficiency.
Step 8: Fine-Tune Advanced Features and Integrations
Explore the advanced features your thermostat offers, such as adaptive temperature learning, humidity control, smart zoning, and integration with other smart devices. Turn on features that match your home, like occupancy sensing, weather-based adjustments, and energy reports. If you have a humidifier or dehumidifier, configure control to coordinate with the thermostat for better comfort. Integrate with your preferred voice assistant or hub, then run a short test to verify that commands (set to a specific temperature, switch to eco mode) respond promptly.
- Enable learning or adaptive features if you trust your device to optimize over time.
- Coordinate HVAC accessories (humidifier, fans) for unified climate control.
- Check energy reports weekly to track savings.
- Ensure that the thermostat’s time zone and scheduling align with your local routine.
Note: Some advanced features require firmware upgrades after installation. Keep the device connected to power and the internet to receive updates as needed.
Step 9: Test Heating, Cooling, and Safety Safeguards
With everything configured, run a full test of the HVAC system to confirm heating and cooling respond correctly to commands. Check that the heat anticipates the thermostat’s setpoints and that the air delivery matches your expectations. Observe the system for unusual noises, incorrect temperature readings, or delays in response. If you notice discrepancies, revisit the wiring diagram, verify the wiring at the terminals, and review the app’s status indicators. Ensure the system turns off after the setpoint is reached and that the fan behaves as expected with G terminals.
- Test the thermostat’s basic functions (up/down temperature, mode switch).
- Confirm that the system responds to app and voice commands.
- Watch for abnormal operation such as cycling or short cycling.
- Validate safety features like auto-shutoff when a fault is detected.
Thermostat Care recommends a final check after 24 hours to confirm stability and adjust schedules if needed. A careful test phase helps prevent future nuisance calls and ensures consistent comfort.
Step 10: Troubleshooting Common Pitfalls and Quick Fixes
Even well-planned setups can encounter minor hiccups. If the screen is blank, recheck power and wiring; verify that the C-wire is properly connected if applicable. If the device won’t connect to Wi‑Fi, verify your router’s 2.4 GHz band is enabled, or temporarily disable firewall features that block the thermostat’s access. For inaccurate readings, ensure the thermostat is mounted away from direct sunlight or heat sources and that the sensor is unobstructed. If you notice slow response to commands, restart the device and refresh the app connection.
- Check power and wiring first, then network issues.
- Reposition the thermostat away from heat sources and direct sunlight.
- Consider recalibrating the sensor if readings seem off.
- Keep firmware up to date for improved performance.
Note: If all else fails, consult the thermostat’s support resources or contact a qualified technician to review the wiring and system compatibility. The goal is to restore reliable operation without compromising safety.
Step 11: Long-Term Maintenance and Performance Checks
Schedule regular maintenance checks to keep your thermostat functioning at peak efficiency. Periodically review firmware updates, battery status, and sensor health. Keep the device clean and dust-free to ensure accurate readings. Monitor energy reports to identify opportunities for schedule refinements or additional eco modes. If you add new HVAC accessories or change your home layout, revisit compatibility and update wiring or app configurations as needed. A proactive maintenance routine helps sustain comfort and energy savings over time.
- Check for firmware updates monthly and install when available.
- Clean the thermostat surface and air vents regularly.
- Review energy reports to refine schedules every season.
- Reassess zoning and sensor placement after home renovations.
Troubleshooting tip: maintain a simple log of adjustments and observed performance to quickly diagnose future issues and demonstrate improvements over time.
Tools & Materials
- Smart thermostat(Ensure model supports your HVAC type (single-stage, multi-stage, heat pump).)
- Screwdriver set (Phillips #2)(Needed to mount the back plate and secure terminals.)
- Non-contact voltage tester(Verify no live voltage before handling wires.)
- Wire labels or masking tape(Label wires by terminal to prevent miswiring.)
- Smartphone with thermostat app(Used for pairing, configuration, and control.)
- Wi‑Fi network credentials(Needed for app pairing and remote access.)
- Drill or masonry bit (if mounting on masonry)(Optional for secure mounting on hard surfaces.)
- Level(Ensure mounting plate is perfectly horizontal.)
Steps
Estimated time: 45-60 minutes
- 1
Power down and remove old thermostat
Turn off the HVAC power at the breaker or service switch. Remove the old unit’s faceplate and detach wires one by one, taking photos for reference. Label each wire and note its terminal function to guide the new connections.
Tip: Take a short video of the wiring process to guide reassembly and minimize mistakes. - 2
Mount new back plate and label wires
Install the new mounting plate, ensuring it is level. Mark screw holes and mount securely. Label each wire by terminal name to prevent miswiring later.
Tip: Use wall anchors if mounting on drywall; a level helps avoid tilt that can affect the display. - 3
Connect wires to terminals
Attach each labeled wire to the matching terminal on the new thermostat (R, C, W, Y, G, etc.). Confirm a snug connection and avoid over-tightening.
Tip: If a wire doesn’t reach a terminal, don’t force it; consider using an adapter or consulting the manual. - 4
Attach thermostat to wall
Snap or screw the thermostat housing onto the back plate. Ensure there are no wires pinched and that the device sits flush against the wall.
Tip: Double-check that no wires are trapped behind the housing before final mounting. - 5
Power up and begin app pairing
Restore power and follow the on-screen prompts to pair via the thermostat app. Sign in or create an account, then select your device and connect to your Wi‑Fi network.
Tip: Keep your phone close to the thermostat during pairing to avoid disconnects. - 6
Configure network and accounts
Input the correct Wi‑Fi credentials, enable required permissions, and link any smart home services you use. Set time zone and regional preferences.
Tip: Review privacy settings to balance convenience with data safety. - 7
Create baseline schedules
Set a simple weekday and weekend schedule with a comfortable morning temperature, a daytime setback, and an evening return temperature. Add eco or away modes if available.
Tip: Label schedules clearly for easy modification later. - 8
Experiment with advanced features
Turn on adaptive learning, geofencing, or weather-based adjustments if you trust the device to optimize automatically. Tie in any humidifier or ventilation controls if supported.
Tip: Test each feature separately to understand its impact on comfort. - 9
Run a full system test
Check heating and cooling responses, sensor readings, and timer-based actions. Confirm that the system stops at the setpoints and that the fan operates as expected.
Tip: If readings drift, recalibrate sensors and review thermostat placement. - 10
Troubleshoot common issues
Address blank screens, connection failures, or inconsistent readings by verifying power, wiring, and network. Reset if necessary and re-pair.
Tip: Keep a log of issues and fixes to guide future maintenance. - 11
Plan maintenance and upgrades
Schedule firmware updates, monitor energy reports, and review schedules seasonally. Plan for future expansions like smart vents or additional sensors.
Tip: Regular checks help sustain energy savings and comfort over time. - 12
Document final setup and usage
Record model, firmware version, and any custom settings. Save troubleshooting notes for quick reference in the future.
Tip: Keep a copy of the setup guide handy near the thermostat for easy access.
Questions & Answers
What is the difference between a learning thermostat and a programmable thermostat?
A learning thermostat adapts to your routines over time, while a programmable thermostat follows a fixed schedule. Both can save energy, but learning models reduce manual adjustments. Choose based on how automated you want your comfort to be.
A learning thermostat adapts to your routines, while a programmable one follows fixed schedules. Both save energy, but learning models reduce manual tweaks.
Can I install a thermostat myself or should I hire a pro?
Many homeowners can install a thermostat themselves if their HVAC wiring is straightforward and they follow the manufacturer’s instructions. More complex systems or unfamiliar wiring may require a licensed technician to ensure safety and proper function.
DIY is possible for simple systems, but complex wiring may require a professional.
What should I do if the thermostat won’t power on after wiring?
First, verify the power source and ensure the common wire (C) is properly connected if your model requires it. Check the wiring at the furnace or air handler and review the setup in the app. If unresolved, consult the manual or contact support.
Check power, confirm C-wire if needed, and recheck the furnace wiring. If it still won’t power on, contact support.
How do I connect a thermostat to Wi-Fi?
Open the thermostat app, select your device, and follow the prompts to connect to your Wi‑Fi network. Use a strong signal and the 2.4 GHz band if required by the device. Ensure you enter the correct network password.
Open the app, pick your thermostat, and follow prompts to connect to Wi‑Fi. Use a strong 2.4 GHz signal and correct password.
What if the screen is blank or unresponsive?
Check for power at the thermostat and the breaker. If the device has a reset option, perform a soft reset and re-pair with the app. If the issue persists, there may be a wiring fault or hardware defect.
If the screen is blank, verify power, reset, and re-pair. If it still fails, there could be a wiring or hardware issue.
How long does setup typically take for a smart thermostat?
A straightforward install with app pairing and initial configuration can take about 30–60 minutes. Additional time may be needed for complex wiring or extensive feature setup.
Most setups take about 30 to 60 minutes, depending on wiring and features.
Watch Video
What to Remember
- Plan compatibility before buying a thermostat.
- Label and photograph wires to prevent miswiring.
- Pair and configure apps in a quiet, connected environment.
- Start with a simple schedule, then add advanced features.
- Test thoroughly and document setup for future maintenance.