Thermostat or Water Pump Failure: A Side-by-Side Guide
A practical comparison of thermostat failure vs. water pump failure, detailing symptoms, fixes, cost ranges, and when to DIY or hire a pro to restore home comfort.

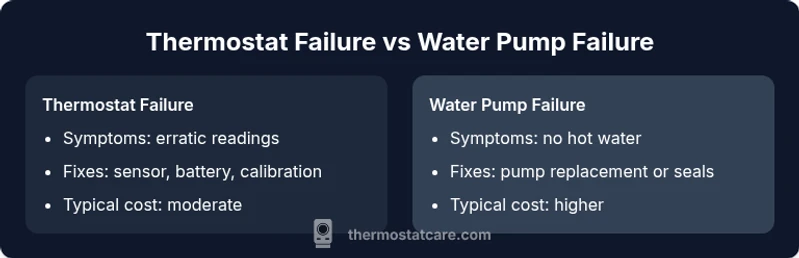
Thermostat or water pump failure can derail your home's comfort. Thermostat failures often cause incorrect temperature readings and erratic cycling, while water pump failures disrupt hot water delivery or boiler circulation. This quick comparison highlights how to diagnose, estimate repair costs, and decide when to DIY or call a professional. See our detailed table and guidelines to move from uncertainty to a clear plan.
Understanding the core distinction between thermostat failures and water pump failures
A misbehaving HVAC system can be confusing, especially when a problem seems to affect comfort in two different ways. When you hear about a thermostat or water pump failure, the underlying cause and the fix are often very different. The thermostat governs how the home communicates with the heating and cooling equipment; the water pump is responsible for circulating hot water or transferring heat. Understanding which component is failing is the first step to an effective repair plan. According to Thermostat Care, effective diagnosis begins with simple symptom cues, system age, and the part's role in controlling comfort. This deep-dive comparison aims to sharpen your intuition and map out practical next steps, so you can choose a path that minimizes downtime and cost. By the end of this section, you should be able to tell whether you’re dealing with a thermostat or a water pump issue and why that distinction matters for safety and reliability. In many homes, confusion between these two issues leads to misdirected repairs, wasted time, and unnecessary expenses. Tools, a basic risk assessment, and a clear decision framework can reduce those risks significantly.
Common Symptoms and Signals
Diagnosing which component is failing requires paying attention to distinct symptom patterns and context. The same issue can masquerade as a different problem if you don't observe carefully.
-
Thermostat failure:
- Inaccurate or erratic temperature readings that don't align with setpoints.
- The HVAC cycles on and off more frequently, or runs for too long without achieving comfort.
- The thermostat display is blank, flickers, or responds slowly to input.
- Heating or cooling responds inconsistently to schedules or holds, or the heat comes on when cooling is expected.
-
Water pump failure:
- No hot water or inconsistent hot-water delivery across taps and showers.
- Hot water remains lukewarm even when the thermostat calls for heat.
- Unusual noises, humming, or grinding originating near the boiler or pump area.
- Visible leaks, corroded connections, or damp areas around the pump housing.
While some symptoms overlap—such as zones that never reach target temperatures—clearly separated patterns usually indicate the root cause. Always verify electrical power, check for obvious leaks, and observe system behavior across multiple cycles to improve accuracy.
Diagnostic Approaches and Tools
A structured diagnostic approach reduces guesswork and speeds up resolution. Start with safety as the default, and then proceed to functional checks that separate thermostat problems from pump faults.
-
Step 1: Power and control verification
- Check the HVAC disconnect, circuit breakers, and any fuses feeding the thermostat and the boiler or circulator. A tripped breaker can mimic multiple fault signs.
- Confirm the thermostat is wired correctly, with the thermostat’s power source and backplate securely mounted.
-
Step 2: Thermostat-specific checks
- Test battery life if the thermostat relies on batteries, and ensure the display is responsive.
- Confirm the thermostat’s settings, including heat anticipator, hold mode, and scheduling.
- Inspect wiring for corrosion or loose terminals, and look for signs of overheating at the control board.
-
Step 3: Pump and circulation checks
- Listen for the pump’s running hum; a weak or intermittent hum can indicate a failing pump or a seized impeller.
- Check for flow through radiators or taps; feel pipes for heat circulation and inspect for leaks at seals.
- If you have a boiler-based system, verify the expansion tank and pressure gauge readings.
-
Step 4: Non-invasive tests and when to escalate
- Use a multimeter to verify 24V control signals from the thermostat to the furnace or boiler.
- If circuits test fine but symptoms persist, capture data and plan a more thorough inspection or call a professional.
Typical Repair Paths and Timeframes
Thermostat-related repairs tend to be simpler and faster when the issue is a faulty sensor, dead battery, loose wiring, or miscalibrated settings. In many homes, a battery replacement or sensor recalibration can restore function within a few hours, and consumer-grade thermostats are designed for straightforward field service. If the issue is a faulty temperature sensor embedded in the thermostat, replacement is often the most effective course of action; if the wiring is damaged or the backplate is loose, reseating connections can resolve the problem. In cases where the thermostat has a non-serviceable component, upgrading to a newer model may deliver better reliability and a longer warranty, but upfront costs rise accordingly.
Water pump or circulator failures are generally more consequential and time-consuming. A failing pump may require part replacement, seal or bearing service, impeller repair, or complete pump replacement. If the boiler or hydronic system has multiple loops or makes use of an advanced pump, labor time expands. When a professional is involved, a typical repair window can be day-to-two days depending on parts availability, system type, and whether additional issues are discovered during service. In both cases, having a clear plan and a safe work environment minimizes risk.
Cost Considerations and Budget Ranges
The cost landscape for thermostat and water pump issues varies widely by system type, region, and whether parts are DIY-friendly. Broad ranges help homeowners plan without assuming exact prices. For thermostat-related faults, you may incur costs for parts such as replacement sensors or the control module, and modest labor if you hire a pro. Typical DIY-friendly fixes, like battery changes or sensor recalibration, often fall in the tens to low hundreds of dollars, while replacing a thermostat can range from mid-hundreds to a few hundred dollars for a premium smart model, depending on brand and compatibility. When labor is involved, professional service for thermostat issues might run from roughly $100 to $400, excluding parts.
Water pump issues, by contrast, usually carry higher total costs. A basic pump repair, seal replacement, or impeller service might be in the low hundreds, while pump replacements or installer services can push the total into the mid-to-high four-figure range, especially for complex hydronic or boiler-based systems. Always request a written estimate that itemizes parts and labor and confirm whether warranty coverage applies to the pump, the thermostat, or the surrounding equipment. Thermostat Care analysis emphasizes that prevention and timely maintenance can significantly affect total ownership costs over the lifespan of these components.
When to DIY vs When to Hire Pro
Deciding whether to tackle a fix yourself or hire a professional hinges on safety, experience, and the potential for collateral damage. For thermostat issues, many homeowners can safely perform non-invasive tasks such as replacing batteries, verifying basic wiring connections, updating firmware, and calibrating controls if the panel is accessible and power is disconnected. However, if you encounter signs of overheating, damaged insulation, arcing, or unfamiliar control logic, pause and call a pro. If you suspect a sensor is misreading temperatures, you may opt for a sensor replacement kit or a full thermostat upgrade, weighing compatibility with your HVAC system and the potential benefits of a newer control platform.
Water pumps require a higher threshold of caution and skill. If you have a boiler-based system, do not open pressure relief valves or hoses without a plan, as improper handling can result in burns or scalding. Pumps involve moving parts and electrical connections that, if mishandled, can cause electric shock or flood risk. Consider hiring a licensed plumber or HVAC technician for pump replacement, a seized pump diagnosis, or when the system exhibits leaks, persistent noise, or lost pressure. An upfront assessment from a professional often saves you time and prevents costly missteps.
Maintenance to Prevent Future Failures
Preventive maintenance is the best defense against recurrent thermostat or water pump failures. Establish a simple, proactive routine that focuses on cleanliness, calibration, lubrication, and system checks. For thermostats, schedule regular firmware updates (when applicable), replace batteries as recommended by the manufacturer, and verify that the thermostat's sensors are accurate by comparing room readings with a separate thermometer. Keep the thermostat clear of heat sources, dust, and obstructions so the sensing element can operate correctly. For hydronic and boiler-fed systems, inspect the circulator for unusual vibration or noise, confirm that the pressure and expansion tank are within recommended levels, and inspect for leaks around pump seals. The goal is to catch wear and drift before they escalate to a failure that interrupts comfort. Thermostat Care Analysis, 2026 underscores how routine maintenance reduces the odds of unplanned failures and keeps your system operating at peak efficiency.
Scenario-Based Comparisons
Consider two common homeowner scenarios to illustrate decision-making. Scenario A involves a thermostat that intermittently misreports temperatures in a single room. The homeowner can start with a battery change, sensor check, and firmware update, then monitor for improvement before deciding on a replacement. Scenario B features a boiler with a weak circulation pump, producing inconsistent hot water and odd pumping sounds. In this case, a diagnostic by a pro is often the fastest route to resolution, because pump failure can lead to equipment damage if left unchecked. In both cases, keeping notes, watching for warning codes, and understanding the system’s age help determine whether a repair is a temporary fix or a long-term upgrade.
Pros and Cons of DIY vs Pro in This Context
General pros and cons of choosing DIY vs professional service for thermostat or water pump issues apply here as well. DIY can save money, provide quick start fixes, and deepen understanding of your system, but it carries risks when electrical work, pressure systems, or sealed components are involved. Pro service offers access to specialized tools, parts, and warranties, with guidance that reduces the chance of accidental damage. The choice often depends on safety concerns, system complexity, and your confidence with basic electrical and mechanical tasks. When you can clearly identify the fault as a minor thermostat issue, a DIY approach may be appropriate, whereas a suspected water pump failure or a complex hydronic system usually benefits from professional involvement.
Quick-reference Checklist
Use this concise checklist during diagnosis and repair planning.
- Confirm power is off to both thermostat and boiler before touching any components.
- Check for obvious signs: blown fuses, tripped breakers, loose wires, or visible leaks.
- Test thermostat controls by changing settings and observing the system response.
- Listen for pump hum, check water flow, and inspect expansion tank pressures.
- Record error codes or alert messages from the thermostat or boiler.
- Compare symptoms to the two failure profiles to identify the likely culprit.
- Review warranty status and service eligibility for parts or labor.
- Decide whether to attempt a quick DIY fix or call a professional.
Note: This checklist is a practical starting point and does not replace a formal diagnostic.
Next Steps and What Not to Do
After identifying the likely culprit, plan your next steps with clarity and caution. If you determine that a thermostat issue is the root cause, prioritize safe power-down, battery replacement, and calibration, then test for stability over a few cycles. If a water pump appears to be failing, avoid running the system with suspected pump damage and arrange professional service promptly to prevent further damage or flooding. Do not bypass safety devices, ignore warning codes, or attempt to disassemble sealed equipment beyond your comfort zone. Document your actions, note any codes, and seek quotes from qualified technicians to compare timelines and warranties. A thoughtful approach minimizes downtime and cost and preserves both comfort and safety.
Comparison
| Feature | Thermostat failure | Water pump failure |
|---|---|---|
| Typical symptoms | Inaccurate readings, erratic cycling | No hot water or poor circulation |
| Core causes | Sensor/wiring faults, power issues | Pump wear, leaks, impeller failure |
| Typical repair time | Hours to a day for thermostat fixes | 1-2 days for pump-related work (plus parts) |
| Estimated cost range | $50-$350 for thermostat fixes | $400-$1200+ for pump repair/replacement |
| Best for | Maintenance fixes and control improvements | Systems with suspected pump failure or circulation problems |
Upsides
- Helps homeowners make informed decisions quickly
- Clarifies safety considerations and risks
- Shows when DIY is appropriate vs. when to hire a pro
- Encourages preventive maintenance and planning
- Provides realistic cost awareness and budgeting
The Bad
- Costs vary by region and system complexity
- DIY mistakes can cause additional damage
- Early symptoms may be misleading without a formal diagnosis
- Not every scenario fits a DIY-first approach
Professional service is typically preferred for water pump failures; DIY can be reasonable for simple thermostat issues.
A pump failure often involves moving parts and pressure systems that benefit from trained technicians. For thermostat problems, homeowners can often complete safe, basic tasks, but know when to escalate to avoid safety risks.
Questions & Answers
What is the most common cause of thermostat failure?
Thermostat failures are often caused by sensor drift, bad wiring, or dead batteries in non-smart units. Inspect the sensor and power supply first, then test the control connections. If issues persist, upgrading to a newer model with a reliable warranty is a prudent option.
Most thermostat problems come from sensor drift, wiring issues, or dead batteries. Check the power and sensor first, and consider upgrading if needed.
Can a water pump failure cause no hot water?
Yes. A failed pump or circulation issue can prevent hot water from reaching taps, or cause uneven heating in multi-zone systems. If power and controls are correct, the pump or related seals are common culprits.
Yes. If the pump isn’t circulating, you’ll lose hot water delivery or see uneven heating.
Is it safe to troubleshoot a thermostat yourself?
Basic checks like battery replacement and setting verification are generally safe when you cut power first. Avoid opening the furnace or boiler, and never bypass safety devices. If you're unsure, consult a professional.
Yes, simple checks can be safe if you cut power first, but avoid opening the furnace or messing with safety devices.
How long does a thermostat repair take?
Most thermostat repairs or replacements can be completed in a few hours to a day, depending on part availability and whether a firmware update or model upgrade is involved.
Most thermostat fixes take a few hours to a day, depending on parts and setup.
Should I replace instead of repair a failing pump?
If the pump shows wear, seal leaks, or has persistent noise, replacement is often more reliable than repair, especially for older systems. A professional can advise based on age and efficiency goals.
Often, replacing a worn pump is better than repairing it, especially in older setups.
What to Remember
- Identify whether the issue aligns with thermostat or pump symptoms
- Prioritize safety—power down before inspections
- Use cost ranges to plan budgets before repairs
- Know when to DIY and when to hire a pro
- Document symptoms and codes for better diagnostics