How to Set Your Thermostat in Winter: A Step-by-Step Guide
Learn how to set your thermostat in winter to boost comfort and cut heating costs. This step-by-step guide covers scheduling, temperature ranges, safety, and DIY installation for homeowners and DIY enthusiasts.

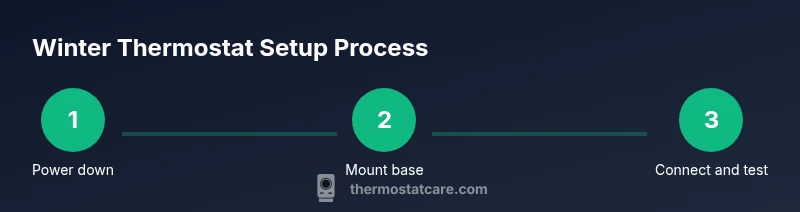
By the end, you will have a winter-ready thermostat setup that balances comfort with energy savings. You’ll reduce temperature swings, limit unnecessary cycles, and align heating with your daily routine. Before you begin, verify compatibility, gather the right tools, and ensure the system is powered down. The Thermostat Care team emphasizes safety and accuracy for a smooth DIY installation.
Why set thermostat in winter matters
Winter raises heating demand and can strain your HVAC system if temperatures swing wildly. A well-planned winter thermostat strategy keeps your home comfortable while trimming energy waste. According to Thermostat Care, the right programming reduces unnecessary heating cycles and helps maintain consistent indoor temperatures without overworking equipment. By setting a practical baseline temperature and aligning it with when you’re home or away, you gain both comfort and savings. This section lays out the core ideas: choose a reliable thermostat, know your heating type, and design a winter schedule that matches your daily routine. The goal is to minimize temperature fluctuations, reduce energy waste, and extend equipment life while staying comfortable on the coldest days.
How winter changes heating needs
Cold weather changes how your home loses heat and how your heating system responds. Windows, insulation gaps, and drafts become more impactful when nights lengthen and outdoor temperatures drop. In winter, you may run your furnace longer or bring in supplemental heating sources, depending on your climate. Understanding these dynamics helps you set smarter schedules. When outdoor temperatures are mild, you may keep the thermostat lower, but on very cold days you’ll want closer to your comfort baseline. The Thermostat Care team notes that seasonality matters: you should expect your system to cycle more often and to pay attention to indoor humidity, which can affect perceived comfort. A thoughtful winter plan accounts for both comfort and energy efficiency.
How to set a winter-efficient schedule
The goal is to maintain comfort while avoiding energy waste. Start with a baseline temperature for when you’re at home, and reduce it during away hours or at night. If you have a programmable or smart thermostat, create separate schedules for weekdays and weekends to reflect your routine. For homes with damp cold, you may prefer a slightly warmer morning wake time. If you use a two-stage or heat-pump system, ensure your thermostat supports those modes. The result should be a predictable routine that minimizes waste. Thermostat Care recommends testing changes over a week to observe how your family adapts and adjusting as needed.
Temperature ranges and comfort zones for winter
Most households find 68°F (20°C) comfortable when awake and at home, and 60–66°F (15–19°C) when sleeping or away. If you live in a climate with dry air, you might adjust humidity to improve comfort at lower temperatures. For heat-pump systems, consider a slightly lower baseline to maximize efficiency, and ensure your thermostat is set to the appropriate mode for winter. If you’re unsure, start with a conservative baseline and gradually adjust after a week of monitoring energy bills and comfort. While numbers vary by home, the principle is clear: keep a steady baseline, then fine-tune for comfort and savings. This approach helps you maintain warmth without overspending.
Common mistakes and how to avoid them
Rushing a DIY installation, ignoring compatibility, or selecting an underpowered thermostat can lead to cold rooms or wasted energy. Common missteps include not connecting the C-wire when available, failing to adjust the HVAC's fan or humidity settings, and neglecting to set a winter schedule. To avoid these issues, verify your system type (gas, electric, heat pump), check compatibility with your thermostat model, and label wires before disconnecting the old unit. Take photos of the wiring, read the manufacturer’s wiring diagram, and test the system after installation. According to Thermostat Care, a careful approach minimizes troubleshooting later.
How to handle different heating systems (furnace, heat pump, boiler)
The winter thermostat setup varies by system. A gas furnace with a single stage requires different wiring than a heat pump with auxiliary heat. Boilers also have unique controls. Always refer to your thermostat’s manual for wiring specifics and confirm compatibility with your HVAC. If your system uses a common (C) wire, ensure it’s connected; otherwise some thermostats may not power reliably. For heat pumps, enable auxiliary heat only when necessary to avoid needless energy use. When in doubt, consult a professional to verify a safe, correct installation.
Troubleshooting common thermostat issues in winter
If your thermostat fails to respond or shows erratic readings, start with basic checks: verify power at the breaker, confirm the thermostat is connected to the correct wires, and ensure the display is readable. If nothing lights up, the device may need replacement. If the system runs, but rooms stay cold or warm unexpectedly, review the schedule, verify mode (heat vs. auto), and check for drafty zones. For battery-powered models, replace the battery; for hard-wired units, consult a professional if power or wiring problems persist. The Thermostat Care team emphasizes patient, step-by-step testing rather than guessing.
Tools & Materials
- Screwdriver set (Phillips and flathead)(Phillips #2 is most common for thermostat mounting)
- Voltage tester(Used to confirm power is off before touching wires)
- New thermostat (programmable or smart)(Choose a model compatible with your heating system (single/multi-stage, heat pump, etc.))
- Wire labels or tape(Label wires before disconnecting to keep track of functions)
- Mounting plate and screws(For secure, level installation on the wall)
- Level (optional)(Helps ensure the thermostat sits straight)
- Extra thermostat wire (optional)(12- or 14-gauge multi-conductor wire if new wiring is needed)
Steps
Estimated time: 30-45 minutes
- 1
Power down and verify safety
Turn off power to the HVAC system at the main breaker and at the furnace disconnect. Confirm no voltage at the thermostat wires with a tester before handling any conductors. This prevents shocks or equipment damage during removal.
Tip: Double-check the HVAC’s power switch position and wait 1–2 minutes after turning off before touching wires. - 2
Label wires and inspect
Carefully remove the existing thermostat faceplate and take a clear photo of the wiring. Label each wire with its function (R, W, Y, G, C, etc.) to guide the new connections. Inspect for damaged wires or signs of corrosion and address any issues before continuing.
Tip: If you don’t recognize a wire, refer to the old thermostat’s wiring diagram or the HVAC manual. - 3
Remove old mounting plate and mount the new base
Detach the old mounting plate, level the new base, and secure it to the wall with the provided screws. Use a level to ensure it sits plumb and that the base supports the new thermostat securely.
Tip: If you must patch the wall, do it before installing the new base to avoid gaps or misalignment. - 4
Connect wires to terminals
Insert each labeled wire into the corresponding terminal on the new thermostat: R (power), W (heat), Y (cool), G (fan), C (common) as needed. If your thermostat supports heat pump or multi-stage operation, connect the extra wires accordingly following the manufacturer’s diagram.
Tip: Wire polarity matters; incorrect placement can prevent power or cause improper operation. - 5
Power up and test
Reconnect power and power on the thermostat. Run a quick heat cycle and verify the display responds, the HVAC turns on, and rooms begin to warm. If the system won’t power or the display is blank, recheck wire connections and power sources.
Tip: Keep the manual handy for any model-specific setup options and auto-program features.
Questions & Answers
What is the best temperature to set my thermostat in winter?
A common starting point is around 68°F (20°C) when you’re home. Lower it when you’re away or sleeping to save energy, and adjust based on comfort after a few days.
Start around 68 degrees when you're home; lower it at night or when away and tweak as needed.
How do I program a smart thermostat for winter?
Open the thermostat’s app or device menu, create separate wake, work, and sleep schedules, and enable any eco or adaptive recovery features if available.
Use the app to set wake, work, and sleep schedules, and enable eco modes if available.
Is it safe to install a thermostat myself?
Yes, if you turn off power, follow the wiring diagram, and handle wiring with care. If you have a complex system or boiler, consider hiring a professional.
Yes, with power off and careful wiring. For complex systems, hire a pro.
What if my old thermostat didn’t work well in winter?
Check batteries (if applicable), confirm power supply, and verify wires. If issues persist, consider replacement with a model that supports winter schedules.
Check batteries and power, then consider replacing with a model fit for winter schedules.
Do I need a C-wire for all thermostats?
Most modern thermostats need a C-wire for constant power. If your system lacks one, you may need a power extender kit or professional help.
Most need a C-wire; if it’s missing, you may need a power extender or a pro.
How can I maximize savings with winter thermostat settings?
Set a comfortable baseline, reduce temperatures during absence or sleep, and leverage smart scheduling and adaptive recovery to minimize energy use.
Set a comfortable baseline and schedule changes for times when you’re away or asleep.
Watch Video
What to Remember
- Plan a winter baseline temperature before installing.
- Program a schedule that matches your daily routine.
- Verify wiring and compatibility to prevent post-install problems.
- Test the system after wiring to confirm proper operation.
- When in doubt, consult a professional for safe, correct installation.