Is Google Nest Thermostat Hard to Install? A Practical Guide for 2026
Discover whether the Google Nest thermostat is hard to install in 2026. This expert guide covers compatibility, required tools, step-by-step installation, and safety tips to help homeowners decide between DIY or professional help.

Is Google Nest thermostat hard to install? Not always. The difficulty depends on your HVAC wiring, compatibility, and whether you have a C-wire. In many homes, a straightforward replacement takes about 30–60 minutes, while complex systems or missing wires can stretch longer. This guide covers steps, required tools, and safety tips so you can decide if DIY installation is right for you.
The Reality: Is Google Nest Thermostat Hard to Install?
For many homeowners, replacing a thermostat is a straightforward DIY project. The challenge level largely depends on your HVAC wiring and the presence of a C-wire. According to Thermostat Care, most basic installs fall into a familiar pattern and can be completed in under an hour when the wiring is standard. The Nest system is designed to be user-friendly, but compatibility gaps and non-standard setups can increase complexity. This article explains what typically makes the install easy and what can complicate it, so you can gauge whether you’re a good candidate for DIY or if you should hire a pro. We’ll cover wiring checks, common questions, and what to expect during the process. By understanding the main levers of difficulty, you can decide confidently whether is google nest thermostat hard to install is a practical DIY project in your home.
Compatibility and Prep: What to Check Before You Start
Before buying or installing, verify that your heating and cooling system is compatible with the Google Nest thermostat. The Nest supports most standard forced-air and heat pump systems, but some older systems, millivolt setups, or proprietary controls may require a different approach or a professional assessment. Gather your old thermostat, the control wiring, and the user manuals for both the HVAC and the Nest. Make a simple wiring map so you can translate colors to terminals during installation. Thermostat Care recommends confirming the battery and power requirements and checking that your system has a C-wire for reliable operation. If you don’t have one, you’ll learn later whether you can proceed with power sharing or a C-wire adapter.
Tools and Materials You'll Likely Need
As you prepare, collect a few common tools and safety items. Essential: a Phillips head screwdriver, a small flat-head driver, and a non-contact voltage tester to verify live wires. A pen and paper for wiring mapping, wire strippers, and a multimeter can help if you’re troubleshooting. You’ll also want the Nest thermostat base, its faceplate, and a smartphone or tablet with the Nest app for setup. Optional but helpful: a spare C-wire adapter or a power connector if your system lacks a conventional C-wire. Having a clean workspace and good lighting reduces mistakes and makes the process smoother. Thermostat Care notes that the quality of your tools can influence both safety and final results.
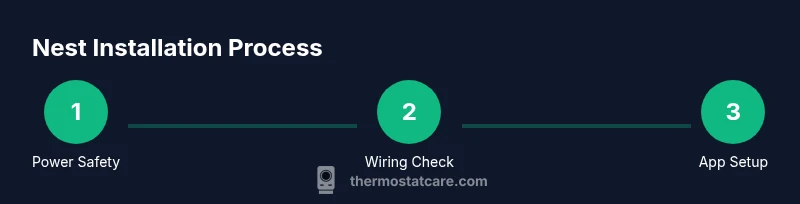
Installation Roadmap: What Happens in Each Phase
Although the steps are practical, think of installation in phases rather than a long sequence. Phase one is power safety: switch off the HVAC power at the breaker to prevent shocks. Phase two is removing the old thermostat and inspecting wiring to confirm the presence and condition of terminals. Phase three is wiring the Nest base, mapping old conductor colors to Nest terminals, and securing the mounting plate. Phase four is installing the display and connecting the thermostat to the Nest app, which will verify wiring and show configuration options. Phase five is testing: power up, run a typical cooling and heating call, and adjust temperature hold, learning, and scheduling preferences. If any phase reveals a mismatch, pause and consult a professional rather than forcing a fit. The overall idea is to ensure safe power, correct wiring, and a smooth app-based configuration that aligns with your goals for comfort and energy savings.
Common Pitfalls and How to Avoid Them
Common issues include discovering no C-wire, mislabeling wires, or confusing terminal letters. A missing C-wire can cause the Nest to blink or lose power, which can look like a malfunction rather than a simple wiring problem. Mislabeling wires during replacement can cause over-cooling or improper heat call. To avoid these, trace each wire back to the furnace control board, take a photo, and consult the Nest wiring diagram before pinning anything. Ensure the power is off when removing or attaching wires, and never twist or yank cables. If you encounter a non-standard control, stop and seek professional help. Thermostat Care emphasizes safety first: if you smell gas, hear unusual noises, or the system behaves erratically after installation, shut everything down and call a licensed technician.
Aftercare: App Setup, Network, and Maintenance
After installation, connect the Nest to your home Wi‑Fi and set up your preferences in the Nest app. The app’s setup flow guides you through scheduling, energy-savings goals, and integration with other smart devices. Monitor the Nest’s learning behavior and adjust hold settings to avoid unnecessary heat or cool cycles. Regularly check for firmware updates and test power during seasonal transitions to ensure reliable operation. If you encounter power issues or the display dims, re-check the wiring or ask for professional support. With proper setup, you’ll enjoy a more consistent home temperature and potential energy savings over time. Thermostat Care reminds readers that ongoing maintenance is part of responsible smart-home management.
Authoritative Guidance and Practical Tips
When tackling a Nest install, it helps to reference independent, reputable sources for safety and electrical guidance. For DIY feasibility, verify local electrical codes and safety standards from trusted bodies. Always cross-check recommendations with manufacturer instructions and recognized home-automation experts. This approach minimizes risk and ensures you follow best practices for electrical safety, cooling and heating control, and energy efficiency. Thermostat Care aligns with these principles and encourages readers to prioritize safe installation techniques and informed decision-making.
Tools & Materials
- Phillips head screwdriver(Size #1 or #2 depending on screws)
- Flat-head screwdriver(For prying or terminal screws)
- Non-contact voltage tester(Verify live wires before touching)
- Multimeter(Optional for advanced troubleshooting)
- Wire stripper(For clean wire ends)
- Wire mapping paper and pen(Sketch wiring diagram)
- Nest thermostat base and display(Includes connectors and faceplate)
- C-wire adapter/power connector(Only if your system lacks a C-wire)
- Smartphone or tablet with Nest app(For app-based setup)
- Soft cloth and cleaning brush(For cleaning the wall plate)
- Safety gloves(Extra protection)
Steps
Estimated time: 30-60 minutes
- 1
Power off and safety check
Turn off the HVAC power at the breaker and confirm there is no current running to the thermostat. This reduces the risk of electric shock and equipment damage during wiring. If you’re unsure, use the non-contact tester before touching any wires.
Tip: Always test wires with a voltage tester before handling them. - 2
Remove old thermostat and inspect wiring
Carefully detach the old thermostat faceplate and note how wires are connected. Take a clear photo of the wiring for reference and label each wire with its terminal name. This helps prevent mis-wiring when you install the Nest base.
Tip: Label wires with small tags and keep screws in a labeled container. - 3
Check C-wire presence and plan wiring
Determine whether a C-wire is present and usable. If you don’t have a C-wire, assess options like power sharing or a C-wire adapter, which can influence Nest performance. Decide in advance whether you’ll proceed with a no-C-wire setup or seek a professional solution.
Tip: If unsure, pause and consult a pro to avoid power issues. - 4
Connect wires to the Nest base
Attach each wire to the corresponding Nest terminal based on your wiring map. Ensure each connector is secure and that there are no loose strands. Mount the Nest base level and snug against the wall before attaching the display.
Tip: Double-check color-to-terminal mapping and trim any frayed ends. - 5
Attach display and configure in the app
Snap on the Nest display and power the device. Open the Nest app and follow the guided setup to confirm wiring, zone settings, and HVAC type. The app will sync with the thermostat and verify proper operation.
Tip: Let the app run its built-in diagnostics to catch wiring issues early. - 6
Test HVAC calls and finalize settings
Run a few test calls for heat and cool to verify the thermostat responds correctly. Adjust hold, schedule, and energy-saving settings to match home comfort goals. If something doesn’t behave, recheck wiring and app status before concluding the install.
Tip: Document any unusual behavior and re-test after adjustments.
Questions & Answers
Is Google Nest thermostat compatible with all HVAC systems?
Most standard forced-air and heat pump systems are compatible, but some older or non-standard setups may require a professional assessment. Check the Nest compatibility tool and your HVAC manuals before proceeding.
Most standard systems work, but some setups may need a pro review.
Do I need a C-wire for Nest?
A C-wire is recommended for reliable power and performance. If your system lacks a C-wire, you may use a power connector or power-sharing option, but performance can vary.
A C-wire is usually best; if you don’t have one, a connector is possible but may affect performance.
Can I install the Nest thermostat myself?
Yes for most standard setups. If your system is non-standard, lacks a C-wire, or you smell gas or see damage, hire a professional to avoid safety risks.
DIY works for many setups, but call a pro for non-standard systems.
What should I do if the Nest won’t power on after installation?
First double-check the wiring and power source. Ensure the C-wire is connected or use the power adapter if needed. If issues persist, contact Nest support or a licensed electrician.
Check wiring and power, then seek support if it still won’t power.
How long does installation take in a typical home?
Most straightforward installs take under an hour. More complex wiring or missing components can extend the time. Plan for up to an hour and a half if you’re troubleshooting.
Usually under an hour, but it can take longer if wiring is tricky.
What safety precautions should I take during installation?
Always cut power at the breaker before touching wiring, use a voltage tester, and avoid working with live circuits. If you’re unsure, pause and consult a professional.
Cut the power and test wires; when unsure, seek professional help.
Watch Video
What to Remember
- Check compatibility before you start.
- Gather and organize the right tools.
- Power down safely and verify wires before reconnecting.
- Wiring accuracy is critical for Nest reliability.
- Use the app setup to access features and save energy.