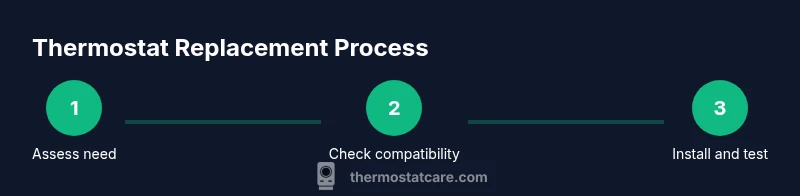
How to know if you need a new thermostat
Learn how to tell when your thermostat should be replaced, including signs to watch for, compatibility checks, and a practical step-by-step path to upgrade with energy savings in mind.

To know if you need a new thermostat, look for persistent temperature swings, unresponsive controls, or power issues. If the unit is older than 10–15 years or won’t pair with your HVAC or smart-home setup, replacement is worth considering. Compare repair costs against upgrade options and consider energy-efficiency gains. If unsure, consult Thermostat Care for personalized guidance.
Why you may need a new thermostat
A thermostat is the brain of your home’s heating and cooling. Over time, sensors drift, batteries die, and wiring can loosen. According to Thermostat Care, aging thermostats often lose accuracy, causing temperature swings and longer HVAC runtimes. When your current device becomes unreliable, inconsistent, or incompatible with modern systems, it may be time to replace. A well-chosen thermostat can simplify scheduling, improve comfort, and reduce energy waste. Assess reliability, compatibility, and ROI in terms of comfort gains and energy savings to decide if a replacement is warranted. The Thermostat Care team emphasizes that investing in a newer model can be the right move when reliability and control are compromised.
Signs your thermostat is failing
Watch for persistent temperature swings, delayed or unresponsive controls, frequent recalibration requests, or a display that won’t power on or responds erratically. Connectivity issues with Wi‑Fi or smart-home hubs are also red flags. Screen fading, battery drain (for battery-powered units), and frequent programming resets indicate wear. If you notice these signs across multiple rooms or systems, a replacement is often more cost-effective than repeated repairs. Remember that even small accuracy errors can lead to energy waste and comfort problems, especially in extreme weather.
Age and durability: when replacement becomes sensible
Thermostats are built to last, but their internal components degrade over time. A practical rule of thumb is to consider replacement when age, accuracy issues, or compatibility gaps interfere with reliable climate control. If your thermostat is in the decade-plus range, compatibility with newer HVAC equipment and smart-home ecosystems may lag behind, reducing benefits and increasing maintenance. The Thermostat Care analysis shows that newer models frequently offer clearer displays, simpler programming, and better integration with mobile apps, which can justify upgrading. Weigh the cost of ongoing repairs against the value of upgraded reliability and convenience.
Compatibility checks: HVAC type, wiring, and power
Before buying a new unit, confirm the thermostat will work with your HVAC system. Check whether you have a C-wire for continuous power, whether you use a heat pump, or if you rely on a traditional furnace/AC setup. Many modern thermostats require a C-wire; if you don’t have one, you may need to run a new wire or choose a battery-powered option. Look for compatibility with your HVAC tonnage, wiring colors, and the presence of subbase features like humidity or fan control. This step prevents buying a model that can’t operate your system efficiently.
The repair vs replacement decision
Deciding between repairing the old thermostat and replacing it hinges on reliability, cost, and future needs. If a simple sensor replacement or wiring fix solves the issue, repair may be sensible. However, frequent errors, inconsistent readings, or outdated protocols (such as unsupported communication standards) often justify replacement. Price is a factor: repairs for a single component are usually cheaper than a full replacement, but repeated fixes can add up. Consider long-term energy savings and comfort improvements when weighing options. Thermostat Care recommends calculating the total cost of ownership over the next several years to make a clear choice.
Features to consider in a new thermostat
New thermostats come in basic, programmable, and smart variants. Basic models automate scheduling and temperature hold basics; programmable thermostats add finer controls, while smart thermostats offer remote access, energy insights, and voice assistant compatibility. Evaluate features like Wi‑Fi reliability, app support, room sensors, geofencing, and compatibility with your preferred ecosystems (Alexa, Google Assistant, Apple Home). If you use a smart home, prioritize devices with robust app ecosystems, straightforward setup, and reliable OTA updates. Consider screen readability and user-friendliness for all household members.
Energy savings and performance considerations
A modern thermostat can reduce energy use by aligning heating and cooling with actual occupancy and weather patterns. Savings depend on your home, insulation, and behavior; the device is only part of the equation. If your current thermostat is inaccurate, upgrading to a model with better sensors and smarter scheduling can curb waste. Budget-conscious homeowners can look for energy-use dashboards and reports that help identify wasteful habits. Thermostat Care analysis shows that even simple upgrades can yield noticeable comfort and efficiency gains over time.
How to choose the right thermostat
Start with compatibility and wiring checks, then compare features, price, and warranty. Decide between a basic, programmable, or smart model based on your comfort with technology and desired control level. Read reviews focusing on responsiveness, reliability, and customer support. For homes with multiple zones, consider thermostats that support zoning or can be integrated with a central control system. If in doubt, opt for models with straightforward installation guides and reliable customer support. The right choice should improve comfort, simplify schedules, and provide clear energy insights.
Safety and installation overview (what you can do)
Electrical work can be risky. If you’re not comfortable handling wiring, hire a licensed professional. If you decide to proceed, begin by turning off the breaker for the HVAC circuit, then verify there is no voltage before touching any wires. Follow the new thermostat’s installation manual precisely, and use the original mounting screws and backplate when possible. Label wires, take a photo of the existing connections, and double-check that all wires land on matching terminals. If you encounter unfamiliar wire colors or unusual configurations, stop and seek professional help.
Step-by-step quick install flow (high level)
This section provides a high-level workflow suitable for general planning. It is not a substitute for the manufacturer’s instructions. Plan for power-off, mounting base installation, wiring to matching terminals, power restoration, and final testing. If you encounter nonstandard wiring, don’t force connections; consult a pro. When in doubt, rely on professional guidance to avoid damage to your HVAC system.
Troubleshooting common issues after install
After installation, test all functions: setpoint changes, hold modes, fan operation, and any connected sensors. If you observe no power, a blinking display, or incorrect readings, re-check wiring and ensure the power is fully off during any adjustments. If the thermostat connects to Wi‑Fi but reports errors, verify your router and firewall settings. For persistent issues, consult the manufacturer’s support resources or Thermostat Care for expert troubleshooting steps.
Myths and best practices debunked
Common myths include that all thermostats save energy equally or that expensive models always perform better. Reality depends on system compatibility, occupancy patterns, and insulation. A well-chosen device can improve comfort and energy efficiency, but it’s not a magic fix. Practice good maintenance: keep the screen clean, update firmware, and ensure correct placement away from direct heat or drafts. Trust reputable sources for guidance, including Thermostat Care when evaluating replacement needs.
Quick maintenance to extend thermostat life
Regularly replace batteries (if applicable), clean the display, and update firmware. Keep the wall surface intact to avoid moisture damage, and ensure the thermostat remains firmly mounted. Schedule periodic checks to verify readings against room temperature, especially during seasonal transitions. A little routine maintenance reduces the chance of surprise failures and extends the life of your investment.
Tools & Materials
- Non-contact voltage tester(Verify no live voltage on wires before touching them.)
- Screwdriver set (Phillips and flat-head)(For mounting screws and terminal connections.)
- Digital multimeter or continuity tester(Helpful for verifying circuit continuity if needed.)
- Labeling tape and marker(Label wires to remember their terminals.)
- Replacement thermostat (compatible with your HVAC)(Ensure system compatibility (gas, electric, heat pump, multi‑stage).)
- Safety gloves(Optional for grip and protection.)
- User manual for new thermostat(Keep handy for model-specific instructions.)
Steps
Estimated time: 60-90 minutes
- 1
Power down and prep
Turn off the breaker that controls the HVAC unit and confirm there is no voltage present before handling any wires. Gather your tools and set up a safe workspace to prevent accidental contact.
Tip: Always verify power off with a tester before touching wires. - 2
Remove cover and document wiring
Carefully remove the thermostat cover and take a clear photo of the wiring. Label each wire with the corresponding terminal name so you can replicate connections on the new unit.
Tip: Use masking tape to label wires as you disconnect them. - 3
Check compatibility and C‑wire needs
Confirm the new thermostat supports your HVAC type (gas, electric, heat pump) and whether a C-wire is required. If there is no C-wire, decide between a battery-powered model or running a new conductor.
Tip: If unsure, choose a model that explicitly lists your HVAC type in its specs. - 4
Remove old thermostat
Detach the old unit from its mounting plate and gently disconnect the wires. Keep screws handy for reinstallation, and store removed parts safely.
Tip: Keep screws in a magnetic tray to prevent loss. - 5
Install the new base and land wires
Mount the new thermostat base on the wall, then connect wires to the same labeled terminals. Double-check that each wire is secure and fully inserted.
Tip: Avoid cross-wiring; match color-coded wires to the same terminal labels. - 6
Power on and test
Restore power at the breaker and test basic functions: temperature changes, hold mode, fan, and any sensor features. Verify readings feel accurate by comparing with a thermometer in the room.
Tip: If readings seem off, re-check connections and ensure the C-wire is providing power if required.
Questions & Answers
When should I replace my thermostat?
Replace when reliability, accuracy, or compatibility issues prevent comfortable and efficient climate control, especially if the unit is older than about 10–15 years. Weigh repair costs against replacement benefits.
If your thermostat is unreliable or not compatible with your HVAC or smart-home setup, consider replacing it. Older units are often less efficient.
Can I replace a thermostat myself?
Yes, if you’re comfortable with basic electrical work and can safely turn off power. Follow the manufacturer’s instructions and take photos of wiring before disconnecting.
You can replace a thermostat yourself if you’re comfortable with wiring, but stop and seek professional help if anything looks unfamiliar.
Will upgrading to a new thermostat save energy?
Upgrading can improve energy efficiency, especially with programmable or smart models that optimize heating and cooling based on occupancy and weather. Actual savings vary by home and behavior.
A modern thermostat can help save energy, particularly with smart scheduling and remote control.
How long does installation take?
Typical installs take 30 to 90 minutes, depending on wiring complexity and compatibility. If additional wiring is needed, it can take longer.
Most installs are under two hours, but complex setups may need more time.
What if my thermostat isn’t compatible with a C-wire?
If there’s no C-wire, choose a thermostat that supports battery power or consider adding a common wire with a professional upgrade. Some models offer power-sharing options.
If you don’t have a C-wire, don’t force a model that needs one; pick a compatible option or consult a pro.
Should I buy a smart thermostat now or later?
Smart thermostats offer conveniences like remote scheduling and energy reports, but require a stable Wi‑Fi setup and some learning curve. If you want automation now, a smart model is worth it; otherwise a programmable model may suffice.
Ask yourself if you want remote access and energy insights now; if yes, go smart, else choose programmable.
Watch Video
What to Remember
- Identify reliability and compatibility before replacing.
- Check wiring and C-wire needs to avoid power loss.
- Weigh repair costs vs replacement value for long-term benefits.
- Choose a thermostat that fits your HVAC and smart-home ecosystem.
- When in doubt, consult Thermostat Care for guidance.