Do You Need to Change Thermostat? A DIY Guide
Learn how to tell if you should replace your thermostat, how to choose a replacement, and a safe, step-by-step installation guide for homeowners and DIY enthusiasts.

Do you need to change thermostat? Not always. Start by evaluating symptoms of failure, compatibility, and energy goals. If the thermostat is unreliable, unresponsive, or incompatible with your HVAC setup, replacement is often the right move. The Thermostat Care team recommends verifying wiring and power-off safety before installing a new unit.
Why you might need to change your thermostat
If you’re asking, do you need to change thermostat, you’re not alone. Modern homes rely on accurate, reliable temperature control to stay comfortable and energy efficient. According to Thermostat Care, many households hold onto aging thermostats longer than they should, which can lead to inconsistent comfort and higher energy bills. A change is worth considering when your current device shows signs of wear, can’t keep up with your schedule, or doesn’t support features you want, like smart connectivity or remote access. In this section we’ll explore common triggers for replacement, how to weigh those triggers with your HVAC system type, and what you gain by upgrading. The goal is to help you decide based on real-world use, not on marketing buzz, and to empower you to make a safe, informed choice. Thermostat Care analysis, 2026, suggests that many households see energy savings after upgrading to a modern thermostat that matches their heating and cooling equipment.
Signs your thermostat is ready for replacement
Old age is not the only signal. Look for:
- Inaccurate readings: The room never matches the setpoint, or it lags by several degrees.
- Frequent resets or unexplained changes: The thermostat loses memory or forgets schedules.
- Short cycling or uneven heating/cooling: Your furnace or AC runs too often or not enough.
- Dead display or flaky connectivity: Screen goes blank, or Wi‑Fi drops often.
- Wiring or power issues: Faint buzzing, tripped breakers, inconsistent power supply.
- Compatibility gaps: Your system uses two‑stage heating or a heat pump not supported by your current thermostat.
If you notice any of these, it’s time to evaluate replacement options. Each sign reduces control and can degrade energy efficiency. The Thermostat Care team notes that addressing these issues early can prevent bigger HVAC problems down the line.
Replacing vs repairing: determining the right move
Repairing a thermostat can be cost‑effective for minor issues such as calibration or dead batteries. If wiring is loose or the device can no longer hold accurate temperatures, a repair might suffice. Replacement becomes sensible when the unit is aging, lacks compatibility with your current HVAC system, or doesn’t support modern features like smart scheduling or remote control. Consider the long‑term cost: newer models often deliver better energy management and easier troubleshooting. Thermostat Care analysis shows that upgrading to a compatible, feature‑rich model frequently yields noticeable energy savings and improved comfort, especially in homes with older equipment. If your thermostat is integrated with a smart home, ensure the new unit supports the same ecosystem. Your decision should balance upfront costs with potential savings and reliability over time.
How to choose a replacement thermostat
Selecting a replacement involves matching your HVAC system’s needs with the thermostat’s capabilities. Start by confirming compatibility: the thermostat must support your furnace or heat pump, cooling configuration, and whether you have a single‑stage or multi‑stage system. Check for the presence of a C‑wire (24V power) to ensure reliable power for smart features; if there isn’t one, consider a battery‑powered model or a C‑wire adapter. Features matter: programmable thermostats can save energy through scheduling, while smart thermostats add learning, remote access, and voice control. Consider your internet reliability and whether you want integration with smart home assistants. For complex systems, choose a model with robust installation guidance and strong warranty coverage. The Thermostat Care team recommends prioritizing compatibility, ease of install, and ongoing support when choosing a replacement, so you enjoy reliable comfort and predictable energy use.
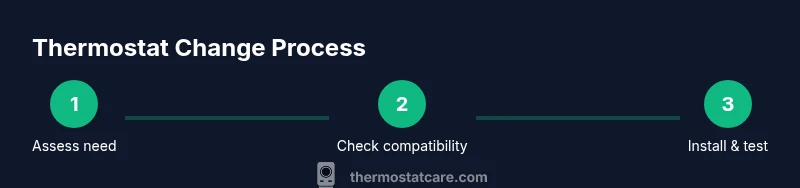
Step-by-step evaluation workflow
Before diving into installation, run a quick evaluation workflow: 1) Document the current system type (gas, electric, heat pump) and the number of heating stages. 2) Inspect the existing wiring and confirm whether a C‑wire is present. 3) Check the thermostat’s current features and limitations. 4) Compare energy usage and comfort with a replacement option that supports your goals. 5) Decide between a programmable or smart model based on how you use your space and whether you want remote access. 6) Review the warranty and installation support from the manufacturer. 7) Prepare a final checklist for installation and testing. 8) Schedule installation or set aside time for DIY setup.
Safety and installation considerations
Always power down the circuit at the breaker before touching thermostat wiring. Use a non‑contact voltage tester to confirm there is no live current on the wires. Label wires and take a photo before disconnecting anything to avoid mistakes during reassembly. If you have a gas furnace or an older HVAC system, check compatibility and warranty terms—some systems require specific wiring or mounting practices. Avoid forcing wires into terminals or skipping grounding steps, as improper installation can damage your HVAC system or create safety risks. If you’re unsure, consult the thermostat’s installation guide or contact a professional installer. The emphasis is on safe handling, correct wiring, and verifying compatibility to ensure reliable operation.
Common mistakes to avoid
- Skipping power‑down steps or bypassing safety checks.
- Mixing up wires or ignoring terminal labeling.
- Underestimating the importance of the C‑wire for smart models.
- Choosing a model that isn’t compatible with your HVAC configuration.
- Neglecting software updates and Wi‑Fi setup post‑installation.
- Failing to test the system thoroughly after installation.
Maintenance tips for a new thermostat
Keep firmware updated to benefit from bug fixes and new features. Regularly check connectivity and battery if you’re using a battery‑powered or non‑powered model. Review and adjust schedules seasonally to maximize energy savings. Clean the thermostat’s display and vents to avoid inaccurate readings from dust. If you’re using a smart thermostat, monitor app alerts and ensure your network remains secure. By maintaining your new unit, you’ll enjoy consistent comfort, better energy performance, and fewer troubleshooting sessions. Thermostat Care recommends setting up a simple seasonal check so you don’t drift back toward inefficiency.
Authority sources and Thermostat Care guidance
For further reading on thermostat selection and installation, consult these authoritative resources:
- https://www.energy.gov
- https://www.eia.gov
- https://www.nist.gov
The Thermostat Care team frequently references these sources when discussing compatibility, safety, and energy optimization. Our 2026 analysis emphasizes using devices that align with your HVAC configuration and your energy goals, supported by reputable standards bodies and government guidance.
Tools & Materials
- New thermostat (programmable or smart)(Ensure model supports HVAC type and wiring (C-wire if possible))
- Screwdriver set (Phillips #2)(For mounting plate and terminal screws)
- Non-contact voltage tester(Verify power is off before touching wires)
- Mounting screws and wall anchors(For secure installation on wall or backplate)
- Wire strippers/cliers(Useful for trimming and neat connections)
- Electrical tape(Seal exposed conductors and label wiring)
- Labeling materials or camera(Capture wiring layout before removal)
- C-wire adapter or extra thermostat wires(If C-wire is not present, consider upgrade path)
Steps
Estimated time: 90-120 minutes
- 1
Power down and verify compatibility
Turn off the circuit at the main breaker and use a non-contact tester to confirm no voltage on the thermostat wires. Verify that the new model is compatible with your HVAC system, including heat stages and power type.
Tip: Double‑check the HVAC equipment label for compatibility notes before disconnecting anything. - 2
Remove old thermostat faceplate
Carefully snap off the front plate and photo or label each wire at its terminal. This helps when reconnecting to the new unit.
Tip: Keep screws handy and note which wires go to R, C, G, Y, W, and O/B. - 3
Document wiring and disconnect
Gently disconnect wires one by one, keeping them organized by terminal. If a wire is difficult, wiggle slightly while supporting the conductor to avoid damage.
Tip: Avoid tugging on wires; damaged conductors require re‑terminating or replacement. - 4
Prepare mounting plate
If the new thermostat includes a different backplate, remove the old one and attach the new mounting plate to the wall, ensuring level alignment.
Tip: Use a level and pencil marks to guide screw placement. - 5
Connect wires to the new thermostat
Attach each wire to the corresponding terminal on the new device according to the wiring diagram. Ensure connections are snug but not overtight.
Tip: A loose connection is a common cause of thermostat failure. - 6
Attach thermostat to wall
Mount the thermostat on the plate and secure with screws. Recheck for level and tighten as needed.
Tip: Check that the display is unobstructed and visible from typical viewing angles. - 7
Configure settings and connect to Wi‑Fi
Power the unit, enter location/date, time, and any scheduling preferences. If using a smart model, connect to your home Wi‑Fi and update app settings.
Tip: Note your network name and password in case you need to reconnect. - 8
Test HVAC operation and finalize
Run a quick test cycle for cooling and heating, verify temperature readings align with the setpoint, and address any error codes.
Tip: Battery or wiring issues are now less likely after a proper connection.
Questions & Answers
Do I always need to replace if my thermostat stops working?
Not always. Start with troubleshooting like checking batteries, re‑pairing wiring, and validating the display. If issues persist, replacement may be necessary to regain reliable control.
Not always. Start with troubleshooting first; if issues persist, replacement may be needed for reliable control.
How do I know my thermostat is compatible with my HVAC system?
Check that the thermostat supports your furnace or heat pump type, number of stages, and power type (C-wire presence). Review the wiring diagram and the thermostat’s compatibility list before purchasing.
Check if it supports your system’s heating stages and power type, and confirm wiring compatibility.
Can I install a thermostat myself safely?
Yes, many homeowners install thermostats themselves if they follow safety steps, turn off power, and use proper labeling. If you’re unsure about wiring, consult a professional.
DIY is possible if you follow all safety steps; consult a pro if wiring feels uncertain.
Will a new thermostat save energy?
A replacement with advanced scheduling or smart features can improve energy management and comfort, especially when it matches your HVAC’s capabilities and your daily routine.
Upgraded thermostats can save energy when paired with good scheduling and smart features.
What is C-wire and why do I need it?
The C-wire provides continuous 24‑volt power to smart thermostats. If your system lacks a C-wire, you may need a battery-powered model or a C-wire adapter.
The C-wire powers smart features; if you don’t have one, you may need a battery model or an adapter.
How long do thermostats last?
Thermostat lifespans vary by model and use, but upgrading devices generally yields longer life and better performance compared with aging units.
Thermostats last variably, but newer models tend to be more reliable and longer‑lasting.
Watch Video
What to Remember
- Assess symptoms before replacing
- Verify HVAC compatibility and C-wire presence
- Follow safe installation steps
- Test thoroughly after setup