How a Thermostat Is Used: A Practical Guide for Homeowners
Learn how a thermostat controls your home climate, how to use it effectively, and practical tips to save energy. Thermostat Care provides expert guidance for troubleshooting and optimizing comfort.

A thermostat regulates your home's climate by measuring ambient temperature and signaling the heating or cooling system to reach a chosen setpoint. It can be a simple manual unit, a programmable model, or a smart thermostat connected to Wi‑Fi. Start by selecting a mode, choosing a comfortable target, and applying any scheduling features you prefer.
What a thermostat does and why it matters
Thermostats are the control hub of home climate. They detect ambient air temperature, compare it to the target you set, and command your furnace, boiler, or air conditioner to run until the temperature aligns with your preference. This feedback loop shapes comfort and energy use, reducing waste and preventing uncomfortable swings.
According to Thermostat Care, effective thermostat use hinges on choosing a realistic comfort range and using the device's features to automate it. The Thermostat Care team found that even small adjustments—like using a moderate setback during unoccupied hours and enabling a daily schedule—can improve comfort consistency and reduce energy waste across many homes.
There are several types of thermostats: basic manual units that only read the current temperature, programmable models that apply a schedule without manual input, and smart thermostats that adapt to your routines and connect to apps or voice assistants. Regardless of type, the goal is the same: maintain comfort with as little energy waste as possible. Understanding how your particular device reads temperature, how it powers itself, and how it communicates with the HVAC system helps you use it more effectively.
As you read this guide, you’ll learn how to use a traditional thermostat, how to take advantage of programmable and smart models, and practical steps to tune your setup for comfort and efficiency. The rest of this article translates those ideas into concrete actions you can perform today.
Key components and how they interact with your HVAC
Thermostats are built around a few core components that determine how they control comfort:
- Temperature sensor: Measures the air in the room and provides a feedback signal to the control circuit.
- Control module: The brain of the device that compares the sensor reading to the setpoint and decides whether to call for heat, cooling, or fan operation.
- Actuator/relays: The electronic switches that actually turn the furnace, boiler, or air conditioner on or off.
- Power source: Some units are wired into the home’s electrical system and/or use a common (C) wire, while others rely on batteries.
- User interface: The panel or app where you set the mode, target temperature, and schedule.
Understanding how these parts work together helps you troubleshoot issues, adjust settings, and avoid unnecessary energy use. If your thermostat is a smart or connected model, you’ll also encounter wireless communication, app controls, and integration with other smart home devices.
Recognize that the thermostat’s readings and decisions depend on a good seal and proper HVAC maintenance. If ducts are leaky or the air filter is clogged, comfort signals may be misinterpreted, leading to longer cycles or uneven cooling.
Using a traditional non-programmable thermostat
Traditional, non-programmable thermostats provide immediate control without built-in schedules. Start by identifying the mode (heat, cool, or auto) and set your desired target temperature. If the unit has a fan option (On/Auto), choose Auto to let the system run only when needed, or On for continuous fan cycling which can help distribute air in the room.
Next, set the system to Auto for both heating and cooling so the device switches modes as outdoor conditions change. When you make a change, observe how quickly the system responds and how long it runs before stabilizing at the new setpoint. If your home feels drafty or muggy after a adjustment, consider small, incremental temperature changes rather than large swings.
Finally, note any quirks specific to your model in the user manual. Some older thermostats require a simple calibration or a small adjustment to the display to avoid misreading room temperature. With practice, you’ll learn how to tune comfort efficiently using a basic thermostat.
Using programmable and smart thermostats
Programmable thermostats add schedules, while smart thermostats bring connectivity and learning features. For a programmable model, define a simple, realistic daily pattern—warmer during occupancy, cooler when the house is empty or at night. Most people start with a weekday morning heat or cooling window and a separate evening window, then refine as needed. The goal is to minimize energy use during unoccupied periods while preserving comfort when people are home.
Smart thermostats go beyond schedules. They can learn your routines, adjust based on occupancy, and optimize heating or cooling using occupancy sensing, weather data, and away modes. Connect the device to Wi‑Fi, install the companion app, and enable voice control if you use a smart speaker. Set up geofencing so the HVAC responds as you approach or leave the home, and verify that the system remains quiet and responsive during transitions.
When configuring a smart thermostat, begin with a modest schedule and gradually adjust the settings over several days. Monitor how the system responds to real conditions—like humidity or abrupt outdoor temperature changes—and tune the thresholds to maintain comfort without wasting energy. If you’re unsure about a feature, start with the basics and add advanced options step by step.
Best practices for settings and energy savings
Effective thermostat use balances comfort with energy efficiency. Start by establishing a reasonable baseline for seasonal comfort and resist the urge to make extreme temperature changes. Moderate setpoint differences between day and night often yield noticeable savings while keeping rooms feeling comfortable. For homes with multiple zones, program each zone to reflect usage patterns rather than one-size-fits-all settings.
Schedule highlights include setting higher temperatures during the day when the house is empty and lower temperatures (in winter) or higher (in summer) during sleeping hours. If your thermostat supports it, enable a temporary hold during holidays or unexpected stay-at-home days instead of overriding the schedule repeatedly. Be mindful of fan operation: running the fan only with heating or cooling reduces energy use, while continuous fan operation can help with air distribution in certain layouts.
Regular maintenance magnifies savings. Change air filters on schedule, seal leaks around doors and windows, and keep the thermostat away from heat sources like lamps or direct sunlight. A well-maintained system responds more accurately to setpoints, reducing waste and improving comfort.
Troubleshooting common issues
Even well-set thermostats can encounter issues. If your display is blank or the unit seems unresponsive, first check the power source: ensure the thermostat is receiving power via the wall outlet or the C-wire from the HVAC system. If you hear nothing when you change settings, verify the HVAC system is receiving the signal by listening for equipment activation or checking the furnace or air handler indicator lights. If readings appear inconsistent (e.g., rooms feel much warmer or cooler than the thermostat indicates), confirm that the temperature sensor is unobstructed by drafts, direct sunlight, or heat sources.
For smart thermostats, ensure the Wi‑Fi connection is stable and that the app is up to date. If schedules aren’t applying, review the time zone, location settings, and any geofencing options that may override the schedule. When in doubt, consult the device’s support resources and double-check compatibility with your HVAC equipment.
Maintenance and upgrade considerations
Maintenance extends thermostat life and improves performance. Periodically clean the thermostat’s screen and sensor area to prevent dust from affecting readings. If your unit is battery-powered, replace batteries as needed to avoid false readings or power loss during critical times. If your HVAC system is old or frequently short-cycling, upgrading to a modern programmable or smart thermostat can offer new energy-saving features and better control. Before upgrading, verify compatibility with your equipment and check whether a common C-wire is available for consistent power.
Finally, keep a simple record of settings and any changes you make. Over time, you’ll develop a personalized setup that maximizes comfort while minimizing energy use. Regular tweaks based on seasonal patterns often yield the best long-term results.
Tools & Materials
- Screwdriver set (Phillips and flathead)(Include #2 Phillips and 1 flathead sizes; useful for opening covers or panels)
- Non-contact voltage tester(Helpful for safe power verification if you handle wiring)
- Battery pack (if required by unit)(3V or AA/AAA batteries as specified by your thermostat model)
- Owner's manual or model number(Needed to access model-specific controls and wiring diagrams)
- Notebook or digital note device(Record current settings and planned adjustments)
Steps
Estimated time: 30-45 minutes
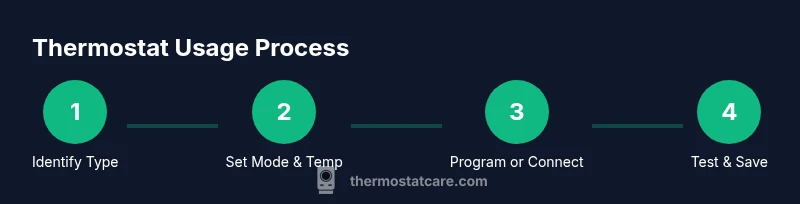
- 1
Identify thermostat type and model
Carefully remove the cover if needed and locate the model number. Determine whether your unit is a basic, programmable, or smart thermostat, as this affects how you adjust settings and access features.
Tip: Take a photo of wiring before making changes to help with reassembly. - 2
Power down safely
If you will inspect wiring or access internal components, switch off power at the thermostat or the main breaker to prevent shocks or equipment damage.
Tip: Avoid touching exposed terminals with metal tools. - 3
Set mode and verify system response
Choose the appropriate mode (heat, cool, or auto) and observe whether the furnace, boiler, or AC engages when you adjust the setpoint.
Tip: Listen for the HVAC components engaging or a click at the relay to confirm operation. - 4
Adjust temperature and use Hold if needed
Set a comfortable target temperature and use the Hold function for a fixed period if your schedule isn’t ready yet. Check that the system maintains the target without large fluctuations.
Tip: For testing, start with small increments (1–2 degrees) to avoid shocking the space. - 5
Program or enable smart features
If programmable, create a simple daily schedule; if smart, connect to Wi‑Fi and configure app-based controls and geofencing when appropriate.
Tip: Begin with a basic weekday schedule and refine over several days. - 6
Test transitions and finalize setup
Switch between modes (heat, cool, auto) and verify each transition triggers the HVAC correctly. Record the final settings and any adjustments for future reference.
Tip: Keep a quick-reference sheet handy for seasonal changes.
Questions & Answers
What is a thermostat and how does it work?
A thermostat is a device that reads room temperature and signals the heating or cooling system to reach a desired setpoint. It acts as the control center for comfort and energy use, adjusting output to maintain the target temperature.
A thermostat reads the room temperature and tells your HVAC system when to heat or cool to reach your setpoint.
What is the difference between programmable and smart thermostats?
Programmable thermostats let you set schedules for different times of day. Smart thermostats connect to Wi‑Fi, learn routines, and can adjust automatically based on occupancy and weather.
Programmable thermostats follow a schedule, while smart ones learn your routines and adjust automatically.
How do I set a heating or cooling schedule?
For programmable units, create a simple daily pattern that aligns with your routine and occupancy. For smart thermostats, start with a basic schedule and refine using occupancy data and app feedback.
Create a simple daily pattern, then refine based on how you actually use the space.
Why is my thermostat not responding?
First, check the power source and ensure the device has power. For wired units, inspect wiring and fuses. If it’s a smart model, verify Wi‑Fi connectivity and app settings.
Check power, inspect wiring if needed, and confirm your smart thermostat is connected to Wi‑Fi.
Are smart thermostats worth the investment for energy savings?
Smart thermostats can offer meaningful energy savings when used with an effective schedule and occupancy features. Evaluate your daily routine and HVAC efficiency to decide if the upgrade fits your goals.
Smart thermostats can save energy if you use their schedules and occupancy features properly.
Do all thermostats require a C‑wire for power?
Not all models require a C‑wire. Some operate on batteries or power stealing. Check your specific unit's wiring requirements before installation to avoid power loss.
Some models don’t need a C‑wire, but many do. Check your unit’s wiring guide.
How often should I replace batteries in a wireless thermostat?
Battery life varies by model and usage. Replace batteries when the low-battery indicator appears to prevent unexpected loss of power.
Replace batteries when you see the low battery indicator.
Watch Video
What to Remember
- Set clear comfort targets and use Hold when needed.
- Leverage scheduling features to reduce energy waste.
- Smart thermostats offer automation but require setup and monitoring.
- Regular maintenance improves accuracy and lifespan.
- Track changes with a simple log for ongoing optimization.