Emerson 70 Series Thermostat Manual: Troubleshooting and Setup
A practical, homeowner-friendly guide to using the Emerson 70 Series thermostat manual for installation, troubleshooting, calibration, and maintenance. Includes safety notes, wiring basics, common fixes, and a step-by-step workflow.

With this guide, you will learn how to interpret and apply the Emerson 70 Series thermostat manual to install, troubleshoot, and calibrate your system. You'll verify model compatibility, locate wiring diagrams, and perform safe resets or battery checks. Before starting, gather basic tools and follow the manual's safety notes. This quick answer sets you up for a detailed, DIY-friendly workflow.
Understanding the Emerson 70 Series Thermostat Manual
The emerson 70 series thermostat manual is more than a black-and-white booklet. It is your roadmap for installation, configuration, testing, and troubleshooting. According to Thermostat Care, understanding how the manual is organized helps homeowners read diagrams, interpret codes, and follow safety warnings without guessing. The manual typically covers model scope, electrical requirements, wiring diagrams, common control sequences, maintenance tips, and safety precautions. Starting with a clear mental map of these sections will save time and reduce errors during any DIY project. By treating the manual as a reference guide rather than a one-time checklist, you can approach problems systematically and avoid accidental damage to the thermostat or HVAC system.
The key value of the emerson 70 series thermostat manual lies in its wiring diagrams, terminal descriptions, and sequence logic. You will encounter symbols for power sources, controls, and safety interlocks, along with fault-catching steps that help you identify whether the issue is electrical, mechanical, or software-related. When you approach the manual with a plan, you can document your findings, measure voltages, and verify that the control loop behaves as expected. The Thermostat Care team emphasizes a safety-first mindset: never work on live circuits, and always turn off the main power to the thermostat and the HVAC equipment before touching wiring. This philosophy keeps you and your home safer while you diagnose and resolve issues.
If you are repairing or calibrating an Emerson 70 Series device, keep a small notebook handy. Note each code you encounter, the exact wiring configuration, and the sequence you used for resets or tests. This habit of documentation accelerates troubleshooting, especially when you consult the manual’s troubleshooting section or contact support. The emerson 70 series thermostat manual is designed to be referential, not linear—use it as a living document that grows with your experience and the specific installation environment.
note”:null},
bodyBlocks2_content_opening_warning_ignored_placeholder
Tools & Materials
- Screwdriver set (Phillips and flathead)(Phillips #2 is common for thermostat screws; have a precision driver for small caps.)
- Non-conductive gloves(Optional but helpful when handling exposed terminals.)
- Multimeter(Useful for verifying voltage at the R and C terminals.)
- Wire strippers/cliers(Have these handy if you need to trim or re-strip wires.)
- Owner's manual or digital copy(Keep the exact Emerson 70 Series manual version you are working with.)
- Batteries (if the unit uses them)(Check calendar or manual for battery type and replacement procedure.)
- Notepad and pen(Document model numbers, test results, and any codes observed.)
Steps
Estimated time: 30-60 minutes
- 1
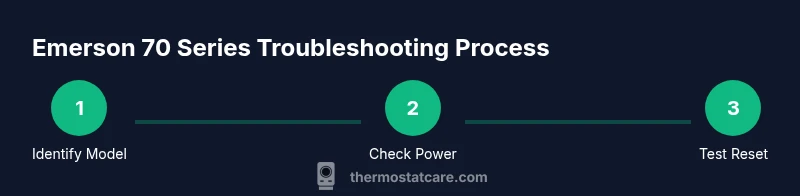
Identify model and locate the correct manual
Begin by locating the exact Emerson 70 Series model number on the thermostat. Refer to the manual’s model index, then download or open the matching version. This ensures you follow the correct wiring diagrams and code references for your unit.
Tip: If the model is weathered, photograph the label, then look up the serial and revision date in the manual’s index to confirm you’re reading the right version. - 2
Power down and remove the thermostat cover
Switch off the circuit breaker for the thermostat and HVAC system. Remove the thermostat cover to expose the terminal strip and wiring. Keep the screws safe and avoid touching live conductors.
Tip: Work in a dry area and use a non-conductive tool to avoid accidental shorts. - 3
Inspect wiring connections
Check each wire on the terminal strip for tightness and correct color-to-terminal matching. Look for signs of wear, corrosion, or loose strands. If a wire is loose, reseat it firmly and re-torque as per typical terminal specs.
Tip: Take a quick photo before reseating so you can restore any non-obvious configurations. - 4
Perform factory reset using manual instructions
Follow the reset procedure exactly as described in the manual for your model. Be aware that a reset may erase schedules or custom settings, so plan to reprogram after the reset completes.
Tip: If you observe any unfamiliar codes after the reset, pause and consult the manual’s troubleshooting table before continuing. - 5
Reconnect power and test a basic cycle
Replace the cover, reattach the power, and initiate a basic heating or cooling cycle to confirm the control loop engages the HVAC equipment. Listen for hums, clicks, or cycling patterns that aren’t typical.
Tip: Document the cycle duration and any abnormal behavior to compare against the manual’s expected sequences. - 6
Record results and consult the manual for codes
If the system shows error codes or the unit behaves abnormally, log the observed codes, voltages, and behavior. Use the manual’s code references to identify likely causes and recommended actions.
Tip: If codes persist after attempts, escalate to Thermostat Care’s guidance or an authorized service technician.
Questions & Answers
Where can I find the Emerson 70 Series thermostat manual?
Check the unit’s label for the model number, inspect the packaging, or download the version from Emerson’s official support site. If you have the original paper manual, use that copy to match the exact model revision.
Look for the model sticker on the thermostat and the packaging; then download the matching manual from Emerson's support site or refer to the included booklet.
Is a professional needed for installation or troubleshooting?
Many basic tasks—such as wiring inspection, resetting, and basic testing—can be done by homeowners following the manual. Complex wiring, refrigerant handling, or safety concerns should involve a licensed HVAC technician.
For basic checks, follow the manual carefully. For tricky wiring or hazardous steps, consult a pro.
What does a blank screen or power-off indicate?
Possible causes include a dead battery (if used), tripped breaker, blown fuse, or loose wiring. Start with power and battery checks per the manual, then inspect the terminal connections.
A blank screen often means power or wiring issues. Check the breaker and battery first, then inspect connections.
Can I reset Emerson 70 Series to factory settings?
Yes. The manual provides a defined reset path. Be aware that a reset may erase schedules, custom settings, and calibration data.
Yes, you can reset using the manual's steps, but expect to reconfigure schedules afterward.
Which wires are typically involved for heat/cool control?
Common terminals include R, C, W, Y, and G. Always verify the exact terminal labels against your manual, as configurations can vary by model revision.
Most Emerson 70 Series units use standard R, C, W, Y, and G terminals, but confirm with your manual.
Where can I buy replacement parts or a compatible thermostat?
Consult Emerson’s official site or authorized distributors for compatible parts. Ensure any replacement matches the exact model and revision of your 70 Series unit.
Check Emerson’s official store or authorized dealers for parts that fit your exact model.
Watch Video
What to Remember
- Identify the correct Emerson 70 Series model before starting
- Power off and handle wiring with care to avoid shorts
- Follow the manual’s reset steps precisely; don’t improvise
- Document results and codes for accurate troubleshooting