Control Heating from Your Phone: A Step-by-Step Guide
Learn how to control your home's heating from your phone with a Wi‑Fi thermostat, setup steps, and tips for schedules, security, and energy savings. A thorough, DIY-friendly guide from Thermostat Care.

You can control your home's heat from your smartphone by connecting a Wi-Fi–enabled thermostat to its companion app. Start by choosing a smart thermostat, linking it to your home Wi-Fi, and installing the official app on your phone. From there, you can adjust temperatures, set schedules, and monitor energy use remotely.
Why control heating from your phone matters
Remote control of heating offers comfort on demand and opens the door to smarter energy use. When you’re away from home, you can adjust the temperature to prevent wasted energy, ensure coming-home comfort, and fine-tune routines based on daily patterns. According to Thermostat Care, homeowners who adopt smartphone-controlled heating are more likely to maintain consistent temperatures and avoid over-heating or over-cooling. The Thermostat Care Team found that remote adjustments often translate into fewer temperature swings and less energy waste, especially when paired with well-timed schedules. To get started, you need a Wi-Fi enabled thermostat, a compatible mobile app, and a stable internet connection. This section helps you understand why mobile control matters, what features to look for, and how to evaluate ecosystems for iOS and Android.
Key takeaways:
- Remote control enables on-demand comfort and energy awareness.
- A strong Wi‑Fi connection plus the official app is essential.
- Scheduling and automation are the biggest energy-savers when used correctly.
What you need before you start
Before you buy or install anything, confirm compatibility with your phone and your home network. A Wi‑Fi thermostat that supports a native mobile app is essential, as is a home network with reliable coverage. The thermostat should support secure cloud access and at least one of the major ecosystems (iOS or Android). It’s also wise to verify that the app can communicate with your HVAC equipment and supports features you’ll use regularly, such as scheduling, geofencing, and energy reporting. The Thermostat Care Team recommends checking for firmware updates during setup and ensuring your router’s firmware is current to avoid connectivity hiccups. If you’re upgrading, consider a thermostat that supports energy dashboards and energy-saving tips.
What this means for you: you’ll be investing in a device and app that can grow with your smart home, rather than a one-off gadget.
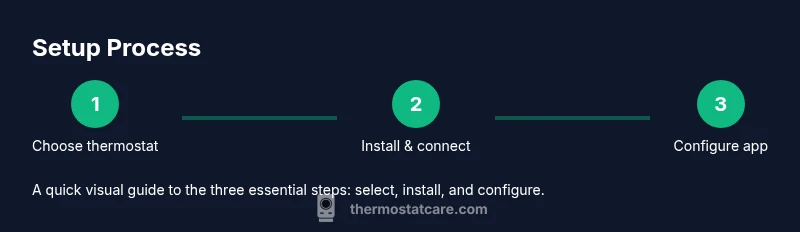
Step-by-step setup overview
A successful setup balances hardware compatibility with a smooth app experience. Start by selecting a thermostat with a compatible mobile app, then install the device and connect it to your home Wi‑Fi. After powering on, download the official app, create an account, and add the thermostat. Once connected, test basic control (temperature changes, fan, and mode) and confirm you can remotely access the device from your phone. This stage sets the foundation for routines and automation that optimize comfort and energy use. The process is designed to be approachable for DIY homeowners, with clear on-screen prompts and guided help from the app’s setup wizard.
Pro tip: keep your smartphone updated to the latest OS version and enable push notifications in the thermostat app so you receive status alerts without delay.
Using schedules, geofencing, and automation
Smart scheduling is the backbone of remote heating control. Create simple daily routines that ramp temperatures up before you wake and cool down when you’re away from home. Geofencing uses your phone’s location to adjust heating as you approach or leave the house, reducing energy waste without manual input. You can also combine schedules with adaptive learning features that adjust settings based on your behavior over time. Start with a basic weekday schedule, then gradually add weekend variations or occupancy-based rules. The goal is to minimize manual tweaks while preserving comfort. The Thermostat Care team emphasizes testing new routines on weekends or during a low-activity period to avoid disruptions to your normal routine.
Examples:
- Weekday: 6:30 a.m. warm-up to 68°F, 9 p.m. setback to 62°F.
- When you leave: auto-setback to 60–62°F; when you return, ramp to preferred comfort level by arrival time.
Security, privacy, and best practices
Remote heating control introduces new security considerations. Use a strong, unique password for the thermostat app, enable two-factor authentication if available, and keep the thermostat’s firmware up to date. Avoid using public Wi‑Fi for setup; if you must, enable a VPN and turn off auto-logins on shared networks. Review app permissions to ensure the thermostat only has access to what it needs (plus notifications). Regularly audit who has access to your home device accounts and change credentials if someone unauthorized gains access. The Thermostat Care Analysis highlights that privacy-conscious users who keep devices updated experience more reliable remote control with fewer security incidents.
Troubleshooting common issues
Connectivity problems are the most common hurdle when enabling phone-based control. If the app cannot reach the thermostat, verify the device is on the same network, the Wi‑Fi password is correct, and the thermostat is within the router’s range. Reboot the router and the thermostat if needed, then re-link the device in the app. If latency is an issue, check for VPNs or firewall settings that might block the thermostat cloud service. Some users see delayed updates when they have weak internet, so consider upgrading to a higher-speed plan or moving the router to a more central location. For app problems, uninstall/reinstall the app, then re-authenticate with your account.
Tip: Keep a concise “home profile” with your thermostat’s preferred temperatures and schedules to speed up troubleshooting when things go wrong.
Energy savings and cost considerations
Remote heating control is most effective when combined with disciplined scheduling. By maintaining a consistent comfort level and avoiding overheating when the house is empty, you can reduce wasted energy. Thermostat Care analysis shows that households using mobile control with schedules typically see better energy management compared to those relying on manual adjustments alone. Another key factor is the quality of your HVAC system and insulation; even the best remote control won’t overcome large room-to-room heat loss without basic home envelopes. Factor in the initial cost of the thermostat and any monthly apps or cloud access fees, then weigh against your expected energy savings over 1–3 years. The payoff grows as you optimize schedules and automate routine changes during peak energy periods.
Advanced tips for power users
If you’re comfortable with tech, you can explore advanced features like scene-based automations (e.g., “Evening Comfort” that adjusts multiple devices), API access for custom automations, and voice assistant integration for hands-free control. For many households, combining a smart thermostat with a compatible voice assistant (e.g., Alexa or Google Assistant) offers a seamless experience. Remember to test as you add features to ensure reliability and avoid conflicting rules that could cause rapid temperature changes. Keep logs of changes to monitor what works best in your home.
Common mistakes and pitfalls
Avoid relying on a single heating plan without testing under different weather conditions. Overly aggressive schedules can lead to discomfort during colds snaps or energy waste in mild weather. Don’t forget to confirm that occupancy-based rules trigger correctly when family members arrive home at unpredictable times. Finally, do not ignore routine firmware updates; these updates often fix security vulnerabilities and improve app reliability.
Tools & Materials
- Smart thermostat (Wi-Fi enabled)(Supports mobile app control and cloud access)
- Smartphone (iOS or Android)(Latest OS version; install the thermostat's official app)
- Reliable home Wi-Fi network(Strong signal; 2.4 GHz or 5 GHz compatible with device)
- Official thermostat mobile app(Used to configure, monitor, and control the thermostat remotely)
- Router with firmware up-to-date(Supports stable cloud connectivity)
Steps
Estimated time: 60-90 minutes
- 1
Choose a compatible smart thermostat
Select a Wi‑Fi-enabled thermostat that supports mobile apps, energy reports, and routine automation. Check compatibility with your HVAC system and confirm cloud access. This step sets the foundation for reliable remote control.
Tip: Pick a model with a clear energy dashboard and strong app reviews. - 2
Install the thermostat and mount
Power off the HVAC system, remove the old thermostat, and mount the new device per the manufacturer’s instructions. Ensure all wires are correctly labeled and connected to the corresponding terminals. Restore power and verify the thermostat boots correctly.
Tip: Double-check the C-wire connection if available; it stabilizes power for the display and sensors. - 3
Connect to your home Wi‑Fi
Using the thermostat's onboard setup or the mobile app, connect the device to your home Wi‑Fi network. Ensure the network name and password are correct, and the thermostat has access to the internet for remote control.
Tip: Prefer a dedicated 2.4 GHz network if your router supports both bands for broader compatibility. - 4
Install and sign in to the official app
Download the thermostat’s app on your phone, create an account, and follow the prompts to add your thermostat. Verify cloud connectivity by testing remote access from another device on a cellular network.
Tip: Enable push notifications so you receive alerts about temperature changes or connectivity issues. - 5
Configure basic heating settings
Set your preferred comfort temperature range, initial schedules, and any required fan or mode preferences. Start with a simple weekday schedule to learn how the system responds.
Tip: Document your baseline temperatures so you can adjust based on actual comfort needs. - 6
Create schedules and routines
Draft daily routines that reflect your presence patterns. Include wake, leave, return, and sleep periods. Use geofencing if you want the system to adapt as you approach or leave the home.
Tip: Test the routines on a weekend to avoid weekday disruptions. - 7
Enable geofencing and automations
Turn on location-based triggers and integrate with other smart devices if supported. Verify that geofence radius suits your commute and that automations don’t conflict with other rules.
Tip: Start with a conservative geofence and gradually widen it as you confirm reliability. - 8
Test remote control and refine
Use the app to adjust heat settings remotely, switch modes, and review energy reports. Observe how quickly the home responds and fine-tune schedules for comfort and efficiency.
Tip: Keep a short log of changes and results to guide future refinements.
Questions & Answers
Can I control heating from my phone without a smart thermostat?
Remote control requires a Wi‑Fi-enabled thermostat and its app. A legacy thermostat may not offer full remote capabilities. Upgrading to a supported device provides remote access, scheduling, and energy reporting.
You need a Wi‑Fi thermostat and its app to control heating remotely. If you don’t have one, upgrading is the simplest path to mobile control.
Is remote heating control secure?
Security depends on the device, app, and network. Use strong passwords, enable two-factor authentication, keep firmware updated, and avoid public Wi‑Fi for setup. Regularly review connected devices and permissions.
Yes, when you use strong passwords, enable two-factor authentication, and keep everything updated.
Do I need a subscription for the app?
Most thermostat apps offer core remote control features for free; advanced energy analytics or premium features may require a subscription. Check the manufacturer's details for your model.
Typically not; basic remote control is usually free, but some advanced features might cost.
Will it work if my internet goes down?
Most remote control features rely on internet access. If the internet is down, local control via the thermostat panel remains available, but remote adjustment won’t work until connectivity is restored.
Local control still works on the device during an outage, but app-based changes require internet.
Can I use voice assistants with a smartphone-controlled thermostat?
Yes, many thermostats integrate with popular voice assistants. You can issue commands through your smart speaker or phone, but ensure you have secure account permissions set up.
Most models work with voice assistants, so you can control heating hands-free.
What kind of savings can I expect?
Smart scheduling and geofencing typically reduce energy usage, especially when you routinely leave the home. Actual savings depend on climate, home insulation, and your behavior.
Savings depend on your setup and home; expect gradual energy reductions as you optimize.
Watch Video
What to Remember
- Use a Wi‑Fi thermostat and official app for reliable remote control.
- Start with simple schedules, then add geofencing and automations.
- Prioritize security: strong passwords and two-factor authentication.
- Regularly update firmware for reliability and privacy.
- Test thoroughly and refine to maximize energy savings.