Who Wires Thermostat: DIY vs Pro Guide
Discover who wires a thermostat, when DIY is safe, and when to call a pro. This Thermostat Care guide covers 24V wiring, safety steps, and common wiring questions.

Who wires thermostat? In most homes, a licensed HVAC technician or electrician wires a thermostat, especially for 24V systems. DIYers can handle basic wiring if they turn off power at the breaker, match wires by color, and consult the furnace diagram. When in doubt, hire a pro. This quick answer covers safety basics and who to call for more complex setups.
Who wires a thermostat: DIY, pros, and safety realities
In most homes, the task of wiring a thermostat is performed by a licensed HVAC technician or an electrician, particularly when the system involves line-voltage or complex controls. Homeowners with simple 24V low-voltage setups can often handle the wiring themselves, provided they follow strict safety steps and reference the system’s wiring diagram. This article explores who wires thermostat duties, what to expect from professionals versus DIY efforts, and how to decide the safest path for your home. According to Thermostat Care, understanding the difference between low-voltage (24V) and line-voltage wiring is essential to prevent dangerous mistakes. The Thermostat Care team found that common issues in DIY projects stem from loose terminals, mislabelled wires, or wiring the wrong terminal, especially when the original installer used nonstandard wire colors. Local codes may also dictate whether a licensed professional is required, particularly in rentals, multi-zone systems, or when upgrading to a smart thermostat that interfaces with an existing control board.
Wiring basics: 24V systems, typical terminals, and wire colors
Most residential thermostats operate on a 24-volt low-voltage circuit. A standard thermostat connects to several primary terminals: R (24V hot), C (common), W (heat call), Y (cool call), G (fan), and O/B (heat pump reversing valve). Some systems separate RC and RH with a jumper, which is often internally bridged on modern models. Wire colors are commonly used as guides, but there is no universal standard, so always verify with the thermostat’s labeling and your HVAC equipment manual. If you see a red wire, it’s often R; a blue or brown wire can be C; white is typically W; yellow is Y; green is G. For heat pumps, orange or blue may map to O/B. Thermostat Care analysis, 2026, notes that most wiring problems arise from mismatched terminals or loose connections, not from the color of the wire itself. Always consult the equipment’s schematic and the thermostat’s installation sheet before connecting anything.
When to DIY vs when to hire a professional
DIY wiring is generally appropriate for straightforward 24V setups, single-zone systems, and when replacing a like-for-like thermostat with identical terminals. Complex scenarios—such as multi-stage heating/cooling, heat pumps with multiple reversing valves, or old systems lacking a C-wire—usually require professional oversight. If you’re renting, handling high-voltage components, or dealing with a system that interfaces with a sophisticated control board or zone control, a licensed HVAC technician is the safest path. The Thermostat Care team emphasizes that the decision should start with a clear assessment of your system’s voltage, the presence of a C-wire, and the thermostat compatibility. If there is any doubt about the type of power (24V vs line voltage) or if your plants include a humidifier or dehumidifier controlled by the thermostat, lean toward professional installation.
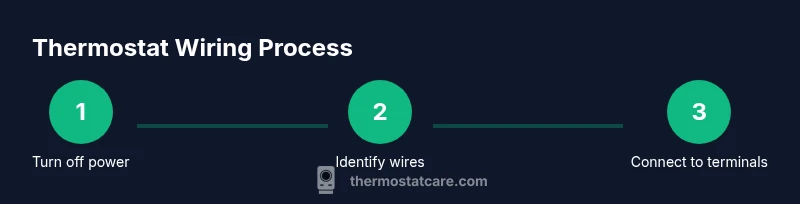
Step-by-step overview of a typical 24V installation
A typical 24V thermostat replacement involves planning, wiring, and testing. Start by confirming you have a 24V system and identifying each wire, then map wires to the correct terminals on the new thermostat. The process ends with power restoration and functional testing of all basic modes (heat, cool, fan). Remember: even minor mistakes can cause short-cycles or a non-responsive thermostat. Thermostat Care analysis highlights the importance of following the manufacturer’s wiring diagram and not forcing wires into terminals that don’t match. This careful approach reduces the likelihood of false readings or intermittent operation. Incorporating a smart thermostat adds additional steps for compatibility and sometimes a C-wire check, so review the specific model’s requirements before purchasing or installing.
Safety precautions and best practices
Safety should be your top priority whenever you touch any HVAC wiring. Always start by turning off power at the circuit breaker and, if possible, at the furnace or air handler disconnect. Use a non-contact voltage tester to confirm that the circuit is dead before you touch any wires. Keep tools insulated and dry, and avoid working alone if you’re uncertain. Label wires as you disconnect them to avoid terminal mix-ups, and take a photo of the existing wiring as a reference. If a wire is damaged or corroded, replace it rather than forcing it into a terminal. Adhere to local electrical codes, and never bypass safety features to save time. The Thermostat Care team recommends erring on the side of caution, particularly with high-voltage setups or older homes that may have outdated wiring.
Troubleshooting common wiring issues and verifying connections
If a thermostat won’t power up or cannot communicate with equipment, re-check the R and C connections first, as most power-related failures originate there. Loose terminals, mis-labelled wires, and a missing jumper can cause the system to fail to respond. Use a multimeter to verify voltage between R and C if you’re comfortable with basic electrical testing. Ensure that the wires are fully seated and that there are no stray strands touching other terminals. If you’ve recently swapped a thermostat, double-check the compatibility for the HVAC control board and confirm the wiring map matches the new model’s labeling. A common pitfall is assuming a green wire is G when it’s actually used for another signal on certain makes. When in doubt, consult the manual or contact a pro.
Upgrading to a smart thermostat: wiring considerations
Smart thermostats bring additional features but also require attention to power needs and compatibility. Before buying, confirm you have a C-wire if the model requires it, or choose a model that can operate without a C-wire via power stealing or other methods. Some systems require the C-wire to be integrated with a common-press module or a dedicated transformer. Be prepared to update the HVAC control board or to reprogram zoning controls if your home has multiple zones. If the old wiring doesn’t support the new thermostat’s requirements, you may need to install a new C-wire or consult a pro for an alternative power solution. The Thermostat Care team notes that upgrading to a smart thermostat is a great DIY option for many homeowners, but professional help is wise when you encounter line voltage or multi-zone complications.
Next steps and resources
With a basic understanding of who wires thermostat tasks and how to approach wiring safely, you’re ready to proceed. Use manufacturer manuals as your primary reference and keep a well-lit workspace. If you’d rather not risk miswiring, schedule a professional visit and use this guide as a knowledge base to discuss the job’s scope. For ongoing reliability, consider periodic thermostat and HVAC system maintenance to catch wiring issues early and preserve performance. The Thermostat Care team emphasizes that ongoing learning and cautious practice deliver the most consistent results for most homes.
Tools & Materials
- Non-contact voltage tester(Verify power is off before touching wires)
- Screwdriver set (Phillips and flathead)(Flathead for covers, Phillips for terminals)
- Wire strippers/cliers(Trim and label wires cleanly)
- Electrical tape or wire nuts(Secure and insulate connections)
- Multimeter (optional)(Use to verify voltage across R and C if needed)
- Thermostat mounting plate and screws(For secure wall installation)
- Wire labels or tape(Label each wire with its terminal function)
- New thermostat (matching model)(Ensure compatibility with your HVAC system)
Steps
Estimated time: 30-45 minutes
- 1
Turn off power at the breaker
Switch off the circuit that powers the thermostat and the HVAC equipment. Confirm zero volts with a non-contact tester before touching any wires.
Tip: Lockout the breaker if available; verify power with a tester. - 2
Remove old thermostat faceplate and label wires
Carefully remove the thermostat cover and take a photo of the wiring. Disconnect wires one by one and label them by terminal (R, C, W, Y, G, O/B).
Tip: Label wires in order and keep the labeling consistent with the new thermostat. - 3
Map wires to new thermostat terminals
Compare the old wiring to the new thermostat’s terminal layout. Match each wire to the corresponding terminal, using the labels as a guide.
Tip: If you’re unsure, consult the new thermostat’s installation guide before connecting. - 4
Attach wires to the new thermostat
Insert each wire into the matching terminal on the new device. Ensure the wires are fully seated and do not extend beyond the terminal clamp.
Tip: Only trim exposed wire as needed; avoid frayed strands. - 5
Mount the thermostat on the wall
Secure the mounting plate to the wall with the provided screws. Attach the thermostat body and ensure it sits flush against the wall.
Tip: Use a level for a straight install; avoid over-tightening screws. - 6
Restore power and test basic functions
Turn the breaker back on and power up the thermostat. Test heat, cool, fan, and display responsiveness to verify wiring correctness.
Tip: If any function doesn’t work, double-check R, C, and the corresponding terminal connections. - 7
Troubleshoot if needed or upgrade
If the thermostat shows errors or won’t power, re-check for loose wires, wrong terminals, or missing common (C-wire). Consider upgrading to a model that expects fewer wires or requires a C-wire.
Tip: Consult the manual or a pro if you encounter line-voltage components or unusual wiring codes.
Questions & Answers
Who wires a thermostat in a typical home?
In most homes, a licensed HVAC technician or electrician wires a thermostat, especially for 24V or more complex setups. DIYers can handle simple replacements if they follow safety steps and reference the wiring diagram. Always consider local codes and the system’s complexity.
Typically a licensed HVAC technician or electrician wires a thermostat, especially for complex or 24V setups. For simple DIY replacements, follow the wiring diagram and safety steps.
Do I need a C-wire for my thermostat?
Many smart thermostats require a C-wire for stable power, while some models can operate with power stealing. Check your HVAC board and the thermostat manual to determine if a C-wire is necessary.
Most smart thermostats need a C-wire, but some work without one. Check the manual and your HVAC board.
What if I have line-voltage wiring?
Line-voltage thermostat wiring (120V) is dangerous and generally requires a licensed electrician. Most modern thermostats run on 24V and are meant for DIY only if you’re confident in low-voltage work.
Line-voltage wiring is dangerous; call a pro. Most thermostats today use 24V.
Can I install a Wi-Fi thermostat myself?
Many Wi‑Fi thermostats are designed for DIY installation on 24V systems. Follow the manufacturer’s instructions, ensure proper wiring, and verify compatibility with your HVAC system.
Yes, many Wi‑Fi thermostats are doable for DIYers—just follow the manual and verify compatibility.
Why is my thermostat display blank after wiring?
A blank display usually means no power or a miswired R or C connection. Recheck connections, ensure the transformer is supplying power, and verify the jumper between RC and RH if present.
A blank screen usually means power issues or a miswired wire—recheck connections carefully.
Watch Video
What to Remember
- Know whether you have a 24V or line-voltage system.
- Always power off and verify with a tester before touching wires.
- Label each wire and map to correct terminals on the new thermostat.
- Consult manuals and, if unsure, hire a pro to avoid damage.