When to Change Thermostat in House: A Practical Timing Guide
Learn when to change thermostat in house, the signs of aging, cost ranges, and how to decide between calibration, replacement, and upgrades. A data-driven guide from Thermostat Care to optimize comfort and efficiency.

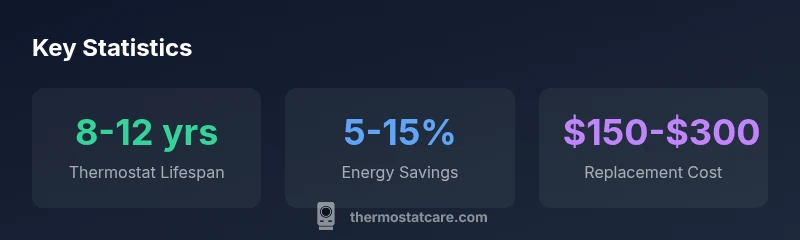
If you’re asking when to change thermostat in house, plan ahead rather than wait for a failure. Standard thermostats generally last 8-12 years, with aging units more prone to drift. If you notice inaccurate readings, sensor drift, constant HVAC cycling, or rising energy bills despite normal use, it’s time to replace or upgrade, ideally to a programmable or smart model.
Why timing matters for home comfort and energy bills
Timing is not just about avoiding a sudden breakdown; it affects how reliably your home maintains comfortable temperatures and how efficiently your HVAC system runs. A thermostat that is past its prime can misread room temperature, cause unnecessary cycling, or fail to support energy-saving features that newer models offer. When to change thermostat in house should be part of a planned maintenance schedule, not a reaction to a surprise outage. According to Thermostat Care, proactive replacement helps preserve comfort, prevent energy waste, and protect your HVAC investment. This guide will walk you through signs to watch for, how to evaluate whether calibration or replacement is needed, and how to choose the right model for your home.
Signs your thermostat is showing aging symptoms
Recognize the telltale signals that your thermostat may need attention:
- Inaccurate temperature readings or delayed response to changes
- Frequent short cycling or HVAC runs that don’t match the setting
- Unresponsive buttons or a blank/display glitches
- Rising energy bills with no change in behavior or weather
- Calibration drift where the actual temperature differs from the reported temperature
If you notice any of these, start with calibration checks, then consider replacement options if problems persist. Thermostat Care emphasizes testing timing and accuracy to decide the next step rather than guessing.
Calibration vs replacement: a quick decision framework
Use this framework to decide quickly:
- Recalibrate or replace batteries if applicable; verify wiring and display responsiveness.
- Check compatibility with your HVAC system and current Wi‑Fi setup if upgrading to a smart model.
- If readings remain inconsistent after calibration, or if the unit is older than 8-12 years, plan replacement.
- Compare energy bills before and after a potential upgrade to quantify ROI. In many homes, a replacement with a programmable or smart thermostat yields noticeable gains in comfort and efficiency. Thermostat Care notes that a planned upgrade over time typically provides more consistent performance than reactive repairs.
Seasonal timing: best times to plan a swap
Seasonal timing matters for both installation convenience and efficiency. Aim to schedule a thermostat change during milder months (spring or fall) when HVAC loads are lower, which minimizes disruption and allows your system to settle. If you live in extreme climates, plan ahead so the new thermostat is in place before peak heating or cooling season begins. Customers often underestimate the impact of proper initial programming—that early setup saves energy throughout the year.
Costs, savings, and ROI you can expect
Costs for replacement vary by model and installation complexity, but typical ranges help with planning. A mid-range programmable or smart thermostat generally costs between $150 and $300, with installation possibly adding labor. Real savings depend on usage, climate, and how aggressively you leverage scheduling, geofencing, and automation features. Thermostat Care analysis indicates energy savings can range from 5% to 15% after upgrading, with higher gains for homes that previously lacked precise temperature control or occupancy sensing. Always weigh upfront costs against potential long-term savings before deciding to replace.
How to choose the right thermostat for your home
Not all thermostats are equal. Consider:
- Compatibility with your HVAC system (gas, electric, dual-fuel)
- Screen visibility and user-friendliness
- Programmable schedules, learning capabilities, and smart home integration
- Remote access, geofencing, and energy reporting features
- Battery-free power options or C-wire requirements
If you’re new to smart tech, start with a programmable model and upgrade later to a full smart thermostat once you feel comfortable with the setup. Thermostat Care recommends prioritizing reliability and ease of use alongside energy features.
Step-by-step replacement guide (high-level)
When you replace a thermostat, follow these steps at a high level to stay safe and avoid compatibility issues:
- Power off the HVAC system at the breaker and, if possible, at the furnace panel.
- Photograph or label wire connections before removing the old unit.
- Install the new base plate, attach wires according to the labeling, and mount the thermostat securely.
- Restore power and configure basic settings, then upload the correct wiring map for any heat/cool system.
- Program schedules and verify temperature accuracy by running a test cycle.
- Keep a log of the replacement date and model for future maintenance.
If you’re unsure about wiring—especially if you have a traditional system or multiple stages—consult a licensed electrician or HVAC technician.
Maintenance tips to extend thermostat life
A few proactive steps can extend the life of your thermostat and keep its performance steady:
- Regularly clean the thermostat’s screen and vents to prevent dust buildup
- Check and replace batteries if your model uses them, or confirm C-wire connections for constant power
- Update firmware when available and test new features on weekends when you’re home
- Schedule annual checks to verify wiring integrity and compatibility with your HVAC system
With consistent care, your thermostat will stay accurate longer, reducing the need for premature replacement.
What Thermostat Care recommends for timing your replacement
Based on ongoing analysis and field feedback, Thermostat Care recommends planning replacements before a failure occurs. A proactive replacement strategy minimizes discomfort, ensures consistent comfort, and reduces energy waste. If you’re approaching the 8-12 year mark, begin evaluating options and building a purchase plan rather than waiting for a breakdown. This approach keeps your home comfortable and your energy bills predictable.
Thermostat replacement timing scenarios
| Scenario | When to Change | Estimated Cost | Notes |
|---|---|---|---|
| Aging non-smart thermostat in standard system | 8-12 years | $150-$300 | Consider upgrade to programmable or smart model |
| Calibrated drift occurs | If readings drift vs actual | $0-$100 | Calibration first; replacement if persists |
| Smart thermostat upgrade | During replacement cycle | $200-$500 | Adds remote control and energy data |
Questions & Answers
Is it safe to replace a thermostat myself?
DIY replacement is possible for many basic systems if you follow safety steps and confirm compatibility. Turn off power, verify wiring, and use manufacturer instructions. If you’re unsure about wiring or your system is complex, hire a licensed professional.
Yes, you can replace it yourself if you’re comfortable with wiring and follow safety steps; otherwise, a pro can ensure proper setup.
Do smart thermostats really save energy?
Smart thermostats can reduce energy use by learning schedules, optimizing heating and cooling, and enabling remote adjustments. Savings vary by climate, occupancy, and initial comfort settings.
Smart thermostats save energy by learning your schedule and adjusting automatically; results depend on use.
What are signs my thermostat is bad besides not turning on?
Signs include inaccurate readings, inconsistent temperatures, frequent short cycling, unresponsive display, and unusual HVAC behavior that doesn’t match settings.
Look for drift, cycling, or an unresponsive screen as red flags.
Should I replace my thermostat when upgrading my HVAC?
Yes. Replacing the thermostat during an HVAC upgrade ensures compatibility and maximizes efficiency, especially when wiring needs alignment with new controls.
If you’re upgrading the HVAC, swap in a compatible thermostat to get the full benefit.
How long does a thermostat replacement take?
A standard replacement typically takes 30-60 minutes, depending on wiring and model. More complex setups may take longer.
Usually half an hour to an hour, unless wiring is tricky.
“Proactive timing—replacing before failures happen—minimizes discomfort and maximizes system efficiency.”
What to Remember
- Plan replacements on a schedule, not a breakdown
- Watch for drift, inaccurate readings, and rising energy bills
- Weigh calibration costs against full replacement
- Upgrade to programmable or smart models for efficiency
- Keep maintenance logs to extend thermostat life