When to Change Battery in Thermostat: A DIY Guide
Learn exactly when to change batteries in your thermostat, how to identify the right battery type, and follow a safe, step-by-step process to keep your home comfortable and energy-efficient.

Replace the thermostat battery whenever you see a low-battery indicator, slow response, dim display, or scheduling issues. Start by checking your model's manual to confirm battery type and orientation, gather fresh batteries, and replace the old ones. After replacement, test the thermostat to ensure it responds to temperature changes.
Why battery life matters for thermostats
Batteries are the invisible power source that keeps many thermostats responsive and reliable. If the battery is weak or failing, a smart thermostat may misread room temperature, skip scheduled programs, or lose connectivity to the HVAC system. Understanding when to change battery in thermostat can prevent comfort gaps and energy waste. According to Thermostat Care, the most frequent complaints from homeowners during seasonal transitions stem from a dead or dying battery rather than a faulty control board. In practical terms, you want to keep fresh power at the moment the device needs it, especially when you rely on automation to regulate energy use. This section explains why good battery health matters and how it translates into stable heating and cooling, accurate temperature readings, and longer device life. We’ll also discuss how battery quality affects features such as remote control, app alerts, and energy-savings modes, all of which hinge on a steady power supply.
Battery types and compatibility: what you need to know
Thermostats come in a variety of power configurations. Some use standard disposable AAA or AA alkaline batteries, others rely on coin cell batteries (like CR2032) tucked inside a slim compartment, and a few models are wired or rechargeable via a direct power connection. The battery type and size are model-specific, so the first step is to locate your thermostat’s manual or model number label on the back and confirm which battery type is required. Using the wrong battery can damage contacts or fail to power all features. In many cases, you’ll find the correct orientation diagram stamped inside the battery cover. If your system uses two batteries, replace both at the same time to avoid imbalanced performance. The Thermostat Care analysis suggests that compatibility issues are a common cause of alarms and false readings, especially after long exposure to heat and cold help cycles.
Signs your thermostat needs new batteries
Spotting the signs early helps avoid temperature fluctuations and control hiccups. Look for a fading or flickering display, a persistent low-battery icon, slower response to button presses, or delayed updates in smart app notifications. If your thermostat hosts a schedule, a failing battery can cause programs to reset or skip entirely. If you notice unexplained changes in room temperature or inconsistent fan behavior, a battery replacement is a quick diagnostic step. In many homes, people only replace batteries once they see a fault, but proactive replacement reduces the risk of a mid-winter outage. Remember to review any manufacturer-specific indicators in the manual, as some models display a clock icon or a battery symbol with a percentage.
Safety first: prep and precautions before you swap
Before you handle any components, ensure you have a safe working space and clear access to the device. Power down or switch the thermostat to an off state if your model supports such a control, but do not disconnect power to the HVAC system itself unless you’re instructed to do so by the manual. Work on a dry, stable surface and wash your hands to avoid oil or residue on the battery contacts. Keep track of screws or small plastic parts so you don’t lose them. If you’re replacing a lithium coin cell, avoid touching both contacts with bare fingers; oils can affect contact performance. This preparation minimizes the chance of accidental short circuits or dropped parts during the swap.
Locating the battery compartment and proper orientation
The battery compartment location varies by model. Some covers slide or snap open from the side; others require a small screwdriver to remove a back plate. Once exposed, identify the polarity indicators (+ and −) near the contacts. Take a moment to study the orientation diagram, usually printed inside the cover or in the manual. If you have two batteries, ensure both are aligned identically. A quick photograph of the original setup can serve as a reference if you’re unsure about the correct placement. A misoriented battery can prevent the unit from powering on or lead to erroneous readings.
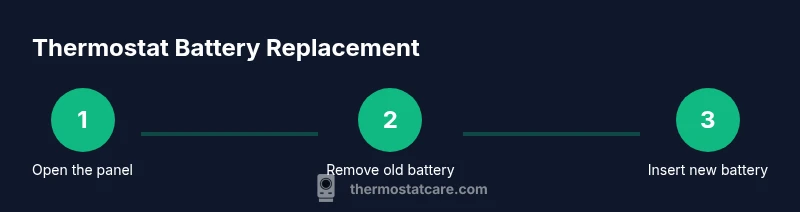
Replacement steps (general approach you can adapt)
Note: Always consult your model’s manual for exact steps, but the general process is consistent across many thermostats. Remove the old battery, insert the fresh one with the correct polarity, reseal the compartment, and power the unit back on. If the device has a backplate, you may need to reattach it before testing. Do not force any parts, and handle fragile connectors with care. After installation, verify that the display turns on cleanly and the thermostat acknowledges temperature changes promptly.
Post-installation testing and calibration
With power restored, confirm the display is bright and readable. Check that the thermostat updates the corresponding HVAC system when you adjust the temperature and that scheduled programs run as expected. If you notice lag, recheck the battery alignment and ensure the cover is fully seated. Some models may run a quick diagnostic or ask you to re-enter time, date, and location information after a battery change. If the system won’t respond, repeat the process carefully or consult the manual for reset steps specific to your model.
Common mistakes and how to avoid them
Avoid mixing old and new batteries, as this can lead to uneven performance and leaks. Do not force covers shut if the battery is not seated properly; a slightly askew battery can prevent contact. Never reuse batteries that show any signs of corrosion or leakage. Maintain a clean environment while swapping to avoid dust infiltration into the contacts. If your thermostat uses two batteries, replace both at the same time to prevent one from failing earlier than the other. Finally, dispose of old batteries according to local regulations.
Maintenance and climate considerations: timing and routine
Battery performance can vary with climate. Colder environments can drain power faster, while hot conditions can affect contact quality. If you live in a region with extreme temperatures, you may benefit from checking and replacing batteries annually or right before peak heating or cooling seasons. Create a simple maintenance cadence, such as flipping a calendar reminder to inspect the battery at the start of each season, so you avoid unexpected outages. Thermostat Care analysis reinforces that proactive maintenance reduces disruption and saves energy in the long run.
Quick maintenance routine you can perform every season
Create a small seasonal ritual: check the battery indicator, replace if needed, confirm display clarity, test HVAC response, and update any manual schedules. Keeping spare batteries on hand can avoid last-minute searches. Document the model and type of battery used for future reference. This routine minimizes downtime and ensures your thermostat reliably supports energy-saving settings and comfort goals.
Tools & Materials
- Replacement batteries (model-specific)(Confirm battery type (e.g., AA, AAA, or coin cell) and voltage from the manual; do not mix types in a single device.)
- Small screwdriver (if needed)(Needed for models with a securing screw or backplate.)
- Soft cloth or lint-free wipe(Used to wipe contacts; avoid leaving fibers inside the compartment.)
- Owner's manual or model number(Helps verify battery type, orientation, and any special reset steps.)
- Safety gloves (optional)(Reduces the risk of slipping with small parts; not strictly necessary.)
Steps
Estimated time: 15-25 minutes
- 1
Gather supplies
Collect the replacement batteries, the thermostat manual, and any required tools. Having everything ready reduces interruptions and helps you verify the correct battery type before you begin.
Tip: Check the manual first to avoid using the wrong battery size. - 2
Power down and prepare the space
Set the thermostat to OFF or stand-by if supported. Ensure the room is dry and you have a stable work surface. This minimizes the risk of short circuits during removal.
Tip: Avoid working on a damp surface; moisture can affect contacts. - 3
Open the battery compartment
Remove the cover by sliding or unscrewing as directed by your model. Keep screws in a small dish so they don’t get lost.
Tip: If a screw is present, don’t over-tighten when reassembling. - 4
Remove the old battery(s)
Carefully lift the old battery(s) and note their orientation relative to the polarity markings. If there’s corrosion, wipe gently with the cloth before inserting new batteries.
Tip: Take a quick photo of the original orientation for reference. - 5
Insert the new battery(s)
Place the new battery(s) in the same orientation as the old ones, aligning the polarity marks (+ and −). Ensure full contact with the terminals.
Tip: Do not force the battery in if it doesn’t fit naturally; re-check orientation. - 6
Close the compartment and reseat the cover
Return the cover, secure any screws, and make sure the panel sits flush. A loose cover can allow dust in and affect contact.
Tip: Tap gently to verify the cover is fully seated. - 7
Power up and verify display
Turn the thermostat back on and confirm the display lights up clearly. If your model shows a battery icon, ensure it no longer indicates low power.
Tip: If the screen is dim, re-check battery seating. - 8
Test the system and reset if needed
Set a simple temperature change to confirm the HVAC responds promptly. If schedules or smart features don’t update, re-enter essential settings or run a quick reset as per the manual.
Tip: Document the model and battery type for future reference.
Questions & Answers
How often should I replace thermostat batteries?
Most thermostats require replacement every 1-2 years depending on usage and model; always follow the manual for specific guidance and indicators. Regular checks prevent unexpected outages.
Typically, check the battery every year and replace as needed based on the indicator light and performance.
Can I use rechargeable batteries in a thermostat?
Some thermostats support rechargeable batteries, but not all. Check the model manual for compatibility and charging needs. If in doubt, use standard alkaline or lithium batteries specified by the manufacturer.
Only use rechargeable batteries if the manual says it’s supported; otherwise stick to recommended standard batteries.
What if my thermostat has no obvious battery compartment?
Some models are hardwired and don’t use user-replaceable batteries. Refer to the manual to confirm power type and any required resets after maintenance.
If there’s no battery area, your thermostat likely uses a wired power source; consult the manual for reset steps.
Is it safe to replace batteries while the HVAC is running?
Yes, you can replace batteries with the system on, but avoid shorting any contacts and keep liquids away from the panel. If you’re unsure, switch off the thermostat first and proceed.
Yes, but exercise caution; turn it off if you’re unsure.
How should I dispose of old thermostat batteries?
Dispose of used batteries following local regulations. Many areas have household hazardous waste programs or battery-recycling options. Do not throw them in regular trash.
Recycle or dispose of batteries per local guidelines.
Do all thermostats require batteries?
Not all thermostats require batteries. Some are fully wired to your home’s power, while others are battery-powered as a backup. Always check the model details.
Some are wired, some use batteries—check your model.
Watch Video
What to Remember
- Check the manual for battery type before replacement
- Replace batteries promptly when indicators appear
- Test system function after installation
- Dispose of old batteries responsibly
- Maintain a seasonal battery check routine