How to Set a Thermostat for Winter
Learn how to set a thermostat for winter to maximize comfort and energy savings. Step-by-step baselines, scheduling, and smart features explained for DIY homeowners.

Goal: Learn how to set a thermostat for winter to stay comfortable while saving energy. This quick answer covers verifying your system, choosing winter baselines, and building a simple schedule. You’ll test changes for even heat, and adjust setbacks to 2–4 degrees. Thermostat Care notes practical steps homeowners can follow safely.
Why winter thermostat settings matter
Regulating heat efficiently during cold months isn't just about staying warm; it's about balancing comfort with energy costs. A poorly configured thermostat can cause your heating system to cycle on and off frequently, waste energy, and create chilly drafts in rooms that never quite reach the right temperature. According to Thermostat Care, the way you set and schedule your thermostat in winter has a meaningful impact on both comfort and annual heating expenses. Small adjustments to baselines and setback timings add up over a season, especially in homes with older windows or drafty doors. In this section we'll explain the core ideas behind winter temperature management and what you should aim for when you first start adjusting your thermostat. We'll distinguish between baseline temps, setback strategies, and how smart features like adaptive recovery and geofencing can help you maintain consistent comfort without overworking your furnace. The goal isn't perfection—it's reliable warmth at a cost that matches how you live in the home. For DIYers, this is about understanding scope: you can achieve a big win with straightforward changes, even if your system isn't new or fancy.
Understand your heating system and thermostat compatibility
Winter comfort starts with knowing what heats your home and what thermostat can control it. Common setups include forced-air furnaces, boilers that feed radiant heat, and hydronic systems. Non-programmable thermostats can work, but programmable or smart models unlock scheduling, setback, and adaptive recovery features that save energy. Before you buy or swap thermostats, verify compatibility with your HVAC equipment, especially if you rely on specialized valves, multizone controls, or a C-wire. Reading your furnace or boiler manual helps you understand voltage, wiring, and power requirements. If you have a heat pump in winter, check whether auxiliary heat engages automatically and how that affects your comfort and bills. Keep a photo of current wiring for reference and consult the thermostat's installation guide for any model-specific steps.
Baseline winter settings: establishing a starting point
Setting a baseline temperature gives your system a clear target to reach each day. Start with a daytime baseline that feels comfortable for your family and a cooler nighttime baseline to save energy. If your home has drafty windows or poor insulation, you may need to adjust to a more moderate baseline to maintain even warmth without overworking the heating system. Use the thermostat's built-in comfort guidance or the manufacturer’s recommended range as a starting point, then tailor it to your schedule and occupancy. Remember, the goal is consistent comfort, not extreme temperatures. Document your baseline settings so you can revert if needed and compare changes over time.
Scheduling and setback strategies
Create a weekly schedule that reflects your routine: wake, away, return, and sleep. Program higher temperatures for the times you are home and lower settings when the house is empty or everyone is asleep. If you have weekends that differ from weekdays, adjust accordingly. For homes with multiple floors, consider prioritizing commonly used spaces first and using zone controls or room sensors if available. The key is to pre-warm spaces so you don’t wake up to a cold house and avoid dropping temperatures too aggressively, which can cause oversized heating cycles and higher costs. Test your schedule for a few days and refine based on comfort and energy use.
How to optimize for energy savings without sacrificing comfort
Energy savings come from consistent, well-planned setbacks and smart features. Use the hold or schedule options to enforce a routine rather than leaving the system to run on a fixed, unpredictable pattern. If you have a smart or adaptive thermostat, enable features like weather-based adjustments or learning capabilities, which anticipate heating needs based on outdoor temperatures and occupancy. If you’re away, a longer setback can save energy without affecting morning warmth. Thermostat Care analysis shows that thoughtful winter settings, coupled with routine monitoring, yield noticeable improvements in comfort and efficiency without requiring expensive upgrades.
Troubleshooting common winter thermostat issues
Winter can stress heating equipment and thermostats alike. If your thermostat isn’t displaying accurately, check the batteries if it is battery-powered, verify power to the device, and look for tripped fuses or blown breakers. For wired thermostats, ensure connections are snug and there’s a common C-wire providing 24-volt power. If rooms stay uneven, confirm zone controls are balanced and that return air isn’t being blocked by furniture. If the thermostat reads correctly but HVAC equipment isn’t responding, consult the furnace/blower panel for fault codes and refer to the system manual before resetting. When in doubt, revert to a known good baseline, then reintroduce changes one by one.
Safety and maintenance checks before winter
Before cold weather hits, perform basic safety checks: replace furnace filters, ensure vents aren’t blocked, and test carbon monoxide and smoke detectors. Keep a clear space around the thermostat and HVAC equipment to prevent overheating or blockage. If you smell gas or detect a furnace malfunction, evacuate and call emergency services. Regular maintenance, including professional inspections, helps prevent unexpected outages and keeps your home warmer and safer throughout the season.
What to do with smart thermostats in winter
Smart thermostats can optimize heating with scheduling, geofencing, and occupancy sensing. Set up your home profiles to reflect work and school patterns, or enable auto-away features when you’re not home. If you have multiple zones, take advantage of room sensors to balance temperature throughout the house. Ensure your Wi-Fi connection is stable, keep firmware up to date, and review privacy settings for energy analytics. If you rely on a voice assistant, enable routine commands for quick adjustments on cold evenings.
Authority sources
For official guidance on thermostat usage and energy savings, consult trusted sources such as the U.S. Department of Energy and ENERGY STAR recommendations. These resources provide foundational concepts for winter settings, safety, and efficiency: - https://www.energy.gov/energysaver/thermostats - https://www.energystar.gov/products/thermostats - https://www.energy.gov/eere/buildings/articles/how-thermostats-work
Tools & Materials
- Programmable thermostat(Ensure compatibility with HVAC system and a functional C-wire if using a smart model)
- Fresh batteries (if battery-powered)(Replace before starting adjustments)
- HVAC system manual(Keep handy for wiring and capacity limits)
- Smartphone or tablet(Useful for remote control and app-guided setup)
- Notepad or digital notes(Record baseline and changes for comparison)
- Small screwdriver(Only if you need to adjust wiring or mount plate)
- C-wire tester (optional)(Verify 24V power to thermostat)
Steps
Estimated time: 45-60 minutes
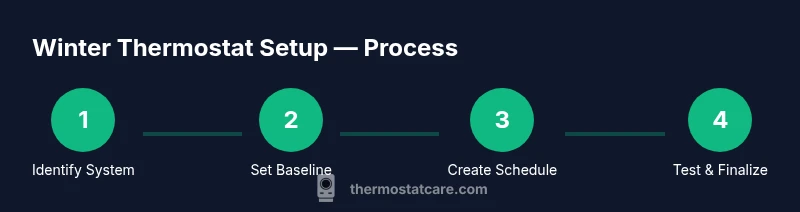
- 1
Identify system and thermostat type
Locate the thermostat on the wall, note the make and model, and photograph the wiring. Check whether a C-wire is present and if the HVAC equipment supports the thermostat features you plan to use. This gives you a safe starting point and helps prevent wiring mistakes.
Tip: Take a photo of the wiring before making changes to revert easily. - 2
Set a comfortable daytime baseline
Using the thermostat interface, establish a daytime baseline that feels comfortable for your household. Avoid extreme temperatures and rely on the manufacturer’s recommended range as a guide. If you have multiple zones, decide which spaces are priorities for daytime warmth.
Tip: Begin with a modest baseline and adjust gradually over a few days. - 3
Create a winter schedule
Program wake, away, return, and sleep times to align with your daily routine. Apply the pattern to weekdays and weekends if your schedule varies. Ensure heating is active before you need warmth in the morning.
Tip: Use a weekend pattern if your home rhythm shifts on Saturdays and Sundays. - 4
Enable energy-saving features
Turn on available modes such as adaptive recovery or weather-based adjustments. Confirm the system still reaches comfortable temperatures at the right times.
Tip: Test changes for at least 24 hours to gauge impact on comfort. - 5
Test across rooms and adjust
Walk through common living spaces to check for temperature consistency. If a room remains chilly, adjust its setpoints or add a room sensor if your system supports it.
Tip: Make small changes and recheck within 24 hours. - 6
Finalize and document
Save the final schedule and baseline settings. Keep a log of changes and monitor energy use over the next week to confirm improvements.
Tip: Store the original baseline somewhere visible as a quick revert option.
Questions & Answers
What is the best winter thermostat setting for comfort?
There isn’t a universal ideal setting; it varies by home and preference. Start with a comfortable daytime baseline, then refine it through testing and logs. Use gradual adjustments and keep safety checks in place.
There isn’t a single best setting; start with a comfortable baseline and adjust gradually while tracking how your home feels.
Should I use a programmable thermostat in winter?
Yes. Programmable thermostats help you establish reliable schedules that reduce energy use while maintaining comfort, especially during early mornings and nights.
Yes, programmable thermostats are great for winter schedules and saving energy.
What if my thermostat won’t hold a schedule?
Check batteries (if battery-powered), verify power and wiring, and ensure the mode is set correctly (auto/heat). If problems persist, revert to a known-good baseline and reattempt changes.
If a thermostat won’t hold a schedule, check power and mode, then retry with a known baseline.
Can smart thermostats save more energy in winter?
Smart thermostats can optimize heating by learning routines, sensing occupancy, and adjusting based on weather. They often save energy when used with well-structured schedules.
Smart thermostats can save energy by learning your patterns and adjusting automatically.
What safety checks should I do before winter?
Replace furnace filters, ensure vents are clear, and test CO and smoke detectors. Keep a safe space around HVAC equipment.
Do safety checks like filters and detectors before winter starts.
Do I need a C-wire for smart thermostats?
Many smart thermostats require a C-wire for consistent power. If you’re unsure, consult the thermostat manual or an HVAC technician.
A C-wire is often needed for smart thermostats to stay powered reliably.
Watch Video
What to Remember
- Establish a warm daytime baseline and cooler nights.
- Create clear winter schedules for weekday and weekend.
- Test room-to-room comfort after changes.
- Leverage smart features to automate adjustments.
- Document changes and monitor energy use across the season.