How to Program a Thermostat: A DIY Guide
Learn how to program a thermostat to save energy and stay comfortable. This guide covers basics, step-by-step instructions, safety tips, and troubleshooting for common thermostat models.

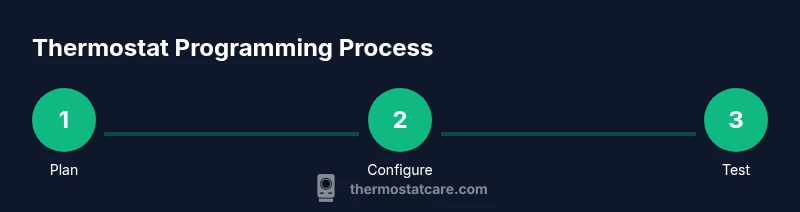
In this guide you’ll learn how to program a thermostat to save energy and keep your home comfortable. You’ll need a compatible thermostat with scheduling capability, and access to its manual for model-specific steps. We break down the process into clear, actionable steps and safety notes so homeowners can configure a reliable, efficient schedule.
Understanding the basics of thermostat programming
Programming a thermostat means telling your device when to heat or cool based on time, occupancy, and preferences. A well-planned schedule can reduce energy use and maintain comfort with minimal manual adjustments. According to Thermostat Care, a smart, well-structured schedule is easier to manage and yields better results than ad hoc changes. This section covers core concepts: what you can do with programming, how different modes work, and how to interpret common menu terms across brands. You’ll learn the difference between fixed schedules, adaptive/learning thermostats, and manual operation, so you know what to expect from most models and where to start.
Before you start: tools, safety, and model checks
Before you touch wiring or settings, gather the essential tools and confirm compatibility. You’ll typically need a compatible thermostat, the device’s user manual, a screwdriver, and possibly a phone or computer for app-based setups. Ensure the power is off during any wiring work to prevent shocks or short circuits. Verify your HVAC system type and confirm the thermostat supports scheduling features you intend to use (eco mode, vacation mode, adaptive scheduling). If you have a heat pump or multiple zones, know which settings affect each zone. This prep minimizes surprises during programming and protects equipment. In this area, a careful read of model-specific notes will pay off later.
Choosing the right programming method: fixed schedules vs adaptive learning
Most households choose between fixed weekly schedules and adaptive models that learn usage patterns. Fixed schedules provide predictable comfort—set wake, leave, return, and sleep temperatures for each day. Adaptive/learning thermostats monitor your habits and adjust automatically within comfortable bounds, potentially saving energy with less manual input. Your choice should reflect your lifestyle, occupancy patterns, and whether you want to tweak every change or rely on the thermostat’s intelligence. If you’re new, start with a simple fixed schedule and gradually explore adaptive features as you gain confidence.
Step 1: Access the programming menu on your thermostat
The exact buttons and menu names vary by model, but you’ll usually find a Programming, Schedule, or Comfort tab. Use the touchscreen or physical controls to navigate there. If you’re using a smart thermostat, you may access scheduling via the mobile app. Ensure your device has the latest firmware and the manual handy, since naming conventions differ across brands. Once you reach the programming screen, confirm you’re in the correct mode (heat, cool, auto) before making changes. This prevents misaligned schedules that can cause unwanted heating or cooling.
Step 2: Set date, time, and time zone
Accurate timekeeping ensures your schedule triggers at the right moments. Set the current date, time, and time zone as prompted. Some thermostats support automatic time synchronization via Wi‑Fi, which eliminates manual updates during daylight saving changes. If you can, enable clock syncing through the cloud or app; otherwise, enter the time manually and confirm it matches your local time. Even a small error can cascade into a week of misaligned heating or cooling patterns.
Step 3: Create a weekly schedule (workdays vs weekends)
Begin by establishing a consistent weekday pattern: wake, leave, return, and sleep temperatures for Monday through Friday. Then adapt a separate but aligned schedule for Saturdays and Sundays if your routine differs. Most thermostats let you copy a weekday template to weekends and adjust by block (morning, daytime, evening). Keep initial ranges conservative to avoid large swings, and plan for gradual changes rather than abrupt shifts. A clear, titled template makes future edits much easier.
Step 4: Program heating and cooling setbacks and hold modes
Set a heating setback for away periods and a cooling setback for warmer days to reduce energy use. Use the hold or temporary hold feature if you want to maintain a new temperature for a specific period. For long absences, a hold helps prevent unnecessary cycling. Note that some units require you to disable hold before re-entering a new schedule, so read the manual for model-specific quirks. Document how you use holds to keep future adjustments logical and traceable.
Step 5: Adjust for occupancy and weather changes
If your home uses occupancy sensors or geofencing, enable them to adjust schedules as people come and go. Prepare for sudden weather shifts by preemptively shifting setbacks or adjusting the schedule via the app. For multi-zone homes with several thermostats, verify all devices are synchronized. Weather-driven adjustments can save energy, but set reasonable limits to avoid discomfort during cold snaps or heat waves. Track how occupancy affects temperature needs to fine-tune future programming.
Step 6: Test, refine, and save your settings
Run a thorough test across a full day. Verify each period’s setpoint changes occur at the expected times and that the home feels comfortable. If you notice gaps in comfort, tweak setback numbers in small increments and re-test. When you’re satisfied with the results, save the profile and consider exporting or printing a copy of the schedule for future reference. Regular review helps keep energy savings on track and makes it easier to revert if a change doesn’t work.
Troubleshooting common programming issues
If a schedule won’t save, confirm you’re in the correct mode and not in a non-programmable state. A blank or unresponsive screen may indicate a low battery, a locked display, or a software glitch. Check for firmware updates and re-connect to Wi‑Fi if needed. Reset only as a last resort, and ensure the reset does not wipe your entire home profile. If you have a multi-stage system or heat pump, confirm the schedule applies to the right zone or stage. For smart thermostats, ensure the mobile app is synchronized with the thermostat.
Maintenance tips and model-specific notes
Keep firmware up to date and replace batteries if the unit uses battery backup. Document model-specific quirks, such as how to enter programming mode, how to create holiday exceptions, or how to leverage energy-saving features unique to your brand. If you own a learning thermostat, allow the initial setup period to complete before relying heavily on automation. Thermostat Care recommends maintaining a log of changes to track what works best over time. This practice helps you build confidence with ongoing tweaks.
Thermostat Care's approach: validation and next steps
To ensure you’ve truly optimized comfort and savings, validate results over two weeks. Compare electricity usage with the previous period and note any days that felt uncomfortable. If readings seem off or you notice unusual cycling, revisit the schedule and adjust in small increments. The Thermostat Care Team recommends documenting your settings and keeping a feedback journal. Use energy reports in the app to refine further, and don’t hesitate to reach out for model-specific guidance.
Tools & Materials
- Smart thermostat (programmable)(Ensure it supports scheduling and multiple stages.)
- User manual or model-specific guide(Keep handy for menu names and features.)
- Flathead screwdriver(Used for older units with mounting screws.)
- Screwdriver set (assorted)(Optional for wiring terminals.)
- Phone or computer with internet access(Needed for app-based or cloud-enabled setups.)
- Notepad or digital notes(For recording your final schedule.)
- Batteries (if device uses them)(Replace before programming.)
Steps
Estimated time: 60-90 minutes
- 1
Access the programming menu
Open the thermostat and locate the Programming, Schedule, or Comfort tab. Use touch or buttons to enter the scheduler. If using a smart thermostat, the mobile app may present the same options. Confirm you’re in the correct mode (heat/cool/auto) before changing values to avoid unintended temperature changes.
Tip: If using a touchscreen, tap Help or the question mark for model-specific guidance. - 2
Set date, time, and time zone
Enter the current date and time, then select your time zone. Some devices auto-set via Wi‑Fi; if not, set manually and verify daylight saving changes. Automatic time sync reduces drift over time.
Tip: Use automatic time sync if your network is reliable to prevent schedule drift. - 3
Create a weekday pattern
Draft wake/leave/return/sleep setpoints for Monday through Friday. Start with modest temperature differences (e.g., 2–4 degrees) to avoid sharp swings. Copy the weekday pattern to weekends if your routine is similar, then tailor as needed.
Tip: Name blocks clearly (Weekdays, Weekends) to simplify edits later. - 4
Configure heating and cooling setbacks
Set back temperatures for away periods. Use the hold feature if you want a temporary change lasting a day or more. Keep holds reasonable to prevent energy waste.
Tip: After a hold, re-activate the schedule to regain automatic control. - 5
Program occupancy and weather adjustments
Enable occupancy sensors or geofencing if available. Plan for weather shifts by adjusting setbacks via the app or manual entry. Synchronize all zones if you have multiple thermostats.
Tip: Document how occupancy changes affect your energy use for future tweaks. - 6
Test the schedule
Walk through each block and confirm the thermostat changes at the expected times. Note any discomfort and adjust setbacks slightly. Run a full day’s test and save when satisfied.
Tip: Keep a test log to track which adjustments improved comfort or saved energy. - 7
Save and back up your profile
Save the final schedule and export or print it for future reference. If your thermostat offers cloud backup, enable it to prevent loss from a device failure.
Tip: Store a copy in a safe place and update it after any major lifestyle changes. - 8
Troubleshoot non-saving issues
If a schedule won’t save, verify mode, power status, and account connections. Restart the device if needed, and check for firmware updates. Avoid frequent resets as they can erase saved profiles.
Tip: Only reset as a last resort when troubleshooting persistent issues. - 9
Handle multi-zone or heat-pump setups
Ensure schedules apply to the right zone and stage of your system. Some configurations require separate profiles per zone. Validate that each zone responds correctly to its schedule.
Tip: Label zones clearly (Zone A, Zone B) to prevent confusion during edits. - 10
Account for seasonal changes
Revisit your schedule at the start of each season and after any major weather events. Minor tweaks often yield the best balance of comfort and savings.
Tip: Set a quarterly reminder to review and adjust. - 11
Document quirks for future reference
Keep notes on menu names, feature limitations, and any model-specific quirks. This makes future edits faster and reduces misconfigurations.
Tip: Maintain a small cheat sheet beside the thermostat for quick reference. - 12
Review results and plan next steps
After a couple of weeks, compare energy data and comfort reports. Plan incremental improvements and re-run tests to refine the schedule further.
Tip: Treat this as an ongoing optimization process rather than a one-time setup.
Questions & Answers
What is the best way to start programming a thermostat?
Begin with a simple weekday schedule (wake/leave/return/sleep) and test for comfort. Gradually add weekend adjustments as you gain confidence.
Start with a simple weekday routine and test for comfort, then add weekend changes.
Can I program a thermostat without Wi-Fi?
You can program most thermostats without Wi‑Fi using the device's local controls. Some smart features may require internet access.
Yes, most programs can be set locally, but smart features might need Wi‑Fi.
How do adaptive learning thermostats differ from fixed schedules?
Adaptive models learn your patterns and adjust automatically, while fixed schedules require manual input. Both can save energy when used thoughtfully.
Adaptive thermostats learn your routine and adjust automatically, whereas fixed schedules require manual input.
What should I do if the display is not showing programming options?
Check power supply, battery status, and ensure you’re in the correct mode. Consult the manual for troubleshooting steps specific to your model.
Check power, batteries, and mode; refer to your manual for model-specific steps.
How often should I update my thermostat schedules seasonally?
Review and adjust your schedule at least quarterly, and after daylight saving changes or when occupancy patterns shift.
Update your schedule quarterly or after changes in your routine.
Is programming a thermostat energy-saving or comfort-first?
Programming aims to balance energy savings with comfort. Start with modest setbacks and adjust as you learn your home's response.
It’s about saving energy while keeping comfort, start small and adjust.
Watch Video
What to Remember
- Plan your weekly schedule before programming.
- Test and refine for comfort and savings.
- Use Hold to lock in changes during absences.
- Document model quirks for future changes.