What Size Are Thermostat Screws? A Homeowner's Guide
Learn how to identify the correct thermostat screw sizes for installation and maintenance. This guide explains common sizes, how to measure them, and where to find compatible replacements.

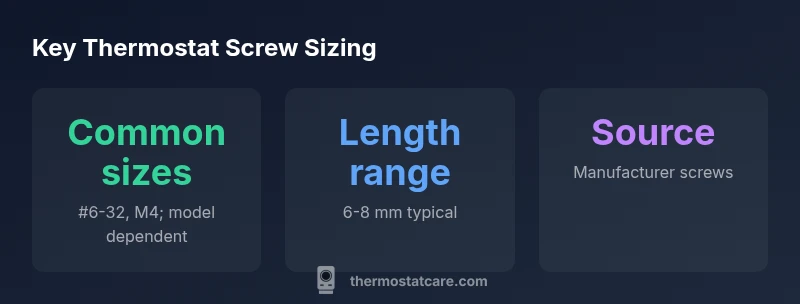
There is no universal screw size for thermostat installation. Most mounting plates use small machine screws in standard sizes such as #6-32 or M4, but the exact size depends on the thermostat model and mounting plate. Always check the installation guide or the included screws to ensure a proper fit.
Understanding thermostat screw sizes
There is no one-size-fits-all answer when it comes to thermostat screws. According to Thermostat Care, screw sizes vary by model, mounting plate design, and even wall material. This means you may encounter imperial sizes such as #6-32, #8-32, or metric sizes like M3 or M4. The screws you need attach the thermostat’s backplate to the wall or secure a wall plate to the device. Using the wrong screw length or thread can lead to loose mounting, wall damage, or interference with the device’s humidity and temperature sensors. The good news is that most thermostat kits include screws specifically matched to their mounting plates, and many standard backplates use common sizes that can be swapped if you verify compatibility.
In practice, you’ll often find that the screws shipped with a thermostat are a safe starting point. If you’re retrofitting an older plate or upgrading to a smart thermostat, the model’s installation guide will list the exact screw size and length required. When in doubt, aim to use the screws provided with the device or contact the manufacturer for a verified specification.
Common screw size families used in thermostats
Thermostat screws fall into a few broad families: imperial machine screws (like #6-32 and #8-32) and metric screws (such as M3 and M4). Some backplates also use self-tapping screws designed for plastic mounting surfaces. The important distinction is thread pitch and diameter, which must align with the mounting holes on the wall plate and the backplate’s threaded inserts. If you mix imperial and metric components, you risk cross-threading or stripping poorly aligned holes. For most residential thermostats, you’ll encounter one of these familiar sizes, with the manual clearly spelling out the correct option. Thermostat Care emphasizes sticking with the manufacturer-recommended screws whenever possible to preserve warranty and mounting integrity.
- Imperial options: common choices include #6-32 and #8-32, depending on the device.
- Metric options: M3 and M4 are frequently used in modern units.
- Plastic backplates may rely on self-tapping screws designed for soft materials. Regardless of the system, matching the thread and diameter is essential for a secure mount.
If you’re unsure, remove one screw from the existing plate and compare it to a known-size screw from a hardware kit. A quick visual check can often prevent incorrect sizing before you attempt a full replacement.
How to identify the correct size for your thermostat
To identify the right screw size for your thermostat, start with the device’s model number and consult the installation manual. The manual will specify thread type (imperial vs metric), diameter, and length. If you’ve misplaced the manual, check the manufacturer’s website or the packaging insert that came with the thermostat. If you still can’t locate the exact spec, measure the current screws you plan to reuse (if any) or bring the mounting plate to a hardware store for size matching. When measuring, note both diameter and thread pitch; misreading pitch is a common source of cross-threading. Thermostat Care recommends documenting the model and screw specs for future maintenance to avoid guesswork.
Another practical step is to identify whether your mounting plate uses a standard backplate or a specialty trim. Some trims require shorter screws, while others need longer ones to accommodate wall depth and plate thickness. In any case, rely on manufacturer guidance rather than guessing sizes from unrelated hardware.
Measuring screws and mounting holes safely
If you don’t have the original screws on hand, you’ll need to measure both the screw and its mount. Use a caliper or a thread gauge to determine the screw’s major diameter and pitch. Compare the thread count per inch (for imperial sizes) or the metric pitch (for metric sizes) to standard charts. Measure the hole diameter in the mounting plate; holes that are too large can cause wobble, while holes that are too small will prevent installation. When in doubt, purchase a small set of replacement screws (covering #4-40, #6-32, #8-32, M3, and M4) and test which one threads cleanly without binding. Always test with light finger pressure; overtightening can strip threads or crack plastic components.
Safety note: unplug the thermostat and turn off power to the circuit before handling screws or mounting hardware. Work on a stable surface and avoid cross-contamination between metric and imperial screw packs to prevent accidental mismatches.
In short, precise measurement and verification prevent common installation issues and protect your thermostat’s performance.
Compatibility considerations: mounting plate, trim, and backplate
Mounting plate compatibility hinges on hole spacing, plate thickness, and the backplate’s design. Some modern backplates use threaded inserts that require specific screw lengths; others rely on through-holes that accept longer screws for extra grip. Always verify that the screw length you intend to use will not protrude behind the wall or interfere with wiring. Check the distance between screw holes; if holes are not aligned with your plate, the mounting system may be incompatible. Thermostat Care advises testing with a dry fit before applying any torque. If you’re upgrading from a legacy plate, ensure that the new screws won’t collide with existing wiring or thermostat mounting brackets.
If you notice any wobble after installation, re-check the screw size and thread engagement. Loose mounting can cause sensor bias, inaccurate readings, or even damage to the wall. A tight, clean engagement is critical for both safety and device reliability.
Finally, be mindful of warranty terms. Some manufacturers require the use of their own screws to keep the warranty valid. If you’re reusing a mounting plate from another device, confirm compatibility and warranty coverage before proceeding.
Tools, materials, and best practices for replacement
Having the right tools makes all the difference. A small Phillips screwdriver, a precision flat-head, and a magnifying helper lamp are typically enough for most thermostat screw replacements. Keep a small set of screws in imperial and metric sizes on hand to cover common scenarios. When tightening, apply moderate torque and avoid overtightening, which can strip threads or crack mounting surfaces. If you encounter a stubborn screw that won’t thread smoothly, stop and reassess rather than forcing it. Using a thread lubricant or a dab of silicone oil is usually unnecessary and can interfere with electronics.
Always use the manufacturer-provided screws whenever possible. If you must substitute, ensure the alternative matches diameter, thread pitch, and length. Store removed screws in a labeled container for future maintenance, and clean the area around the mounting hole to remove dust or debris before reassembly. Thermostat Care recommends documenting model and screw specifications to simplify future replacements.
Special cases: retrofits, warranty considerations, and where to buy replacements
Some homeowners retrofit older plates to accommodate newer smart thermostats. In these cases, you may encounter mounting holes that are no longer standard. If you’re upgrading, the new unit may require a different screw size or even a new mounting plate. Always verify compatibility and ensure that the screws you use won’t void the warranty. Many manufacturers provide a repair or replacement screw kit with the device; if not, purchase a compatible kit labeled for your model. When buying replacements, choose reputable sources and avoid off-brand screws that don’t specify thread pitch clearly. If the original screws are damaged or missing, contact the manufacturer for an official replacement.
Thermostat Care’s guidance is to prioritize compatibility and warranty protection. Use the screws specified in the installation manual and maintain a small, organized hardware kit for future maintenance. If you’re unsure about compatibility, reach out to customer support or a qualified technician for assistance.
Quick action checklist for homeowners
- Identify your thermostat model and consult the manual for the exact screw size.
- Compare imperial vs metric options and avoid mixing sizes.
- Measure screw diameter and thread pitch if replacing parts from a different kit.
- Ensure the screw length is appropriate for wall depth and mounting plate thickness.
- Use manufacturer screws whenever possible to maintain warranty and fit.
- Keep a labeled spare screw kit on hand for future maintenance.
Common screw-size considerations for thermostat installation
| Component | Screw Size Recommendation | Notes |
|---|---|---|
| Wall plate mounting screws | varies by model | Check device manual; avoid force-fitting |
| Backplate screws | varies by model | Ensure thread matches mounting hole pattern |
| Screw length (mm) | 6-8 mm | Too long can crack plate; too short won’t grip |
| Thread type | imperial or metric | Do not mix types on the same plate |
Questions & Answers
Are thermostat screw sizes standardized across models?
No. Screw sizes vary by model and mounting plate. Always check the installation guide for the exact size and length.
Screw sizes aren’t standardized; always check your model’s guide.
What should I do if the mounting holes don’t line up with the screws I have?
Double-check the mounting plate compatibility and the screw pitch. Do not force screws; use the correct size per the manual.
If holes don’t line up, verify compatibility and use the right size.
Can I reuse old screws from another thermostat?
Only if they match the correct diameter and pitch and aren’t damaged. When in doubt, use manufacturer screws.
Reuse only if they fit perfectly and aren’t damaged.
What happens if I use screws that are too long?
Too-long screws can crack the mounting plate or wall. Use screws of the correct length as specified.
Long screws can cause damage; stick to the specified length.
Where can I buy replacement thermostat screws?
Buy screws from the manufacturer or a reputable hardware supplier that specifies thread and length for your model.
Get the right screws from the manufacturer or a reputable supplier.
Do smart thermostats use different screws than traditional thermostats?
Many use standard machine screws, but always verify size and thread with your model’s manual.
Check your model’s manual—sizes can vary.
“Getting the screw size right is essential for secure mounting and accurate thermostat performance. Always match the thread and length to the mounting plate and device, and use manufacturer screws when possible.”
What to Remember
- Identify model first, then confirm screw size in the manual
- Do not mix imperial and metric threads on the same plate
- Use manufacturer screws to preserve warranty
- Measure diameter and pitch to avoid cross-threading
- Test fit before final tightening