Setting a Heat Pump Thermostat: Step-by-Step Guide
Learn how to set a heat pump thermostat for energy-efficient climate control. This Thermostat Care guide covers modes, wiring, and best practices for safe, DIY installation.

Setting a heat pump thermostat involves selecting the correct mode (heat, cool, or auto), configuring fan and setback schedules, and ensuring proper humidity and energy-saving settings. You’ll need a compatible thermostat, access to the HVAC box, a screwdriver, and the user manual. This guide will walk you through a safe, step-by-step setup.
Understanding heat pump thermostat basics
Setting a heat pump thermostat is central to energy efficiency and home comfort. When you optimize the settings, your system uses outdoor air more efficiently and reduces reliance on auxiliary heaters during shoulder seasons. According to Thermostat Care, starting with a compatible thermostat and enabling the correct mode is the foundation of a reliable setup. A heat pump can operate in several modes (heat, cool, auto, and emergency heat), each with implications for comfort and cost. The goal is to balance indoor temperature with outdoor conditions while minimizing energy waste. In practice, this means using auto or adaptive modes, staggering fan operation, and configuring sensible setbacks that respect your house’s thermal inertia. You’ll also want to ensure your thermostat is communicating with the outdoor condensing unit and the indoor air handler, which often requires pairing a C-wire for stable power. This section explains why those decisions matter and how to translate them into practical settings that work for most homes. The Thermostat Care team emphasizes that small adjustments to scheduling, hold times, and humidity control can yield noticeable comfort improvements without a costly remodeling project.
Modes, features, and how they affect comfort and cost
Heat pumps rely on intelligent controls to drive two-way heat exchange. The most common setting is Auto, which toggles between heating and cooling to maintain a target temperature. In cold weather, you may see the system engage auxiliary or emergency heat; this helps maintain warmth but can raise energy use if left unchecked. With Cool mode, the system reduces temperature on hot days, while Eco or Energy Saver profiles limit runtime and optimize compressor efficiency. The O/B valve (changeover valve) orientation matters: some thermostats energize O in cooling, others in heating. For most homes with a standard heat pump, program an energy-saving schedule that matches your occupancy patterns, and enable a setback strategy that lowers temperature when nobody is home. A good thermostat will also show outdoor temperature or dew point in some models, helping you anticipate defrost cycles. In all cases, use a C-wire for reliable power and avoid battery-only operation. The Thermostat Care analysis shows that properly configured auto, fan, and setback settings can reduce runtimes and preserve compressor life, especially when paired with a well-sealed home.
Safety, compatibility, and preliminary checks
Before touching any wires, switch off power at the furnace or air handler to avoid shock or equipment damage. Verify that your heat pump thermostat is compatible with your system’s controls, including the outdoor unit and reversing valve. If your existing thermostat lacks a C-wire, plan to run one from the air handler or install a compatible adapter kit; running a thermostat on batteries can cause voltage fluctuations and short battery life. Gather the essential tools: a screwdriver set (Phillips #2 and flat-head), a non-contact voltage tester, wire labels, and the user manual for your model. Identify the wires currently connected to the old thermostat—common colors like red (R), white (W or Aux), yellow (Y), green (G), blue or brown (C)—and label them for reference. Confirm the 24-volt control signal is present with a voltmeter or tester if you are unsure. This step reduces the risk of miswiring and ensures a smooth handoff to the new thermostat. According to Thermostat Care, taking time on compatibility and labeling saves time during installation and prevents damage during power restoration.
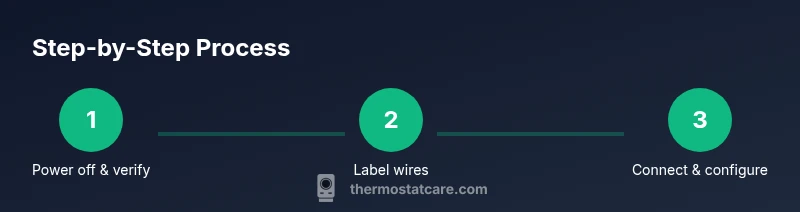
Step-by-step setup overview (high level)
This overview lays out the main actions you’ll take in the detailed STEP-BY-STEP section. First, power down and verify compatibility. Then remove the old thermostat and inspect the wiring in the wall. Next, mount the new base plate, thread wires through, and connect them to the correct terminals (R, C, Y, G, O/B, Aux). Finally, set up your initial program: season-based presets, a daytime schedule, and a night setback. After installation, test all functions: heating and cooling, fan operation, hold and schedule features, and the system’s response to temperature changes. If you encounter a mismatch (for example, an unresponsive O/B signal), re-check the wiring and verify the terminal labeling against the thermostat’s wiring diagram. Thermostat Care suggests keeping the old thermostat accessible for reference while testing the new unit. This overview should be used as a map while you perform the detailed steps in the next section.
Troubleshooting and post-install checks
If the system doesn’t respond after powering on, recheck connections and confirm you landed wires on the correct terminals. A lack of C-wire power can cause the thermostat to reboot or dim the display. If HVAC equipment runs continuously, verify the setpoint and mode parameters; a stuck hold or out-of-range temperature may keep the system active. Ensure the thermostat is paired with the outdoor unit if you have a two-stage system; some models require a pairing step or app authorization. For defrost cycles, ensure the thermostat’s firmware is up to date and that the outdoor sensor is not obscured by poor weather conditions. If the heat pump seems to run excessively, consider a one-hour setback and revisit the schedule to avoid constant Aux heat use. The Thermostat Care team notes that regular firmware updates and a well-sealed home reduce common issues and improve efficiency over the life of the system.
Maintenance, energy savings, and next steps
After you finish the setup, schedule a monthly quick check: confirm the thermostat shows the correct current temperature, stage status, and fan operation. Use the data provided by the thermostat to monitor energy use; many models offer energy history graphs that highlight days with high compressor runs. Calibrate humidity controls if your model supports it; maintaining comfortable humidity levels can reduce the need for prolonged heating or cooling. Keep your thermostat firmware up to date, and periodically re-check wire terminations at the wall plate to prevent loose connections. For best results, pair the thermostat with a well-sealed home and a properly sized heat pump. In closing, the Thermostat Care team recommends revisiting your settings seasonally to maintain comfort and efficiency as weather patterns shift and home insulation changes.
Tools & Materials
- Safety gear (gloves and eye protection)(Wear when handling wiring or opening panels)
- Screwdriver set (Phillips #2 and flat-head)(Needed for mounting plate and terminal screws)
- Non-contact voltage tester(Check for live circuits before touching wires)
- Wire labels(Mark wires by function (R, C, W, Y, G, O/B))
- Thermostat with heat pump compatibility(Ensure model supports O/B, Aux, and C-wire)
- User manual for thermostat model(Reference wiring diagram and settings)
- Optional: multimeter(For precise voltage checks)
Steps
Estimated time: 60-90 minutes
- 1
Power down and verify compatibility
Turn off power at the furnace to cut power to the thermostat and the outdoor unit. Confirm compatibility with your heat pump, especially the O/B valve and any auxiliary heat wiring. This prevents shocks and miswiring during installation.
Tip: Double-check that the power is off using the tester before touching any wires. - 2
Remove old thermostat and inspect wiring
Carefully remove the old device from the wall plate. Take a photo or label each wire; note which terminal each wire was connected to (R, C, Y, G, W, O/B).
Tip: Label wires in advance to avoid mix-ups during the new connection. - 3
Mount base and prepare wiring
Mount the new mounting plate on the wall. Thread the wires through the back of the plate and strip about 1/4 inch of insulation for clean contact with terminals.
Tip: Use a level to ensure the plate sits flat and straight. - 4
Connect wires to the new thermostat
Connect R to R, C to C, Y to Y, G to G, W/Aux to W or Aux, and O/B to the O/B terminal as appropriate for your model. Re-check wire colors against labels.
Tip: If a wire doesn't reach the terminal, do not force it; use the correct terminal nearest to the wire. - 5
Configure basic settings and connectivity
Power the thermostat and run through the initial setup: date/time, system type, and Wi‑Fi or app pairing if it’s a smart model. Enable Auto mode and set a reasonable setback schedule.
Tip: Enable C-wire power if the model supports it to avoid battery drain. - 6
Test, verify, and fine-tune
Run a quick test for heating, cooling, fan operation, and warming/cooling responses. Adjust schedule and setpoints based on observed comfort, then save the profile.
Tip: Document any deviations and revisit after a week to fine-tune.
Questions & Answers
Do I need a C-wire for a heat pump thermostat?
Most modern heat pump thermostats require a C-wire for stable power. If you don’t have one, consider a power extender kit or a thermostat that supports battery power with caution.
A C-wire is usually needed for stable power; if you don’t have one, consider a power extender kit or a compatible thermostat.
Can I install a heat pump thermostat myself?
Yes, many homeowners can install heat pump thermostats themselves by following the manual and safety steps. If you’re unsure about wiring or wiring colors, hire a pro.
You can install many models yourself if you follow safety steps and the manual.
What is the O/B function on a heat pump thermostat?
O/B controls the changeover valve; set it according to your system’s wiring instructions. Incorrect wiring can cause heating and cooling to behave oddly.
O/B is the changeover valve and should be wired per the model’s directions.
Why does AUX heat turn on so often?
Aux heat activates when outdoor temperatures are low or when the system needs extra warmth. If it runs too often, adjust your setback temperatures or occupancy schedules.
Aux heat kicks in when it’s cold or when extra warmth is needed. Adjust schedules to reduce how often it runs.
How can I maximize energy savings with a heat pump thermostat?
Use Auto mode, set moderate setbacks, maintain humidity control, and keep the home well-sealed to reduce heat loss or gain.
Auto mode, sensible setbacks, and good sealing save energy.
My thermostat won’t power on. What should I do?
Check the C-wire supply and power at the breaker. Ensure all wire connections are secure; if the problem persists, seek professional help.
First check the power and C-wire; if it doesn’t fix, call a pro.
Watch Video
What to Remember
- Choose Auto mode and set consistent setbacks for efficiency
- Ensure C-wire connection for reliable power
- Label wires and reference wiring diagrams during install
- Test all functions and refine the schedule after a few days
- Keep firmware up to date for optimal performance