Heat Tape and Thermostat: Install, Test, Maintain
A practical guide from Thermostat Care on pairing heat tape with a thermostat to protect pipes. Learn selection, installation steps, testing, and maintenance for safe, reliable cold-weather protection.

This guide shows homeowners how to pair heat tape with a thermostat to protect pipes in exposed locations. You’ll learn how to select compatible heat tape and thermostats, size the system, install wiring safely, set up controls, test for proper operation, and maintain reliable performance throughout winter. This entry also covers safety considerations and common mistakes to avoid.
Why heat tape and a thermostat work together
Heat tape and a properly configured thermostat form a simple, reliable defense against frozen pipes. When a knot of cold air envelopes exposed plumbing in basements, attics, crawl spaces, or outdoor wall lines, heat tape provides gentle warming along the length of the pipe. A thermostat completes the loop by turning the heat tape on and off based on temperature in the area or along the pipe itself. According to Thermostat Care, pairing a sensor-driven heat tape with an appropriately rated thermostat reduces the risk of burst pipes and water damage, especially in regions with sudden temperature drops. The key is to match the heat tape’s wattage and the thermostat’s switching method to the installation environment. For most homes, a self-regulating heat tape with a compatible thermostat is sufficient; in more demanding climates, a higher wattage rating or a thermostat with multiple setpoints may be warranted. Understand that heat tape is not a substitute for insulation or proper drainage; it should be part of a broader winterization plan.
Choosing heat tape types and thermostat compatibility
Heat tape comes in a few common varieties, each with its own control options. Self-regulating heat tape adjusts its output in response to ambient temperature, which helps prevent overheating and reduces energy waste. Mineral-insulated tape provides consistent heat but requires careful installation and more robust protection against moisture. Thermostats for heat tape fall into two broad categories: line-voltage units that switch the full household current directly, and low-voltage units that actuate a relay to control the heat tape. When pairing tape and thermostat, confirm compatibility: the thermostat must be rated for the tape’s wattage and switching type. In damp or outdoor settings, prefer tape and a thermostat designed for outdoor use and weatherproof connections. As a rule of thumb, always prioritize a system with labeled outdoor or damp location ratings if the pipes run in exposed areas.
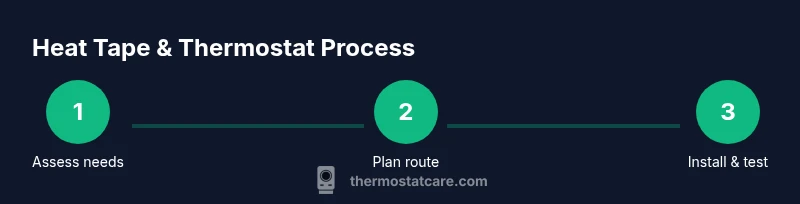
Planning: length, wattage, and placement
Proper planning saves time and reduces risk. Measure the exposed pipe length and plan a tape route that covers the majority of the pipe without overlapping excessively. Select heat tape with a wattage rating that suits the climate and exposure; under-sizing is a common mistake that leads to inadequate protection. Plan for a safe, tidy installation by leaving slack at corners, avoiding sharp bends, and securing the tape with manufacturer-approved clips or adhesive pads. Don’t forget to account for connections to the thermostat and power source; a clean routing minimizes moisture exposure and reduces tripping hazards for maintenance.
Safety first: electrical considerations and codes
Electrical work is the main risk area with heat tape installations. If you are wiring line-voltage heat tape, you must follow local electrical codes and consider professional assistance for the power connection and the thermostat relay. Always cut power at the main breaker before handling any wiring. Use a Ground Fault Circuit Interrupter (GFCI) outlet if the tape route is near water or damp surfaces. Keep all wiring dry and protected, and never run exposed conductors through insulation without a weatherproof enclosure. Check for any building codes specific to exterior installations in your area and ensure you have adequate clearance from flammable materials.
Installation overview: what you’ll do
This overview outlines the typical flow of a heat tape and thermostat installation. Prepare your materials and tools, lay out the tape along the pipe following manufacturer guidelines, attach the thermostat sensor or junction, connect the power supply and the thermostat, and secure all components in weatherproof enclosures where needed. You will then bond the heat tape and sensor, perform a basic power-on test, and verify that the thermostat cycles the tape on and off correctly. While the steps are straightforward, never bypass safety steps or force materials into tight spots. Follow the product instructions and local codes closely.
Wiring and mounting basics
Wiring needs depend on whether you’re using line-voltage tape or a low-voltage setup with a relay. For line-voltage systems, you’ll connect the tape directly to the thermostat and to the power source; for low-voltage setups, the thermostat controls a relay that switches the heat tape’s circuit. Mount the tape along the pipe with proper spacing and avoid overlapping sections that can overheat. Install any required fuses or circuit protection per the thermostat and tape instructions. When mounting near outdoor areas, seal any entry points to prevent moisture intrusion and reduce corrosion risks.
Testing, dialing in and safe operation
After installation, test the system carefully. Power up and observe whether the tape begins warming once temperatures reach the thermostat’s setpoint. Listen for unusual buzzing or overheating indicators and check for any loose connections. Adjust the thermostat’s setpoint to balance energy use with protection needs. If the tape doesn’t activate or cycles erratically, recheck sensor placement and verify connections. Document the test results and record the installation details for future maintenance.
Maintenance and common issues
Maintenance involves periodic visual checks, testing, and prompt replacement of damaged tape. Inspect the adhesive backing, weatherproof sealants, and sensor leads for wear. If you notice degraded insulation or frayed wires, replace the affected section rather than attempting quick, temporary fixes. Temperature drift—where the tape runs too cool or too hot—usually points to incorrect placement, damaged tape, or a faulty thermostat. Regular self-checks help prevent unexpected freezes.
Final safety reminders and next steps
Maintain clear access to the heat tape and thermostat components. Keep children and pets away from exposed wiring and ensure that outdoor installations have proper weatherproofing. For complex layouts, or if your home uses an older electrical panel, consult a licensed electrician before proceeding. The goal is reliable protection with minimal risk, achieved through careful planning, correct product selection, and rigorous testing.
Tools & Materials
- Self-regulating heat tape(Choose length to cover exposed pipe; outdoor-rated if installation is outside or in damp areas.)
- Thermostat (line-voltage or low-voltage with relay)(Match thermostat type to heat tape; verify wattage rating and switching method.)
- GFCI outlet or weatherproof power source(Use outdoor-rated or weatherproof outlet/enclosure where needed.)
- Weatherproof enclosure or junction box(Protect connections in damp locations.)
- Adhesive clips or mounting tape(Secure heat tape to pipe with manufacturer-approved fasteners.)
- Electrical tape and wire nuts(Seal wire splices and insulate connections.)
- Utility knife/scissors(Trim tape edges cleanly; avoid damaging insulation.)
- Gloves and safety glasses(Personal protective equipment for handling wiring and sharp edges.)
Steps
Estimated time: 2-3 hours
- 1
Assess risk and plan system
Survey the exposed piping area, climate exposure, and accessibility. Decide whether you will use line-voltage or low-voltage control based on existing wiring and codes. Confirm the heat tape length to cover the pipe portion most at risk of freezing, and select a compatible thermostat.
Tip: If in doubt about voltage type, opt for low-voltage with relay for safer DIY handling. - 2
Measure pipe length and route tape
Measure the pipe segment that needs protection and map a continuous route for the tape. Plan to avoid tight bends and overlaps, which can cause damage or overheating. Note any valves or joints that require special consideration.
Tip: Document the layout before cutting to prevent over- or under-coverage. - 3
Prepare mounting surface and lay out hardware
Clean the pipe surface and lay out tape along the intended path. Gather all mounting clips, weatherproof enclosures, and connectors in one place to streamline installation.
Tip: Have the thermostat location in mind for sensor mounting and wiring routes. - 4
Apply heat tape and secure
Adhere the heat tape to the pipe according to the manufacturer’s instructions, ensuring full contact with the surface. Use clips or ties at regular intervals and avoid compressing the tape. Leave endpoints for connections as instructed.
Tip: Do not stretch tape; let it lay flat to avoid gaps. - 5
Install thermostat sensor or control module
Mount the thermostat sensor near the pipe or along the tape route per instructions. Ensure the sensor is not blocked by insulation that could skew readings. Route sensor wires to the control module with minimal exposure to moisture.
Tip: Keep sensor away from direct heat sources that could misread ambient temperature. - 6
Connect power and thermostat wiring
For line-voltage systems, connect the tape to the thermostat and power supply following code. For low-voltage systems, wire the thermostat to its relay and route the relay to the tape circuit. Turn off power at the main breaker before starting connections.
Tip: If you’re uncomfortable with electrical work, hire a licensed electrician. - 7
Test operation and adjust settings
Power on the system and confirm that the tape heats when the thermostat calls for heat. Check for uniform warmth along the taped area and listen for abnormal sounds. Adjust the thermostat setpoint if needed and document settings.
Tip: Do a cold-start test in winter conditions for accuracy. - 8
Document, label, and schedule maintenance
Label the circuit, note the installed components, and set reminders for periodic checks. Schedule an annual review before winter to re-verify wiring and tape integrity.
Tip: Keep a simple maintenance log with dates and results.
Questions & Answers
Is professional installation required for heat tape and thermostat?
Electrical work can be hazardous. If you are wiring line-voltage tape or handling large heat loads, hire a licensed electrician. For simpler, low-voltage setups with a relay, careful adherence to manufacturer instructions and local codes may allow a DIY approach.
If you’re not confident with electrical work, hire a pro. For standard low-voltage setups, follow the guide closely.
Can heat tape be used in bathrooms or outdoor locations?
Yes, but only with products rated for outdoor or damp locations. Ensure weatherproof connections and enclosures, and keep electrical components dry.
Use outdoor-rated tape and weatherproof wiring for bathrooms or outdoors.
Will heat tape damage pipes or insulation?
When installed correctly, heat tape helps protect pipes without causing damage. Avoid overlapping tape, protect insulation, and ensure the tape does not contact flammable materials.
Install it as directed and keep it away from insulation that could trap heat.
What maintenance is needed for heat tape and thermostat?
Regularly inspect for wear, test the thermostat, and replace damaged tape promptly. Keep connections dry and replace weatherproofing as needed.
Check it seasonally and after harsh weather; quick checks save bigger issues later.
Can I use a smart thermostat with heat tape?
Yes, if the thermostat supports the heat tape’s switching type (line-voltage or relay-controlled). Confirm compatibility and safety features before pairing.
Make sure your smart thermostat is compatible with how the tape is switched.
How long will heat tape last?
Durability depends on exposure, moisture, and usage. Follow manufacturer guidance, replace damaged sections, and perform regular inspections to extend life.
How long it lasts varies with conditions; maintain it to extend life.
Watch Video
What to Remember
- Plan coverage carefully before buying materials
- Choose compatible heat tape and thermostat types
- Secure all connections and weatherproof enclosures
- Test system thoroughly and monitor performance
- Maintain a documented maintenance schedule