What Thermostat for Heat Mat: A Practical Guide
Learn how to choose and install the right thermostat for heat mats, ensure safe operation, and avoid common mistakes. Thermostat Care guides homeowners through compatibility, wiring, sensor placement, and maintenance for reliable warmth.

You will learn how to choose a thermostat for a heat mat with emphasis on safety, compatibility, and reliable temperature control. The guide covers heat mat basics, identifying the right thermostat type, sensor placement, wiring considerations, and practical setup steps to prevent overheating and ensure even warmth. You'll also find maintenance tips and troubleshooting guidance.
Understanding heat mats and thermostats
Heat mats provide a controlled surface warming solution for floors, terracotta pots, seedbeds, or hydroponic trays. They operate within a specific wattage rating and require a thermostat that can handle the mat’s load while delivering stable, repeatable temperatures. When you pair a heat mat with a thermostat, you gain precise control over warmth, reduce energy waste, and improve safety. According to Thermostat Care, selecting the right thermostat is foundational to a reliable setup. The thermostat should match the mat’s power rating, and you should confirm whether your mat expects a floor sensor (probe) or an ambient sensor. In many residential applications, the goal is to keep the surface just warm enough to support seed germination, root development, or tile comfort, without overheating the surface beneath. This section lays out the core concepts: load rating, sensor type, and safety limits. For homeowners, the simplest starting point is a dedicated thermostat designed for heat mats, with a sensor that can monitor surface temperature and shut off the mat when the limit is reached. Understanding these basics helps prevent overheating, preserve carpet or flooring materials, and prolong the mat’s life.
Choosing the right thermostat is not a one-size-fits-all decision. There are three primary factors to consider: load rating, sensor type, and safety features. A thermostat must be able to safely switch the mat’s wattage without overheating the wiring or the floor. If your mat’s wattage exceeds the thermostat’s rating, the device can overheat, trip breakers, or fail prematurely. Sensor type matters because a floor probe provides direct feedback from the mat surface, while an ambient sensor relies on air temperature nearby. For heat mat users, a floor probe is typically preferred for more accurate surface control. Thermostat Care emphasizes selecting a model with an integrated floor sensor and a rated switching mechanism (relay) designed for continuous operation. In addition, choose a thermostat with clear temperature labeling, a simple user interface, and a built-in safety cutoff or overheat protection. The target temperature for many applications is the ambient room temperature or a slightly warmer surface, but always follow the mat’s manufacturer guidance and the floor type in your space. Modern thermostats also offer features like program schedules and temporary holds, which can help you save energy without sacrificing comfort. When in doubt, consult the mat’s documentation and keep spare fuses or wiring components on hand for quick fixes. Thermostats designed for heating mats are specifically engineered to ensure safe operation in a floor environment, reducing risk and giving you reliable warmth over time.
Before you buy, verify compatibility with your heat mat’s electrical specifications. Most heat mats are designed to operate on standard household circuits (120 V in North America, with variations elsewhere). Check the mat’s wattage and the maximum amperage the thermostat can handle. If your mat requires 10–15 amps and the thermostat is only rated for 8 amps, you’ll need a higher-capacity controller or a dedicated circuit with proper protection. Thermostat Care recommends confirming the mat’s voltage, resistance, and temperature range, especially if you plan to place the mat under flooring or in moisture-prone areas. In addition to load matching, you should assess whether you need a sensor integrated into the thermostat or an external floor probe. The floor-probe option typically yields more accurate temperature control on the mat surface, which is crucial for seed germination, plant propagation, or tile underlayment. Ensure the thermostat you select offers an adjustable high limit and a clear display so you can monitor real-time readings. If you live in a humid area or have a bathroom or kitchen installation, consider a thermostat with splash resistance or IP-rated housings. A quality thermostat will provide a stable, repeatable temperature and reduce long-term wear on the heating element.
Sensor placement and wiring basics are critical for accurate control. The floor probe (sensor) should be positioned between the mat coils and the upper flooring layer, not directly on top of the mat’s heating elements. This placement helps the thermostat read actual surface temperature rather than air temperature nearby. If your mat uses a non-sensor thermostat, you’ll rely on ambient temperature readings; in that case, expect some lag between ambient changes and surface conditions. When wiring, turn off power at the circuit breaker before starting any work, and use a properly rated thermostat designed for heating mats. Route the sensor and power lead away from moisture-prone areas, and secure cables with cable clips to prevent tripping hazards or damage. Thermostat Care notes that good cable management reduces wear and prolongs both the mat and thermostat life. If you’re unsure about wiring, contact a licensed electrician. A correctly wired setup will reduce nuisance tripping, improve response time, and ensure your mat operates within the rated safety margins.
Programmable features and user experience matter for daily use. A good heat mat thermostat offers a straightforward interface, multiple program slots, and a hold function that lets you set a constant temperature when needed. Look for a device with adjustable ramp rates, so the mat can gradually reach the target temperature rather than jumping to full heat, which can stress the wiring and the mat. Programs can be tailored for seasonal changes or specific tasks (seed germination cycles, seed starting trays, or hydroponic growth). For safety, select a model that provides automatic shutoff after a defined period and an alert when the temperature hits a limit. If you plan to integrate the mat with a home automation system, verify compatibility with your preferred platform (for example, support for common smart-home ecosystems). Always test new programs with the mat on and monitor temperature with an infrared thermometer or a surface thermometer to confirm the readings match the thermostat’s display. The more precise your control, the more consistent your heating and the less energy you burn.
Calibration and ongoing monitoring help you maintain consistent warmth. After installing a new thermostat, calibrate it against a reliable surface temperature reading. Place a digital thermometer against the mat surface at several points to verify uniform heat distribution. If readings vary significantly across the mat, adjust the sensor placement or consider a different mat layout to reduce hotspots. Consistent checks every few weeks during initial use help catch drift in sensor accuracy or wiring wear before they become a problem. Keep a log of temperatures and settings for seasonal adjustments. Warrior-level consistency comes from attention to detail rather than a single setting. Thermostat Care recommends documenting the mat’s expected surface temperature range and comparing it with the thermostat’s actual readings, then tweaking as needed. This approach ensures an even warmth that protects flooring materials and reduces energy waste.
Safety, maintenance, and final checks to complete the setup. Ensure that all electrical connections are secure and protected from moisture. Use a grounded outlet or dedicated circuit with proper overload protection. Regularly inspect the mat and thermostat for signs of wear, frayed wires, or heat buildup beneath the floor surface. If you notice any scorching smell, discoloration, or warm spots on the mat surface, disconnect the power and reassess the installation. Keep pets and children away from exposed wiring, especially in high-traffic areas. When in doubt, schedule a professional inspection, particularly in older homes with outdated wiring. The Thermostat Care team emphasizes completing a thorough safety check before regular use to minimize risk and ensure reliable operation.
Authority references and safety standards to consult as you proceed. For electrical safety and installation guidance, refer to standards and guidelines from reputable sources. This article references general electrical safety practices and industry guidance to help you approach heat mat thermostat projects with confidence. Always follow local electrical codes and the mat manufacturer’s instructions. For more formal standards, see the following authoritative sources and publications to deepen your understanding and stay compliant. Thermostat Care reinforces that professional guidance is prudent for any wiring tasks beyond basic plug-in devices. The following sources provide context and safety considerations:
Tools & Materials
- Heat mat thermostat (mains voltage with floor sensor)(Ensure compatibility with mat wattage; floor sensor preferred for accuracy)
- Electrical tester / multimeter(Verify power and continuity; test circuits before and after wiring)
- Wire nuts / waterproof connectors(Use watertight connectors for any exposed terminals)
- Screwdriver set(Flat and Phillips head for mounting and securing terminations)
- Electrical tape and heat-shrink tubing(Secure and insulate splices; protect from moisture)
- Floor temperature probe (external, if required)(Only needed if your thermostat model relies on an external sensor)
- GFCI outlet or GFCI circuit protection(Important for moisture-prone installations; ensures personal safety)
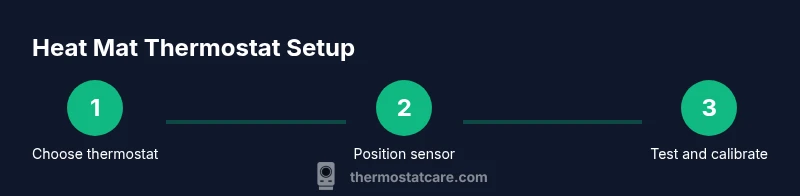
Steps
Estimated time: 60-90 minutes
- 1
Power off and verify
Go to the circuit breaker and switch off the power to the area where the heat mat will be installed. Use a multimeter to confirm there is no voltage present on the mat leads before touching any components.
Tip: Double-check the breaker label and test both mat leads for voltage before proceeding. - 2
Check compatibility
Review the mat wattage and ensure the thermostat’s switching rating matches or exceeds it. Confirm whether a floor sensor is included and whether it’s compatible with your mat type.
Tip: If in doubt, choose a thermostat rated for a higher amperage than your mat requires. - 3
Mount the sensor and route wiring
Place the floor sensor between mat coils and the flooring layer, away from direct heat sources. Route power and sensor wires neatly, avoiding sharp bends and moisture-prone areas.
Tip: Use clips or conduit to keep wires secure and accessible for inspection. - 4
Make the electrical connections
Connect the thermostat’s line and load wires according to the device’s instructions. Use appropriate connectors and insulate splices with heat shrink or electrical tape. Ensure a solid ground connection where required.
Tip: Follow the manufacturer’s wiring diagram exactly; incorrect wiring can damage components. - 5
Program the temperature range
Set the target temperature or heat range based on the mat’s purpose (seed germination, comfort warmth, etc.). If using a programmable model, create a simple daily schedule and a hold period if needed.
Tip: Start at a conservative setting and adjust after monitoring surface temps for a week. - 6
Calibrate and test
Place a surface thermometer on the mat and compare readings to the thermostat display. Make minor adjustments to sensor placement or setpoint to align readings.
Tip: Document test results to track drift over time. - 7
Safety verification
Confirm there is no heat buildup behind walls or under flooring. Check that the thermostat auto-shuts off at the upper limit and that the surface remains within expected temperature ranges.
Tip: Keep a fire extinguisher accessible as a precaution in the early days of use. - 8
Final checks and documentation
Tidy wiring, label components, and store spare fuses or connectors. Create a simple log of settings, probe placement, and maintenance reminders.
Tip: Photos of the wiring layout help future servicing and upgrades. - 9
Post-install monitoring
During the first week, check the mat every day and record temperatures at multiple points. Watch for uneven heating or tripping breakers and address promptly.
Tip: Incremental checks prevent surprises and extend the life of the mat and thermostat.
Questions & Answers
Do I need a dedicated thermostat for heat mats, or can I use a standard thermostat?
For most heat mats, a dedicated thermostat designed for heating mats is recommended because it provides an appropriate load rating and sensor options. While some standard thermostats may work in simple setups, using a model not rated for mat loads can cause overheating or failure.
A dedicated heat-mat thermostat is usually best because it matches the mat’s load and offers a proper sensor option.
Should I use a floor probe or an ambient sensor with my heat mat?
A floor probe provides the most accurate surface temperature control for heat mats, which is important for plant propagation and safe operation on floors. An ambient sensor can work in some setups but may lead to slower response or less precise readings.
Floor probes give the most accurate surface temperature control for heat mats.
What safety features matter most in a heat-mat thermostat?
Look for automatic shutoff at a defined limit, overheat protection, clear temperature readouts, and robust electrical isolation. A model with splash resistance is advantageous in moisture-prone areas.
Automatic shutoff and clear readouts are essential safety features.
Do I need a professional to install a heat mat thermostat?
If you’re comfortable with electrical work and follow local codes, you can install a heat mat thermostat yourself. For wired mats or exposed wiring, hiring a licensed electrician is advised to ensure compliance and safety.
For complex or high-wault setups, hire a licensed electrician.
What is a typical heat range I should aim for on a heat mat?
Temperatures vary by mat and application. Always follow the mat manufacturer’s recommended range and calibrate the thermostat to maintain those surface readings.
Follow the mat’s manufacturer range and calibrate to match surface readings.
How often should I test or recalibrate the system?
Test during the first week after installation, then periodically (e.g., monthly) to ensure readings remain accurate. Recalibrate if you notice drift between sensor readings and surface temp.
Test weekly early on, then monthly to keep readings accurate.
Watch Video
What to Remember
- Identify heat mat wattage and match with a compatible thermostat.
- Use a floor sensor when possible for accurate surface control.
- Follow electrical codes and safety practices to prevent hazards.
- Program and calibrate gradually, then monitor regularly.
- Choose a thermostat with clear UI and reliable safety features.