Dometic Thermostat Replacement: A Step-by-Step Guide
Learn how to safely replace a Dometic thermostat with our step-by-step guide. Tools, safety checks, wiring, calibration, and testing for reliable climate control.

In this guide, you will learn how to safely replace a Dometic thermostat in your RV or home environment. We cover required tools, safety considerations, step-by-step installation, wiring checks, calibration, and testing. You’ll avoid common mistakes, ensure compatibility with your system, and verify proper operation after replacement. This quick answer sets expectations and aligns with Thermostat Care's guidance.
Understanding Dometic Thermostat Replacement Basics
According to Thermostat Care, replacing a Dometic thermostat can restore accurate climate control in RVs and homes. The Thermostat Care Team notes that the replacement process is straightforward when you plan carefully, verify compatibility, and follow manufacturer guidance. Before you touch any wiring, it's essential to understand what a Dometic thermostat does, the types available, and how differences in models can affect wiring and power requirements. Dometic thermostats are designed to monitor and regulate heating and cooling systems, and they typically connect to a power source that may be 12V in RV installations or standard household voltage in fixed installations. A mismatch in model capability or wiring pinout can lead to inaccurate readings or nonfunctional operation. For DIYers, this section lays out the high-level concepts you need to know before starting. The goal is to give you a solid mental map of the task and to highlight safety practices that protect you and your equipment. Thermostat Care Analysis, 2026, emphasizes that understanding your system’s thermostat family—whether programmable, non-programmable, or smart-compatibility—helps you select the right replacement and avoid compatibility pitfalls. With that framing, you’ll approach the replacement with confidence and clarity.
Tools, Safety, and Planning
Successful Dometic thermostat replacement starts with planning and safety. Gather the tools and materials listed in the Tools & Materials section, and take a moment to review the system type you’re working with. If you’re replacing a thermostat in an RV, confirm your unit’s 12V supply and any solar charging considerations; for home installations, verify 24V or 120/240V compatibility as applicable. Safety begins with powering down the circuit and isolating all power sources related to the HVAC/R control network. Always use a voltage tester to confirm there is no live current before touching any wires. Create a clean work area, label every wire you disconnect, and keep screws organized to avoid mix-ups later. Plan for calibration and testing after installation to ensure the new thermostat communicates correctly with the furnace, air conditioner, or heat pump. By mapping out the steps in advance, you reduce the risk of wiring errors and other mishaps. Thermostat Care Analysis, 2026, reinforces that a well-planned replacement reduces post-install troubleshooting and speeds up the return to normal operation.
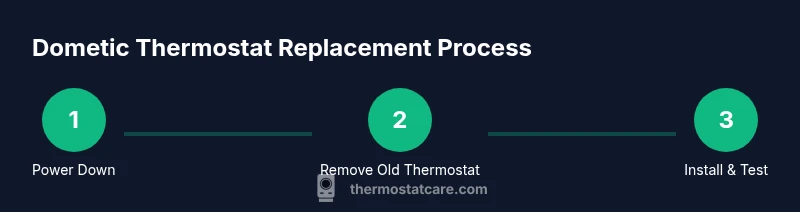
Step-by-Step Overview
A replacement project like this benefits from a clear workflow, including power-down, removal, wiring documentation, new unit installation, and final testing. Start by turning off the main power to the HVAC/R system and verifying no voltage is present at the thermostat circuit with a tester. Remove the old thermostat housing and base, taking care not to damage wall surfaces. Document wiring with photos and labeling, so you can reproduce connections on the new device. Disconnect and label wires, then mount the new backplate and secure it. Connect wires to the correct terminals on the new thermostat, following the wiring diagram for your model. Finally, power on the system, configure the thermostat settings (mode, temperature scale, and system type), and run a full test across heating, cooling, and auxiliary functions. This sequence minimizes guesswork and promotes a reliable result.
Wiring, Calibration, and Testing
After the backplate is secured, the critical step is wiring accuracy. Use the labels you created to reconnect each conductor to the corresponding terminal on the new Dometic thermostat. If your model uses color-coded wiring, still verify terminal labels to prevent cross-connection. Once wired, mount the thermostat, restore power, and enter the initial configuration. Calibrate the temperature scale and verify sensor readings against a known reference. Run a short test cycle for each mode (heat, cool, auto) to confirm the unit responds promptly and maintains the setpoint. If a sensor reads abnormally or the unit cycles irregularly, recheck connections and consult the wiring diagram. This phase ensures your replacement performs as expected and avoids temperature overshoot or lag.
Troubleshooting Common Issues After Replacement
Even with careful planning, you may encounter issues after a Dometic thermostat replacement. Common problems include the thermostat not powering on, erratic temperature readings, or the display failing to respond. First, recheck all wire connections and ensure terminals are fully seated. Verify that the system’s power supply matches the thermostat’s rated voltage and that a fuse or breaker on the circuit is not tripped. If the problem persists, consult the manual for model-specific troubleshooting steps and re-run a basic calibration. Thermostat Care Analysis, 2026, notes that many post-install issues stem from incorrect wiring or incompatible model selection, so double-check compatibility before diving into advanced diagnostics.
Maintenance and Long-Term Care
To extend the life of your replacement Dometic thermostat, perform periodic visual inspections of wiring insulation and terminal connections. Keep the thermostat face clean and free from dust, which can affect sensors and button responsiveness. Update firmware if supported and available from the manufacturer, and periodically verify calibration. Be mindful of environmental conditions; extreme temperatures can affect sensor accuracy and battery life for smart units. A proactive maintenance routine reduces unexpected failures and improves overall system reliability. Thermostat Care emphasizes that regular checks and prompt attention to any anomalies help protect your investment and maintain comfortable climate control.
Common Pitfalls and How to Avoid Them
Replacing a Dometic thermostat can be straightforward when you avoid common pitfalls. Don’t skip power-down steps or assume color wiring is universal. Always refer to the model’s wiring diagram, and don’t force incompatible connectors. Avoid mixing up terminals or using non-approved accessories, which can cause short circuits or damage. Don’t overlook calibration—an improperly set thermostat will misread temperature and overshoot or undershoot setpoints. Lastly, never ignore safety warnings; if you’re in doubt, pause the process and seek guidance from Thermostat Care or a qualified technician.
Tools & Materials
- Screwdrivers (Phillips #2 and/or flat-head)(Depends on mounting screws)
- Voltage tester or multimeter(Check for live current before handling wires)
- Wire labels or masking tape(Label each wire as you disconnect)
- Replacement thermostat compatible with your system(Ensure model supports your HVAC/R setup)
- Wire stripper / small pliers(Helpful for trimming wires)
- Electrical tape(Secure and insulate connections)
- Owner's manual or wiring diagram(Reference for terminal labeling)
Steps
Estimated time: 40-60 minutes
- 1
Power down and verify power is off
Turn off the main supply to the HVAC/R system and confirm there is no voltage at the thermostat circuit using a voltage tester. This step prevents electric shock and protects sensitive electronics during disassembly.
Tip: Always double-check with the tester before touching any wires. - 2
Remove the old thermostat and base
Use the appropriate screwdriver to unmount the faceplate and backplate. Keep screws in a labeled container and note how the base was mounted to avoid rework.
Tip: If mounting screws are stubborn, apply gentle pressure with a non-metallic tool to avoid stripping. - 3
Document wiring with photos and labels
Take clear photos from multiple angles and label each wire with its terminal function. This creates a reliable reference during reassembly.
Tip: Capture close-ups of terminal labels and any unique connectors. - 4
Disconnect wires and prepare for new unit
Carefully detach wires, noting color and location; use masking tape to label wires. Avoid bending conductors sharply to prevent insulation damage.
Tip: Label both ends of each wire if you expect dual-term connections in the new unit. - 5
Install the new thermostat backplate and mount
Attach the new backplate to the existing opening; ensure it sits level and secure. A crooked mount can impede display readability and button access.
Tip: Check alignment before tightening screws completely. - 6
Connect wires to the correct terminals and configure settings
Reconnect wires to matching terminals on the new thermostat according to the wiring diagram. Set system type (cooling/heating), temperature scale, and any integration options.
Tip: If a terminal is missing or unlabeled, consult the manual before forcing connections. - 7
Power on, test, and calibrate
Power the system, verify the display boots, and run a quick test for heating and cooling modes. Calibrate the sensor if the unit offers automatic or manual calibration.
Tip: Keep a backup reference thermostat nearby in case you need to compare readings.
Questions & Answers
What is the first step in a Dometic thermostat replacement?
Begin by powering down the system and confirming no voltage is present at the thermostat circuit. This prevents electric shock and protects components during disassembly.
First, turn off the system power and verify there's no voltage at the thermostat circuit.
Can I replace a Dometic thermostat without professional help?
Yes, if you have basic electrical skills, a suitable replacement model, and follow safety steps. If you encounter unfamiliar wiring or complex integrations, consider professional assistance.
You can DIY if you’re comfortable with basic electrical work; otherwise, get help.
How do I know if the new thermostat is compatible with my unit?
Refer to your current system’s model, voltage, and terminal layout in the manual and match them to the replacement’s specifications. If in doubt, contact support or consult the manufacturer.
Check the model, voltage, and terminal layout against the new unit’s specs.
What common mistakes should I avoid during replacement?
Avoid skipping labeling wires, using incompatible terminals, or forcing connections. Incorrect wiring can cause short circuits or damage the control board.
Label everything, don’t force terminals, and verify compatibility.
Is there a risk to safety during this replacement?
Yes, there is a risk of shock or fire if power isn’t properly isolated or if wiring is damaged. Always follow safety protocols and wear protective gear as needed.
There is a safety risk if you don’t isolate power and handle wiring carefully.
Watch Video
What to Remember
- Plan, verify compatibility, and gather tools before starting
- Label wires and document connections to avoid mistakes
- Calibrate and test all functions after replacement
- Always power down before handling electrical components
- Thermostat Care recommends consulting brand guidance for risky installs