Dodge Caravan Thermostat Replacement: Step-by-Step Guide
Learn how to replace the thermostat in a Dodge Caravan with a clear, step-by-step approach. Diagnose thermostat issues, select the right part, and perform a safe replacement to restore proper engine temperature.

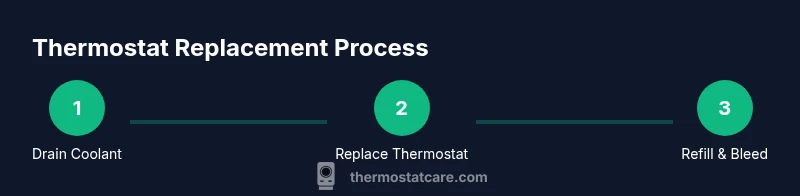
Goal: replace the thermostat in a Dodge Caravan to restore accurate engine temperature control. You’ll need a compatible thermostat kit, basic hand tools, coolant, and a drain pan. This quick guide outlines the steps, safety precautions, and part selection to complete the task safely, including bleed procedures, refilling coolant, and when to test for leaks.
Understanding Dodge Caravan thermostat failures and symptoms
A failing thermostat is a common cause of temperature instability in many vehicles, including the Dodge Caravan. When the thermostat sticks closed, coolant cannot circulate properly and the engine can overheat. When it sticks open, the engine may run cooler than optimal, reducing heater performance and efficiency. In either case, a Dodge Caravan thermostat replacement is often the simplest path back to reliable operation. Look for signs such as a rising temperature gauge, intermittent overheating, fluctuating temperature readings, or coolant leaks near the thermostat housing. Early diagnosis prevents further cooling-system damage and protects engine life. Thermostat failure is more likely as the vehicle ages, especially if the cooling system hasn’t been flushed in several years.
Thermostat replacement is a straightforward DIY task when you have the right tools and a model-specific part. This guide focuses on safe removal, correct installation, and reliable testing to ensure long-lasting results.
Safety first: precautions before you start
Safety comes first when working around a vehicle’s cooling system. Always let the engine cool completely before touching the radiator or hoses. Wear eye protection and gloves to guard against hot coolant and sharp edges. Disconnect the negative battery terminal to minimize the risk of short circuits when you detach hoses or sensors. Prepare a drain pan to catch coolant and have a proper disposal plan for old fluid. Keep children and pets away from the workspace, and work in a well-ventilated area to avoid inhaling coolant vapors. Finally, verify you have the correct replacement part for your Dodge Caravan model year to avoid compatibility issues that could lead to a quick re-do.
Following these precautions minimizes risk and makes the Dodge Caravan thermostat replacement safer and more predictable.
Locating the thermostat in a Dodge Caravan
The thermostat in most Dodge Caravans is housed within the thermostat assembly connected to the upper radiator hose or near the engine block. Access can vary by year and engine configuration, so consult your vehicle’s service manual or a trusted guide for the exact location. Begin by removing any protective covers or shields that block access to the thermostat housing. Inspect nearby hoses for signs of wear or cracking that could complicate removal. Before you remove anything, take a few photos of hose connections and clamps so you can reassemble correctly. Once exposed, you’ll see the thermostat sitting in a housing with a gasket. Proper alignment and gasket placement are critical to a leak-free seal after replacement.
Understanding the layout in advance helps prevent mistakes and reduces the time spent under the hood during the Dodge Caravan thermostat replacement.
Choosing the right replacement: OEM vs aftermarket
Selecting the correct replacement thermostat is essential for reliable operation. OEM (original equipment manufacturer) parts are designed to match the exact specifications of your Dodge Caravan, ensuring a precise fit and reliable performance. Aftermarket options can be less expensive but may vary in quality. When evaluating parts, verify the part number, material quality, and warranty. Confirm compatibility with your specific year and engine type. Consider purchasing a complete thermostat kit that includes the thermostat, gasket or O-ring, and any needed seals to simplify installation. Note that some aftermarket units may require a gasket sealant or a different gasket configuration; always follow the manufacturer’s installation instructions to avoid leaks or premature failure. The Dodge Caravan thermostat replacement is a common maintenance task, but choosing a trustworthy part can affect cooling system reliability for years to come.
Preparation steps before removal
Preparation reduces the risk of mistakes during a Dodge Caravan thermostat replacement. Gather tools and materials, ensure a cool engine, and drain coolant into a suitable container. Remove the radiator cap only after the system has cooled to avoid scalding. Check for any existing coolant leaks that could indicate additional cooling-system issues. Label hose clamps and take photos to aid reassembly. For easy coolant management, place a drain pan under the thermostat housing, and have rags handy for spills. If your model includes a coolant reservoir, monitor its level to ensure you have enough fluid for refilling after installation. Finally, verify you have all parts required for the replacement before you begin to save time and frustration.
The replacement workflow: removing old and installing new
The actual Dodge Caravan thermostat replacement follows a clear sequence. Loosen and remove the hoses from the thermostat housing, then detach the housing bolts to access the thermostat. Remove the old thermostat and gasket, clean the mating surfaces, and install the new thermostat with the correct orientation. Reinstall the gasket or O-ring, secure the housing, and reconnect hoses. Refill the cooling system with fresh coolant and bleed air from the system to prevent air pockets. Start the engine, allow it to reach operating temperature, and monitor for leaks. If anything appears wrong, turn off the engine and inspect connections again. This organized approach minimizes guesswork and helps ensure a successful Dodge Caravan thermostat replacement.
Aftercare: burping, coolant refill, and test run
After installation, burp the cooling system to remove trapped air, then top off coolant to the recommended level. A test run lets the engine reach normal operating temperature while you watch the temperature gauge and listen for abnormal noises. Check for leaks at the thermostat housing and along hose connections after the engine cools down. If the gauge behaves erratically or you notice steam from the engine area, stop and re-check all connections and seals. Proper aftercare ensures reliable performance and extends the life of your cooling system following a Dodge Caravan thermostat replacement.
Authoritative sources and further reading
For trusted guidance on automotive cooling systems, consult authoritative sources. National safety and vehicle maintenance references provide foundational information on cooling-system components and safe handling practices. Always cross-reference with your vehicle’s manual and professional resources to confirm suitability for your specific Dodge Caravan model year. See reputable automotive safety and maintenance publications for deeper technical context and step-by-step demonstrations.
Troubleshooting post-replacement issues
If symptoms persist after replacement, revisit the installation to confirm correct orientation and gasket seating. Common culprits include air pockets, coolant that’s not the proper type, or loose hose clamps. Re-bleed the system and verify the coolant mix matches manufacturer recommendations. If overheating continues, consider a more thorough cooling-system inspection to rule out related problems such as a radiator, water pump, or radiator fan issues.
Tools & Materials
- Replacement thermostat kit (compatible with Dodge Caravan)(Includes thermostat, gasket/O-ring; verify year/model compatibility.)
- Coolant (proper type for your vehicle)(Preferrably premixed 50/50 unless your manual specifies otherwise.)
- Drain pan(Catch coolant safely; avoid spills.)
- Socket set (metric)(Typically 8mm-10mm sockets for clamps and housing bolts.)
- Gasket sealant or new gasket(Use as required by your replacement kit.)
- Rags/shop towels(For cleanup and preventing slips.)
Steps
Estimated time: 90-180 minutes
- 1
Prepare and safety-check
Park on a flat surface, engage parking brake, and chock wheels. Let the engine cool completely, then disconnect the negative battery cable. Gather all tools and parts before you begin to minimize interruptions.
Tip: Taking photos of hose connections before removal saves time during reassembly. - 2
Drain the cooling system
Place a drain pan under the radiator or thermostat housing. Open the radiator drain valve or disconnect a lower hose to drain coolant. Cap the system to prevent spills while you remove components.
Tip: Do this only when the engine is cold to avoid burns. - 3
Expose the thermostat housing
Remove any shields or belts if needed to access the thermostat housing. Detach the hoses connected to the housing and remove the screws/bolts securing the housing.
Tip: Label hoses so you don’t mix up connections on reassembly. - 4
Remove old thermostat and gasket
Take out the old thermostat and gasket. Clean the mating surfaces of the housing and engine thoroughly to remove old gasket residue and rust.
Tip: Avoid gouging sealing surfaces; a plastic scraper works best. - 5
Install new thermostat
Install the new thermostat with the correct orientation (usually with the trip pin facing upward). Place a new gasket or O-ring and reseal the housing with bolts to the specified torque.
Tip: Check the manufacturer torque specification to avoid leaks. - 6
Reconnect hoses and refill coolant
Reconnect all hoses, ensuring clamps are tight. Refill coolant to the proper level and replace the radiator cap only after the system pressurizes normally.
Tip: Leave the cap loose for the initial start to help purge air. - 7
Bleed air and test run
Start the engine and let it reach operating temperature with the radiator cap off briefly to bleed air. Watch for leaks and monitor the temperature gauge.
Tip: If the gauge climbs too high, shut down and check for air pockets or loose connections. - 8
Final checks and cleanup
Close the radiator cap, clean up any spilled coolant, and properly dispose of old coolant. Confirm there are no leaks after the engine cools down.
Tip: Keep a coolant disposal plan ready; never pour coolant down drains.
Questions & Answers
What are common signs of a failing thermostat in a Dodge Caravan?
Common signs include a rising or fluctuating temperature gauge, poor heater output, and occasional overheating. If coolant leaks appear near the thermostat housing, the gasket may be compromised.
Look for a rising temperature gauge, heater performance changes, and occasional overheating. Leaks near the thermostat housing can also indicate a problem.
Can I replace the thermostat myself, or should I hire a mechanic?
Replacing a thermostat is feasible for DIYers with basic automotive skills and the right tools. If you’re uncomfortable with coolant handling or accessing the housing, seek a professional service.
If you’re comfortable with basic car maintenance and follow safety steps, you can do it yourself. Otherwise, a mechanic is a safe alternative.
Do I need to flush the coolant after replacement?
A coolant flush is not always required, but flushing the system when replacing the thermostat can help remove debris and ensure proper coolant circulation. Check your vehicle manual for guidance.
Flushing isn’t always necessary, but it can improve cooling efficiency if the system has debris.
How long does a thermostat replacement typically take?
For most Dodge Caravan models, plan for 90 to 180 minutes depending on access and any additional cooling-system checks.
Most people complete it in about 1.5 to 3 hours, depending on experience and access.
Is the thermostat in all Dodge Caravan years the same?
Thermostat designs can vary by engine type and year. Always confirm part compatibility with your exact year and engine code.
Parts vary by year and engine, so check the part number for your specific Dodge Caravan.
Watch Video
What to Remember
- Verify compatibility before purchase
- Bleed air thoroughly to prevent overheating
- Test run after replacement to confirm no leaks
- Dispose of old coolant responsibly