Replacing a 350 Chevy Thermostat: A DIY Guide
Learn to diagnose, select, and replace a 350 Chevy thermostat with clear, step-by-step guidance from Thermostat Care. Safe, practical advice for DIYers tackling thermostat installation and cooling system maintenance.

According to Thermostat Care, you can diagnose, replace, and bleed a 350 Chevy thermostat in four clear steps: locate the housing, drain coolant, swap the old unit with a new one and gasket, then refill and bleed air. This keeps engine temperatures consistent and avoids overheating. Be sure to use the correct temperature rating and properly torque the housing bolts.
Why the 350 Chevy thermostat matters
The thermostat is a small but critical component in a 350 Chevy engine. It controls coolant flow between the engine and radiator, helping the engine reach and stay at its optimal operating temperature. If the thermostat sticks closed, the engine can overheat; if it sticks open, it may run cooler than ideal, reducing efficiency and increasing wear. For classic car owners and modern builds alike, understanding how the 350 chevy thermostat affects performance can save time and money. According to Thermostat Care, using the correct temperature rating and ensuring a clean seal are essential for reliable operation. When you replace it, you’re not just swapping parts—you’re setting the stage for consistent heat, smoother idling, and better fuel economy. In this guide, you’ll learn how to diagnose, select, and replace a thermostat in a 350 Chevy with practical, safe techniques.
Signs your thermostat may be failing on a 350 Chevy
Common symptoms of a failing 350 chevy thermostat include temperature fluctuations, overheating at idle or in stop-and-go traffic, a radiator fan running continuously, and a heater that cannot produce warm air. In cold weather, the engine should warm up quickly; if it stays cool well past normal warm-up, the thermostat could be stuck open. Conversely, if the gauge climbs toward the red or the heater produces little heat, the stat may be stuck closed. You might also notice erratic temperature readings on your dash cluster. If you observe any of these signs, plan a careful inspection rather than a rushed replacement. Always check for coolant leaks around the thermostat housing, as a leaky gasket can mimic thermostat failure. Thermostat Care notes that many thermostat problems are actually caused by worn gaskets or corrosion around the housing, not a failed thermostat itself.
How the 350 Chevy thermostat works in your engine
On a typical 350 Chevy V8, the thermostat sits in the coolant path, opening at a specified temperature to allow flow to the radiator. When the engine is cold, the thermostat stays closed to help warm up quickly. As the coolant heats, the wax inside the thermostat expands, pushing a plunger that opens the valve. This regulation maintains a narrow temperature window that keeps the engine efficient and reduces emissions. The correct thermostat ensures the heater core functions well and the radiator can shed heat efficiently at cruising speed and during highway pulls. If the thermostat opens too early, the engine may run cooler than designed, causing increased fuel consumption and slower warm-up. If it opens late or not at all, the engine can overheat quickly, leading to potential head gasket or piston wear. Choosing a thermostat with the right opening temperature and a reliable gasket is essential for longevity, particularly in hot climates or for engines with aftermarket cooling upgrades.
How to choose the right thermostat for a 350 Chevy
Start with the intended operating temperature. Most 350 Chevy enthusiasts aim for a thermostat that opens around 180–195°F (82–91°C), but you should verify compatibility with your specific year, carbureted or fuel-injected setup, and radiator capacity. OEM replacements mirror factory specs, while aftermarket units can offer performance options or corrosion resistance. Consider whether your cooling system uses a standard single-pass radiator or a high-capacity unit; for high-performance builds, some owners opt for thermostats with tighter tolerances. Ensure the gasket and o-ring are compatible with your thermostat housing. If your vehicle has an electric cooling fan, you may prioritize robust seals to minimize leaks. Thermostat Care recommends choosing a reputable brand and following torque specs when reinstalling the housing.
Step-by-step overview for replacing a thermostat on a 350 Chevy
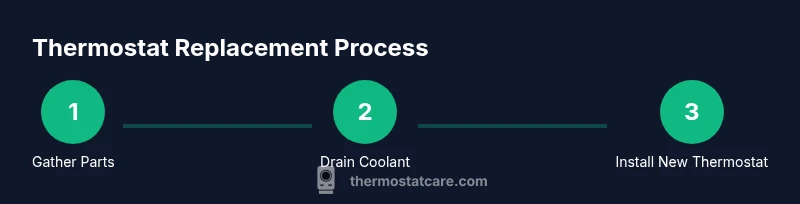
This section provides a concise overview of the replacement process. See the separate STEP-BY-STEP section for the exact actions and safety notes. You’ll start by gathering the right parts and tools, then you’ll safely drain the cooling system, remove the old thermostat housing, install the new thermostat with the gasket in the correct orientation, and finally refill the coolant and bleed air to prevent air pockets that could hinder cooling.
Post-replacement checks and maintenance
After installation, start the engine and let it reach operating temperature with the radiator cap removed to bleed air. Watch for leaks around the thermostat housing and ensure the heater is providing warm air once the engine warms. Recheck the coolant level after the engine cools, and dispose of used coolant properly. Regularly inspect the thermostat housing, hoses, and clamps for signs of wear or corrosion. Keeping the cooling system clean and properly filled reduces future thermostat-related problems and helps maintain consistent performance for your 350 Chevy.
Tools & Materials
- New thermostat with gasket (180–195°F / 82–91°C)(Ensure exact rating matches engine specs)
- Coolant (volunteer mix of water and coolant)(Use the correct type for your vehicle)
- Drain pan(Place under radiator drain or lower hose)
- Socket wrench set and extensions(Bolts on thermostat housing)
- Screwdrivers (flathead and Phillips)(For hose clamps and housing bolts)
- Torque wrench(To manufacturer torque specs)
- Gasket scraper(Clean mating surfaces before installing new gasket)
- Shop towels or rags(Clean spills and wipe surfaces)
- Safety gloves and glasses(Protect hands and eyes from coolant)
- Pliers and hose clamps tool(Remove/reseat hoses safely)
Steps
Estimated time: 60-90 minutes
- 1
Prepare and safety check
Park on a level surface and let the engine cool completely. Disconnect the negative battery cable to prevent shocks or shorts. Gather all tools and new thermostat parts before you begin.
Tip: Always verify the engine is cool before touching hot components; hot coolant can cause serious burns. - 2
Drain the cooling system
Place a drain pan under the radiator drain valve or lower hose. Open the valve slowly or loosen the hose clamp to drain coolant into the pan. Catch and dispose of old coolant responsibly.
Tip: Have rags ready; coolant is toxic to pets and wildlife. - 3
Remove the thermostat housing
Loosen the hose clamps and remove the thermostat housing bolts. Carefully lift the housing to expose the thermostat and gasket.
Tip: Note the orientation of the old thermostat before removal for correct alignment of the new unit. - 4
Remove old thermostat and gasket
Take out the old thermostat and gasket. Inspect the housing surface for corrosion or residue that could leak with the new gasket.
Tip: If residue is present, clean thoroughly with a gasket scraper and a clean rag. - 5
Install the new thermostat and gasket
Position the new thermostat with the correct orientation (usually with the spring side toward the engine) and install the new gasket. Reattach the housing and tighten bolts to the specified torque.
Tip: Do not overtighten; over-torquing can crack the housing or strip threads. - 6
Refill, bleed, and test
Reassemble, refill coolant to the proper level, and bleed air by running the engine with the radiator cap off until you see steady bubbles stop. Check for leaks, then top off coolant after the engine cools.
Tip: Run the engine to operating temperature and monitor for fluctuating gauges or leaks; address issues before driving.
Questions & Answers
What are the common signs of a bad thermostat in a 350 Chevy?
Typical signs include temperature fluctuations, overheating, heater issues, and a fan that runs constantly. Check for leaks near the thermostat housing as a possible cause. If in doubt, perform a controlled inspection before replacing.
Common signs are temperature swings, overheating, and unheated heater; inspect the housing for leaks and confirm by a controlled test.
Can a faulty thermostat cause overheating in a 350 Chevy?
Yes. A thermostat stuck closed prevents coolant from circulating, causing the engine to overheat. Replacing it with the correct rating helps restore proper coolant flow and temperature control.
Yes, a stuck-closed thermostat can cause overheating. Replacing it with the right part fixes the issue.
Should I flush the coolant when replacing the thermostat?
Flushing is often recommended if the coolant is old or contaminated. A simple drain, clean refill, and bleed may suffice for many replacements, but a full flush reduces the risk of contaminants affecting the new thermostat.
If your coolant is old or contaminated, flush it. Otherwise, a drain and refill with proper bleeding usually works.
Can I reuse an old thermostat if it looks fine?
Reusing an old thermostat is not advised. Even if it looks fine, a worn seal or degraded wax can fail after installation. It's safer to replace with a new unit that matches your engine specs.
It's best to replace with a new thermostat rather than reusing the old one.
OEM vs aftermarket thermostat for a 350 Chevy?
OEM replacements mirror factory specs and are reliable for stock setups. Aftermarket units can offer improved corrosion resistance or performance options, but verify compatibility with your model year and cooling system configuration.
OEM parts match factory specs; aftermarket parts can offer advantages but check compatibility.
How do I bleed air after replacing the thermostat?
With the engine warm and the radiator cap off, run the engine to operating temperature and watch for air bubbles in the radiator. Add coolant as needed until the level stabilizes, then replace the cap and recheck after cooling.
Run the engine warm with the cap off to purge air, topping up coolant as needed.
Watch Video
What to Remember
- Identify the thermostat housing location on the 350 Chevy.
- Use the correct thermostat rating and gasket for reliable operation.
- Bleed air after refilling coolant to prevent air locks.
- Inspect gaskets and housing surfaces for leaks or corrosion.
- Test run and monitor temperatures to confirm a successful replacement.