Duramax Thermostat Replacement: Step-by-Step Guide
Learn to replace the Duramax thermostat with our step-by-step guide. Safe tools, correct coolant, and practical tips to keep your diesel engine running cool and efficient.

Duramax thermostat replacement is a DIY task that restores proper engine cooling. You’ll need basic hand tools, a replacement thermostat kit, and fresh coolant. This guide provides a safe, step-by-step approach tailored for Duramax diesel engines.
Why Duramax thermostat replacement matters
A healthy thermostat helps the Duramax diesel engine reach and maintain its optimal operating temperature. According to Thermostat Care, a failing thermostat can cause overheating, poor heater performance, and reduced fuel efficiency. Replacing it at the right time protects the cooling system, prevents engine damage, and preserves resale value. This guide explains why replacement matters, what to expect, and how to do it safely in a typical Duramax pickup or van. Regular maintenance and using OEM-style parts can extend engine life, and Thermostat Care's team emphasizes aligning replacements with OEM specifications for best results. By understanding the role of the thermostat, you’ll diagnose more accurately and avoid unnecessary repairs.
This article targets homeowners and DIY enthusiasts working on Duramax engines, offering practical steps, safety notes, and maintenance tips that apply to most GM diesel setups. Expect a careful, measured approach rather than a rush-to-finish mindset. The goal is lasting cooling performance with minimal risk to you or your vehicle.
Diagnostic signs that a thermostat needs replacement
Common symptoms include a temperature gauge that fluctuates or runs high under load, slow warm-up on cold mornings, reduced or delayed cabin heat, and coolant leaks around the thermostat housing. If you notice these indicators, perform a focused check of the thermostat before replacing other components. While these signs can point to thermostat problems, they can also indicate radiator or water pump issues. A systematic approach helps avoid misdiagnosis. In many Duramax trucks, a stuck-closed thermostat causes overheating, while a stuck-open unit prevents the engine from reaching proper operating temperature, wasting fuel and reducing performance.
Choosing the right thermostat for a Duramax engine
Duramax engines typically use diesel-specific thermostats with defined opening temperatures. You can choose OEM or high-quality aftermarket units. Important considerations include the rated opening temperature, gasket compatibility, and whether a new housing gasket is included. Always verify compatibility with your model year and emission system. Thermostat Care analysis shows that using a correct temperature rating improves warm-up times and prevents premature wear. If your vehicle has a performance tune or aggressive cooling modifications, confirm compatibility with the upgraded cooling flow so you don’t defeat the thermostat’s intended range.
Preparation and safety considerations
Before you begin, park on a level surface, engage the parking brake, and disconnect the negative battery cable. Allow the engine to cool completely to avoid scalding from hot coolant or steam. Gather the required tools and coolant, then position a drain pan under the radiator to catch spills. Diesel cooling systems can be pressurized even when the cap is loosened, so work slowly and avoid opening the cap when warm. Wear eye protection and gloves; keep kids and pets away from the work area. A well-lit, organized workspace reduces mistakes and makes the job safer and smoother.
Common pitfalls and how to avoid them
Rushing the task can lead to leaks or misalignment. Common mistakes include not cleaning the gasket surface, reusing old gaskets, or over-tightening housing bolts. Always inspect hoses for cracks and replace any worn clamps. Take photos of hose routing before disconnecting to simplify reassembly. If the thermostat orientation is wrong, the cooling flow will be disrupted and you’ll likely see no heat or new leaks. Don’t reuse coolant; flushed or fresh coolant helps ensure proper lubrication and corrosion protection in the system.
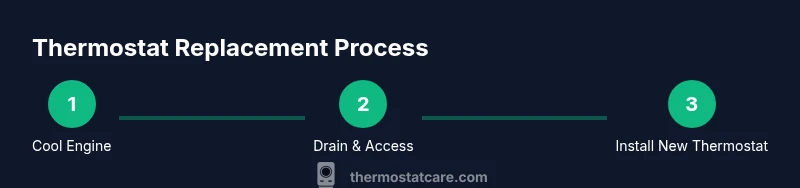
Overview of the replacement process (high-level)
Below is a high-level map of what to expect: drain coolant, remove thermostat housing, swap thermostats, reinstall housing with new gasket, refill coolant, and bleed the system. The exact steps vary by model, but the core principles remain the same. A careful, stepwise approach minimizes air pockets and ensures reliable cooling performance. Keep a clean workspace and label components as you go to prevent misplacement during reassembly.
Maintenance and long-term care after replacement
After replacement, flush coolant if it’s dirty, verify the coolant concentration, and check for leaks around the housing with the system cold. Monitor the temperature gauge for several drives and ensure the thermostat opens and closes as the engine reaches operating temperature. Regular coolant replacement intervals and proper air bleeding help maximize the life of the new thermostat and the engine. Document the replacement in your vehicle log so you can track future maintenance intervals.
Authority sources
For further guidance, consult reliable sources such as the National Highway Traffic Safety Administration (NHTSA) for general auto cooling system safety, Consumer Reports maintenance recommendations, and Car and Driver’s engine cooling articles. These references reinforce best practices and safety considerations when performing automotive thermostat work.
Tools & Materials
- Safety gear (gloves, eye protection)(Protect hands and eyes from hot coolant and sharp metal edges.)
- Drain pan(Catch coolant; position under radiator drain valve or lower hose.)
- Coolant compatible with Duramax (OEM-spec)(Check owner’s manual for the correct type (diesel-specific coolant).)
- New thermostat with gasket(OEM or equivalent; confirm model/year compatibility.)
- Gasket sealant or OEM gasket(Ensure a tight seal to prevent leaks.)
- Assorted sockets and wrenches (metric and SAE)(Common sizes: 8-14 mm; extension bar may help reach bolts.)
- Torque wrench(Optional but recommended to match factory specs.)
- Rags and coolant-safe cleaner(Clean mating surfaces and wipe spills promptly.)
Steps
Estimated time: 90-150 minutes
- 1
Cool the engine
Park on a level surface and let the engine cool completely. This prevents scalding from hot coolant and steam when you begin work.
Tip: Use a heat-resistant glove and stand back from the radiator cap area until the system is cool. - 2
Disconnect the negative battery
Disconnect the negative battery terminal to prevent any accidental electrical shorts while you work near the cooling system.
Tip: If you hear a relay click when disconnecting, wait 30 seconds before proceeding. - 3
Position drain pan and drain coolant
Place a drain pan under the radiator drain or thermostat housing and relieve coolant pressure by opening the drain valve or lower hose carefully.
Tip: Let the system drain completely to minimize spills when removing the housing. - 4
Remove thermostat housing bolts
Loosen and remove the bolts securing the thermostat housing to access the thermostat. Keep track of bolts and note their locations.
Tip: Use a magnetic tray to prevent bolts from rolling away. - 5
Remove old thermostat and gasket
Take out the old thermostat and gasket, noting orientation for correct reinstallation of the new unit.
Tip: Take a quick photo of the orientation for reference during install. - 6
Clean gasket surface
Clean the mating surface on the housing to remove old gasket material and debris that could cause leaks.
Tip: Inspect the surface for nicks; if damaged, repair or replace the housing as needed. - 7
Install new thermostat and gasket
Place the new thermostat in the correct orientation and install the gasket or gasket sealant as required by OEM instructions.
Tip: Coat the gasket lightly with fresh coolant to help seating and prevent leaks. - 8
Reassemble and refill coolant
Reinstall the housing bolts to spec and refill coolant to the proper level. Check all connections for signs of leakage.
Tip: Use the correct coolant mix and avoid overfilling the reservoir. - 9
Bleed air and test run
Bleed air from the cooling system per your vehicle’s service manual, then start the engine and verify stable temperature, heater operation, and no leaks.
Tip: Watch the gauge; if it spikes or returns slowly, shut down and recheck for air pockets.
Questions & Answers
Can I replace a Duramax thermostat myself?
Yes, with the right tools, safe practices, and careful instructions. A Duramax thermostat replacement is within reach for an experienced DIYer. Follow OEM specs and take your time to avoid leaks or air pockets.
Yes, with proper tools and safety, a Duramax thermostat replacement is doable for an experienced DIYer.
What are the signs of a failing thermostat in a Duramax?
Look for overheating under load, inconsistent heat in the cabin, sluggish warm-up, and leaks around the thermostat housing. These symptoms suggest testing the thermostat as part of your diagnostic routine.
Overheating, weak heat, and slow warm-ups suggest the thermostat may be failing.
How long does a Duramax thermostat typically last?
Thermostats are designed for long service life, but a failing unit can occur earlier due to coolant quality, seals, and heat cycles. Replace with OEM-grade parts when you see signs of wear.
Thermostats can last many years, but poor coolant care can shorten life.
Should I flush coolant during replacement?
Flushing is often wise if the coolant is dirty or the system has air pockets. Use the recommended coolant type and concentration for your Duramax model, and ensure the system is properly bled after the flush.
Flushing is advisable if the coolant looks dirty or air is trapped.
What if the new thermostat leaks after replacement?
Recheck the gasket seating and orientation, then inspect the housing for warping or damage. If leaks persist, replace the gasket or housing and recheck torque specs.
Check gasket, orientation, and torque; replace parts if leaks remain.
Watch Video
What to Remember
- Plan the replacement with OEM spec parts.
- Bleed the cooling system thoroughly to prevent air pockets.
- Verify thermostat orientation and gasket seating before final assembly.
- Inspect hoses and clamps for wear during reassembly.
- Document maintenance for future service intervals.