Chevy Colorado Thermostat Replacement Guide
Learn how to replace the thermostat on a Chevy Colorado with step-by-step instructions, safety tips, and troubleshooting guidance from Thermostat Care. A practical guide for DIY enthusiasts.

You will replace the Chevy Colorado thermostat, restoring proper engine cooling and preventing overheating. This DIY task requires basic hand tools, a coolant catch basin, and a new thermostat with gasket. The steps cover safety checks, proper torque, and refilling coolant, so you finish with a leak-free repair and a cooler running engine.
Understanding the Chevy Colorado thermostat replacement basics
The Chevy Colorado cooling system relies on a thermostat to regulate coolant flow between the engine and radiator. When the thermostat sticks open or closed, you risk overheating, reduced heater performance, and potential engine damage. A Chevy Colorado thermostat replacement is a common, manageable DIY task for enthusiasts who have basic tools and a plan. According to Thermostat Care, diagnosing the issue early and replacing the thermostat with a high-quality unit can extend engine life and prevent costly cooling system damage. This section explains what the thermostat does, how to know when it’s failing, and what you should have on hand before you begin. By understanding the role of the thermostat, you’ll approach the repair with confidence and avoid unnecessary mistakes.
Signs your Chevy Colorado needs a thermostat replacement
Not all thermostat problems are identical. Look for overheating gauges climbing higher than normal, reduced or no heat in the cabin, and coolant leaks around the housing. If the gauge stays at or near the middle range and the fans run constantly, the cooling system may be struggling due to a faulty thermostat. Also watch for visible coolant leaks, fluctuating temperature readings, or an engine that takes longer to reach operating temperature. Before deciding on a replacement, verify that the issue isn’t caused by a stuck radiator cap, a clogged hose, or a failing water pump, which can mimic thermostat symptoms. Recognizing the exact cause helps you avoid unnecessary parts replacement and expense.
Safety and preparation for a Chevy Colorado thermostat replacement
Working on a vehicle’s cooling system requires care. Always start with a cool engine to prevent burns, disconnect the negative battery terminal, and drain coolant into a clean basin to minimize spills. Wear eye protection, use the proper tools, and work in a well-ventilated area. If you’ll be crawling under the vehicle, use jack stands on a level surface and never rely on a jack alone. Prepare a clean area to set bolts and parts, and label hoses to reassemble correctly. Realistically plan for about 60-90 minutes if you’re comfortable with basic mechanical tasks; more time may be needed if the housing is stubborn or if you’re working in tight spaces. This preparation reduces the risk of mistakes that could lead to leaks or air pockets.
High-level overview of the replacement process
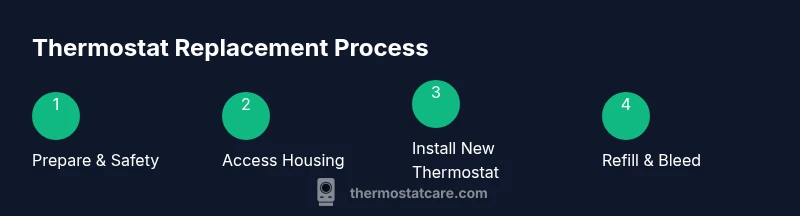
The replacement involves accessing the thermostat housing, removing the old thermostat, cleaning mating surfaces, and installing a new thermostat with a fresh gasket. After installation, you’ll refill the cooling system and bleed air until the system is free of air pockets. While this is a straightforward task for many DIYers, the key is to stay organized and follow torque specs and orientation markers. Retain all fasteners in a small labeled container so nothing is misplaced, and double-check hose connections before refilling coolant.
Common pitfalls and how to avoid leaks
Air pockets are a frequent cause of overheating after a thermostat swap. Bleed the cooling system properly by running the engine with the radiator cap off until steady flow appears in the overflow. Don’t reuse old gaskets; always install a new gasket with a clean surface. Over-tightening bolts can warp the housing, while under-tightening can cause leaks. Take your time to inspect hose clamps and hoses for cracks. Finally, verify the system is full and the engine reaches and maintains operating temperature before taking the vehicle for a test drive.
Aftercare: testing, monitoring, and maintenance
Once the thermostat is replaced, refill the coolant to the correct level and clear any air pockets by running the engine with the radiator cap off briefly. Observe the temperature gauge as the engine warms to operating temperature and ensure the cooling fans engage normally. Check for leaks around the housing and hoses after a short drive, then recheck the coolant level and top off if needed. Regularly inspect the thermostat housing for signs of seepage during the first few weeks of operation, and schedule a follow-up check if you notice any abnormal temperature behavior. This quick post-replacement routine helps ensure a long-lasting repair.
Tools & Materials
- Socket wrench set(Metric sizes commonly 8mm-14mm for Chevy Colorado thermostat housing bolts)
- Screwdrivers (Phillips and flathead)(For clamps and small screws)
- Coolant catch basin(To safely drain and catch coolant)
- Coolant(Plan for 50/50 mix or pre-mixed coolant compatible with your vehicle)
- New thermostat with gasket(Ensure correct temperature rating and a fresh gasket)
- Gasket scraper or clean rag(Clean mating surfaces to prevent leaks)
- Torque wrench (optional)(Helps ensure proper seating on bolts)
- Drain hose or funnel(Assists with controlled coolant flow)
Steps
Estimated time: 60-90 minutes
- 1
Park, cool engine, and disconnect battery
Park on a flat surface and let the engine cool completely. Disconnect the negative battery terminal to prevent electrical shorts when you unplug sensors or disconnect wiring near the thermostat housing.
Tip: A cool engine reduces burn risk and prevents accidental shorts. Use a magnetic tray to keep fasteners organized. - 2
Drain cooling system
Place a drain pan underneath the radiator drain valve or thermostat housing, loosen the valve, and let coolant drain into the pan. This minimizes spills and makes it easier to handle the old thermostat.
Tip: Keep the engine off and use gloves; coolant is toxic. Collect used coolant for proper disposal later. - 3
Access thermostat housing
Remove any shielding or hoses that block access to the thermostat housing. Use the socket set to remove mounting bolts holding the housing in place, and gently lift the housing away to expose the old thermostat.
Tip: Take note of the orientation marks or arrows on the old thermostat to replicate for the new unit. - 4
Remove old thermostat and gasket
Carefully lift out the old thermostat and gasket. Inspect the housing and thermostat seat for dirt, corrosion, or damage. Clean surfaces with a gasket scraper or rag before installing the new unit.
Tip: If the old gasket sticks stubbornly, apply a small amount of gasket remover or warm soapy water to ease removal. - 5
Install new thermostat and gasket
Position the new thermostat in the correct orientation, then seat the gasket cleanly in place. Reinstall the thermostat housing with bolts to the manufacturer’s torque spec and reconnect any hoses you removed.
Tip: Never use thread sealant on thermostat gasket surfaces; the gasket should seal directly against clean metal. - 6
Refill, bleed air, and test
Refill the cooling system with coolant, then bleed air by running the engine with the radiator cap off until a steady coolant flow is seen. Reinstall the cap, start the engine, and monitor temperature and for leaks.
Tip: Check for leaks around the housing after the engine reaches operating temperature; monitor gauge and fan activity closely.
Questions & Answers
What are common signs a thermostat needs replacement on a Chevy Colorado?
Common signs include overheating, a heater that won’t get warm, and fluctuating temperature readings. If the gauge stays high or fans run constantly, the thermostat could be failing. Confirm there are no leaks or other cooling-system issues before replacing.
Common signs include overheating, a heater that won’t warm up, and erratic temperature readings. If the gauge stays high, you may have a thermostat issue.
Do I need to flush coolant before replacing the thermostat?
Flushing isn’t always required, but it’s a good opportunity to clear sediment and contaminants. If you’re already draining coolant, consider a quick flush before installing the new thermostat to improve cooling efficiency.
A quick coolant flush is optional but helpful if you’re already draining the system.
Can I reuse the old gasket with a new thermostat?
It is generally best to use a new gasket. Reusing a gasket can lead to leaks if the surface isn’t perfectly clean or if the gasket has become warped or damaged during removal.
Usually you should replace the gasket to prevent leaks.
How can I tell if the thermostat is stuck open or closed?
A thermostat stuck closed typically causes overheating, while one stuck open causes the engine to run cooler than normal. If you notice persistent overheating or abnormally cool readings, inspect the thermostat for sticking or spring failure.
If the engine overheats, the thermostat may be stuck closed; if it stays cool, it could be stuck open.
What tools are essential for this replacement?
You’ll need a basic socket set, screwdrivers, a coolant catch basin, and fresh coolant with a new thermostat gasket. A torque wrench is optional but helpful for proper bolt torque.
A socket set, screwdrivers, a coolant catch basin, and fresh coolant are essential.
Is this repair suitable for a beginner with basic hand tools?
Yes, with careful planning and patience. Follow the steps, use the torque specs, and avoid forcing parts. If you feel unsure at any point, pause and consult the service manual or a professional.
It’s doable for beginners with time and careful attention, but don’t rush.
Watch Video
What to Remember
- Identify symptoms before replacing to avoid unnecessary parts.
- Follow orientation marks on the new thermostat for proper seating.
- Bleed the cooling system to prevent air pockets that cause overheating.
- Check for leaks after the engine reaches operating temperature.