Thermostat for Hot Water Heater: Install, Program, and Save
Learn how to choose, install, and program a thermostat for hot water heater to save energy and prevent scalding. This guide covers compatibility, wiring basics, safe temperature settings, troubleshooting, and maintenance.

Goal: optimize hot water with a thermostat for hot water heater to save energy and prevent scalding. This quick guide shows how to verify compatibility with your water heater, install a compatible thermostat, wire it correctly, and set safe temperatures. You’ll learn safety checks, common wiring scenarios, and troubleshooting tips.
Why a thermostat matters for hot water heater
According to Thermostat Care, heating water is a major energy draw in many homes, and a well-chosen thermostat for hot water heater can make a noticeable difference in comfort and bills. The Thermostat Care team found that properly controlling water temperature reduces energy waste, lowers standby losses, and helps prevent accidental scalding. In practice, a thermostat keeps the water at a steady, safe temperature across daily use, from showers to laundry. This is true for electric and gas water heaters alike, whether you have a traditional tank or a modern tankless model. If you haven’t touched the temperature controls in years, you’re likely leaving energy on the table and risking unsafe hot spots. Implementing a dedicated thermostat is a practical upgrade for most households, especially where kids, seniors, or frequent guests are present.
The block emphasizes why this upgrade matters, what outcomes to expect, and how it ties into safety and energy savings for typical homes.
Tools & Materials
- Replacement thermostat compatible with your water heater(Check electrical rating (voltage, amperage) and compatibility with tank vs tankless systems.)
- Non-contact voltage tester(Ensure power is off before handling any wiring.)
- Screwdrivers (Phillips and flathead)(For removing panels and securing terminals.)
- Wire nuts/connectors(For safe, code-compliant wire joins.)
- Electrical tape(Seal and insulate connections as needed.)
- Wire stripper/cliers(Helpful for clean wire preparation.)
- Labeling materials (masking tape, marker)(Label wires to avoid miswiring when reconnecting.)
- Safety gloves(Protect hands during work.)
Steps
Estimated time: 60-90 minutes
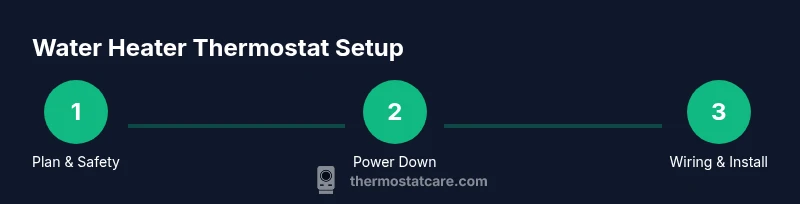
- 1
Power down and verify
Turn off the circuit breaker that supplies the water heater and switch off any local power switch if present. Use a non-contact voltage tester to confirm no current is present at the thermostat terminals before you touch wiring.
Tip: Double-check the main breaker panel and give the unit a few minutes to cool if it was recently in use. - 2
Access and inspect the old thermostat
Remove the access panel on the water heater and locate the existing thermostat or control. Take a photo of the wiring configuration before disconnecting anything so you can reference it when wiring the new thermostat.
Tip: Label each wire with tape as you detach to prevent mix-ups. - 3
Disconnect old wiring
Carefully disconnect wires from the old thermostat. Note which wire color or terminal matches each lead. Keep the wires organized to avoid confusion during reassignment to the new thermostat.
Tip: If a wire is stuck, don’t yank—use a small amount of needle-nose pliers and heat to loosen. - 4
Prepare the new thermostat
If required, trim wires to a clean length and strip insulation if needed. Read the installation guide for the new thermostat to identify the correct terminal layout and wiring sequence.
Tip: Some units require diagrammed wiring; keep the manual handy for reference. - 5
Connect the new thermostat
Attach each conductor to the corresponding terminal on the new thermostat as per the manufacturer’s diagram. Secure connections firmly, then use wire nuts or built-in connectors as appropriate.
Tip: Avoid over-tightening screws which can damage conductors. - 6
Mount and seal
Mount the thermostat in its enclosure or on the panel, reattach the cover, and ensure there are no loose wires. Replace the access panel on the water heater and secure all fasteners.
Tip: Check that the device is not touching hot surfaces and that vent clearance is maintained. - 7
Restore power and test
Turn the breaker back on and run hot water from a faucet to validate operation. Observe the new thermostat for proper cycling and confirm the water reaches the set temperature.
Tip: Wait a few minutes for the water to stabilize at the new temperature.
Questions & Answers
What is a thermostat for hot water heater, and do I need one?
A thermostat for a hot water heater helps regulate the tank’s temperature, improving comfort and efficiency while reducing scald risks. It’s especially beneficial for homes with children or seniors, and for both electric and gas systems when the tank is older or less consistent.
A water heater thermostat keeps your water at a safe, steady temperature and can save energy. If your home uses hot water frequently, this upgrade is worth considering.
What temperature should I set the water heater to?
A common safe and energy-conscious setting is around 120°F (49°C). This temperature reduces scald risk while providing comfortable hot water for most tasks. If you have very high hot water demand or vulnerable occupants, you may adjust within a safe range.
Many households find 120 degrees Fahrenheit to be a good balance of safety and comfort.
Can I install a thermostat myself, or should I hire a pro?
DIY installation is possible for straightforward electric or simple gas setups with clear wiring diagrams. If you’re unsure about wiring, electrical codes, or gas connections, hire a licensed electrician or plumber to ensure safe and compliant work.
If you’re not comfortable with wiring or gas systems, it’s best to hire a professional.
Will installing a thermostat affect my water heater warranty?
Installing a thermostat may affect warranties if it alters factory wiring or components beyond the allowed modifications. Check your water heater’s warranty terms and the thermostat’s compatibility before starting the project.
Review warranty terms; improper installation can sometimes void coverage.
What are common signs the thermostat needs replacement?
Frequent temperature fluctuations, inconsistent hot water, tripped breakers, or audible buzzing can indicate a failing thermostat. If replacement doesn’t restore stable temperatures, consult a professional.
If your water doesn’t stay hot consistently, a thermostat issue is a common culprit.
Are there safety tips I should follow during installation?
Always shut off power before working, use insulated tools, and don’t bypass safety devices. If you smell gas, hear hissing, or notice unusual flames, stop and call a professional.
Safety first: power off, insulate your work area, and call a pro if anything seems unsafe.
Watch Video
What to Remember
- Verify compatibility before installing a new thermostat
- Set a safe, energy-saving water temperature (around 120°F)
- Follow wiring diagrams precisely to avoid safety risks
- Test system thoroughly after installation
- When in doubt, consult a licensed professional