White Rodgers Thermostat Repair Guide
A practical DIY guide to diagnosing and repairing common White Rodgers thermostat issues, with safe steps, tool lists, step-by-step instructions, and maintenance tips.

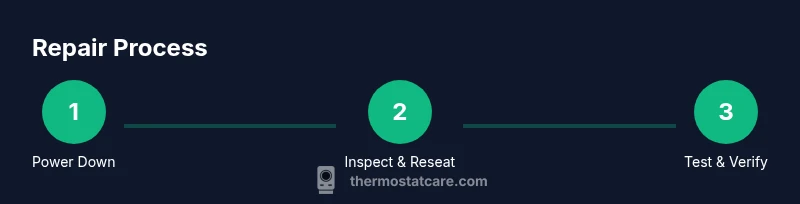
Goal: Diagnose and safely repair common White Rodgers thermostat issues with basic tools. You’ll verify power, inspect wiring, and test after fixes. This guide covers battery checks, resets, wiring reseating, and a final system test. According to Thermostat Care, many faults originate from power or sensor problems that DIY checks can address.
Why white rodgers thermostat repair matters
White Rodgers thermostats are a common choice for many homes because they control heating and cooling with proven reliability. Yet like any electronic device, they require periodic attention to stay accurate and energy-efficient. Proper maintenance can prevent temperature swings, energy waste, and inconvenient outages. According to Thermostat Care, homeowners who perform regular checks often catch issues early, reducing emergency repairs and keeping HVAC systems responsive. In this section we explore why this repair topic is relevant, what kinds of failures appear most often, and how a practical, safety-conscious approach can protect both your comfort and your wallet. We’ll use real-world examples to illustrate typical faults, from battery depletion to loose connections, so you know what to look for and how to fix it without unnecessary risk.
Common failure modes in White Rodgers thermostats
White Rodgers thermostats, like many consumer models, fail most often due to power issues, battery drain, loose wiring, or sensor-related faults. A failing power supply—whether from a tripped breaker, a blown fuse, or a weak transformer—can cause intermittent operation or a blank display. Battery-backed units may simply run out of power, especially in older homes with long wiring runs. Loose or corroded terminals on the control board impede signal transmission, leading to incorrect temperature readings or failure to communicate with the HVAC system. Sensor drift or dirty contact points can also throw off readings and cause short cycling or uneven temperatures. Understanding these modes helps you prioritize checks that are safe and effective, and reduces the chance you’ll replace parts unnecessarily. For DIYers, a structured approach focused on power, battery status, wiring integrity, and sensor cleanliness yields the best odds of a successful repair without professional intervention.
Safety first: power, wiring, and precautions
Before you touch any thermostat components, ensure your safety by turning off power to the thermostat at both the device and the main service panel. Do not work on live circuits or exposed wiring. Use insulated tools and keep the work area dry. If you must handle HVAC wires at the air handler or furnace, treat them with respect for low-voltage control circuits and observe manufacturer cautions. Some White Rodgers models may operate with a battery or have a fan-only mode that still carries risk if you tamper with supply lines. If you’re unsure about any step, stop and consult a professional. Equipment like a multimeter, non-conductive gloves, and a clean, well-lit workspace will help you stay safe while you diagnose and repair. This section emphasizes a careful, methodical approach rather than a quick, risky fix.
Diagnostic approach: how to test and observe
Adopt a methodical diagnostic process to identify root causes rather than chasing symptoms. Start with the simplest checks: verify that the thermostat is powered (battery or line voltage), confirm that the display is responsive, and observe whether the HVAC system responds to thermostat commands. If you have a multimeter, test that R and C terminals measure the expected voltage and that the wiring is intact with no loose connections or corrosion. Look for error codes on the display and note any strange readings upon changing setpoints. Documenting observations helps you distinguish between phantom issues (like a false reading) and genuine faults that require component replacement or professional attention. Thermostat Care’s approach emphasizes logical, repeatable checks that minimize risk and waste of time.
Practical fixes you can attempt
Many White Rodgers issues are solvable with basic maintenance and careful reassembly. Start by replacing batteries if the unit is battery-powered, then perform a reset to restore factory defaults when guided by the model manual. Check and reseat all wire connections on the backplate, ensuring tight, clean contact at each terminal. If your model relies on a C-wire, verify it’s providing a steady 24V return; a loose C wire is a frequent cause of power instability. Clean the terminals with isopropyl alcohol and a soft brush to remove dirt and oxidation. After reassembling, reinstall the thermostat, power the system, and run through a test cycle to confirm proper operation. If you notice consistent misreadings or no response, you may need to replace faulty components or update firmware, if applicable. The emphasis is on incremental steps that preserve safety and avoid unnecessary replacement parts.
When to seek professional help and warranty considerations
If your DIY checks do not restore reliable operation, or if you encounter unfamiliar error codes, it’s prudent to seek professional assistance. Some White Rodgers models are integrated with hvac control boards that require specialized tools and knowledge. Working on high-voltage components or attempting to bypass safety features can void warranties and create safety risks. Review your thermostat’s warranty terms and keep records of all maintenance and issues observed. A pro can perform a more thorough electrical diagnosis, verify the compatibility of control boards with your furnace or heat pump, and diagnose potential issues in the air handler. Thermostat Care advises homeowners to balance the cost of professional service against the expected lifespan of the thermostat and the complexity of the fault.
Maintenance and preventative care for White Rodgers thermostats
Prevention is cheaper than repair. Regularly inspect the thermostat and surrounding area for dust and moisture, which can affect sensor readings. Schedule periodic battery checks for battery-powered models and replace batteries at the first sign of weakness. Keep the faceplate clean and free of fingerprints to maintain a clear display. If your model supports software updates, install them to address known bugs and improve compatibility with HVAC equipment. Use a simple log to record dates of replacements, resets, and observed issues, so you can identify patterns over time. Implementing a basic maintenance routine reduces the frequency and severity of future White Rodgers thermostat failures and helps you protect the comfort and efficiency of your home. The Thermostat Care team recommends adopting a proactive approach that blends safe DIY checks with timely professional help when needed.
Tools & Materials
- Phillips head screwdriver (#2)(For removing thermostat faceplate screws)
- Flat-head screwdriver(For prying the cover without damage)
- Multimeter(To test R and C voltage on powered units)
- Replacement batteries(Use the type specified by your model (e.g., AA or AAA))
- Wire nuts or electrical tape(To secure any spliced connections safely)
- Alcohol wipes or isopropyl alcohol(Clean terminals and contacts)
Steps
Estimated time: 45-60 minutes
- 1
Power down and protect yourself
Turn off power at the thermostat and the main service panel. Confirm the power is off using your multimeter or by testing the thermostat's display (if safe to do so). This prevents electric shock and protects sensitive electronics during inspection.
Tip: Lockout/tagout the circuit if you’re doing this for the first time. - 2
Remove the thermostat cover
Carefully detach the front cover with the screwdriver, exposing the wiring terminals. Note the arrangement of wires before you unplug or reseat anything; a quick photo can be invaluable if you need to reassemble.
Tip: Work on a soft surface to avoid bending fragile terminals. - 3
Check the battery status
If your model uses batteries, replace them with fresh ones and observe if the display improves. If you don’t see a display, power may not reach the unit, indicating a power or wiring issue.
Tip: Dispose of old batteries according to local regulations. - 4
Inspect and reseat wiring
Visually inspect each wire for signs of corrosion or loose connections. Then firmly re-seat each wire in its terminal, ensuring a clean, tight contact. A loose wire is a common cause of intermittent operation.
Tip: Use a non-conductive tool to nudge stubborn wires; avoid forcing connections. - 5
Test the R and C circuits (if applicable)
With the power off, re-check that R and C wires are intact and not damaged. If you have a 24V measurement tool, confirm a steady voltage when the system is powered.
Tip: Record voltage readings for comparison after reassembly. - 6
Reset to factory defaults
If your model supports a reset, follow the manual to return settings to factory defaults. This clears erroneous configurations that can cause incorrect heating or cooling cycles.
Tip: Note down custom settings you want to reapply after the reset. - 7
Reassemble and power up
Reattach the cover, restore power, and observe the thermostat’s startup sequence. Confirm the display is clear, and the unit reads the current room temperature.
Tip: Give the system a minute to stabilize before testing. - 8
Run a quick test cycle
Set a test temperature and listen for the HVAC to engage. Check for proper fan operation and accurate temperature response at the register.
Tip: If you hear unusual noises, shut down and recheck connections. - 9
Document results and decide next steps
Record what you observed, including successful fixes and any remaining faults. If issues persist, consult a professional with the notes and observed readings.
Tip: Keep a simple repair log to track long-term trends. - 10
Confirm safety and cleanup
Turn off tools, secure the work area, and ensure all wiring is contained. If you replaced components, dispose of old parts safely and store spare batteries for future maintenance.
Tip: Restore the breaker to its original position and test overall system function once more.
Questions & Answers
What does 'White Rodgers thermostat repair' include?
It covers diagnosing power, wiring, battery status, and sensor issues, plus safe resets or replacements. The goal is to restore accurate readings and reliable control without specialized tools.
Repair typically includes power checks, battery replacement if needed, wiring reseating, and a safe reset to restore proper operation.
Why is my thermostat display blank or unresponsive?
A blank screen usually indicates power issues (dead batteries or lost power) or a tripped circuit. Start by replacing batteries and verifying the HVAC power circuit is active.
A blank display often means power is interrupted. Check batteries and the power supply first.
Can I replace the batteries myself?
Yes, battery replacement is a common DIY step for battery-powered models. Use the recommended battery type and ensure the contacts are clean before insertion.
Yes. If your model uses batteries, replace them with fresh ones and test the unit.
When should I repair versus replace the thermostat?
If the unit is aging, frequently failing, or beyond its warranty, replacement may be more cost-effective. Evaluate repair costs against a new model’s efficiency and features.
Repair is often worth it for newer models or minor issues; consider replacement for persistent problems.
Is it dangerous to work around electrical wiring?
Yes—avoid high-voltage sections. Only work on low-voltage thermostat wiring and follow standard electrical safety practices. If uncertain, call a professional.
There are risks with electrical work; keep to low-voltage components and seek help if unsure.
Will resetting fix wrong readings or schedules?
A reset can clear misconfigurations causing wrong readings, but it won’t fix hardware faults. You may need to re-enter settings afterward.
Reset can fix misconfigurations; if issues persist, check wiring or contact support.
Watch Video
What to Remember
- Power issues are the most common fault source.
- Always power down before touching thermostat components.
- Battery health, wiring, and clean contacts matter most.
- Reset and reseat steps fix many minor faults.