Which Wire in Thermostat Is Heat: A Practical Guide
Learn how to identify the heat wire in a thermostat, including standard W terminal (white wire), AUX/E, and W2 for heat pumps. Safe DIY steps, plus troubleshooting tips from Thermostat Care.

Which wire in thermostat is heat? In a typical gas or electric furnace with a single-stage heat call, the white wire connected to the W terminal is the heat signal. On heat-pump systems, the heat call may appear as AUX or E (and W2 for second-stage heat), with O/B for reversing valve on some configurations. Always power down and confirm wiring against the furnace diagram.
Understanding Heat Wires Across System Types
In most homes with a traditional furnace (gas or electric), the heat signal is carried by the white wire on the W terminal. The thermostat uses this wire to request heat from the furnace when the user sets a heat demand. If your system is powered by a heat pump, the heat signal may be labeled AUX, E, W2, or similar, depending on the staging. It's crucial to verify the exact wiring against your furnace control board and the thermostat manual since color coding can vary between manufacturers. The Thermostat Care team has found that relying on color alone often leads to incorrect assumptions. Always power off the system before inspecting wires, and use the furnace label or wiring diagram to confirm which terminal controls heat.
Reading the W Terminal and Color Codes Safely
The most common color for the heat wire is white, but color schemes are not universal. Some manufacturers use different colors or may reuse white on other functions. To identify heat, locate the W terminal on your thermostat base and trace the connected wire back to the furnace. If you see a white wire on W, that is your heat call in a standard setup. For heat pumps, you may see AUX or E wires; W2 indicates second-stage heat, if present. Always label the wires with tape after you disconnect them so you can restore the correct configuration.
Special Cases: Heat Pumps, Aux, and Multi-Stage Heating
On heat-pump systems, the heat call may be split between AUX/E and W2 depending on season and stage. The O/B terminal is used for the reversing valve, not heat, and should not be confused with W or AUX. If your thermostat shows W2, W1, or AUX/E, you are dealing with multi-stage heat. In some modern systems, the heat call might be integrated into a single W terminal, while the outdoor unit and internal furnace both respond via the same line. In all cases, consult the equipment manuals and verify at the control board before making any changes.
Safety First: How to Verify Heat Wire Without Risk
Before touching any wires, switch off power at the thermostat and at the HVAC disconnect or breaker. Use a low-voltage tester or multimeter to confirm there is no live voltage on the conductor you will handle. If a screw terminal is loose, tighten it securely and ensure there is no corrosion. If you are unsure about the wiring configuration, pause and contact a professional. The goal is to avoid miswiring that could cause the furnace to run unexpectedly or a short circuit. Authority sources within this guide come from standard electrical safety practices and thermostat manuals.
Tools & Materials
- Flathead screwdriver(for screw terminals)
- Phillips screwdriver #2(for mounting and terminal screws)
- Digital multimeter(to verify voltage and continuity)
- Non-contact voltage tester(safety check for live conductors)
- Wire stripper/c cutter(strip insulation cleanly for testing)
- Electrical tape(label wires and insulate connections)
- Extra thermostat wiring(spare length ~6 inches if replacement needed)
Steps
Estimated time: 30-60 minutes
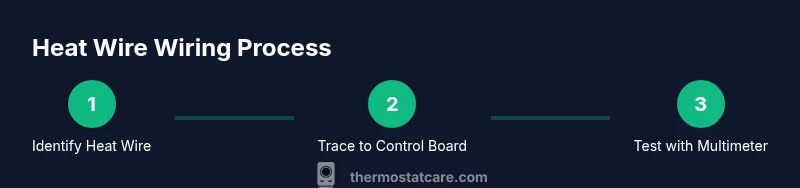
- 1
Power down and verify safety
Turn off power at the thermostat and at the HVAC disconnect or main breaker. Use a non-contact tester or multimeter set to AC voltage to confirm there is no live current on exposed wires. This prevents electric shock and equipment damage during inspection.
Tip: Double-check both the thermostat and the furnace disconnect before touching any wire. - 2
Remove the thermostat cover and document wiring
Carefully remove the thermostat faceplate. Take a clear photo of the terminal block and each connected wire. Label each wire with its terminal (R, C, W, Y, G, etc.) using masking tape so you can restore wiring accurately later.
Tip: Labeling keeps you from mixing up wires if you disconnect multiple conductors. - 3
Identify the heat wire at the thermostat
Examine the W terminal and the wire attached to it. If W is occupied by white, that’s typically the heat call in a conventional system. If you see AUX/E or W2, your system uses auxiliary heat or second-stage heat. If there is no W connection, cross-check your manual for the appropriate terminal.
Tip: If uncertain, don’t assume the color; verify with the furnace wiring diagram. - 4
Trace the heat wire to the furnace control board
Follow the identified wire from the thermostat into the furnace cabinet and locate the corresponding terminal on the control board (W, AUX, or W2). Note any differences between the thermostat label and the board labeling.
Tip: Use a flashlight and work slowly to avoid disturbing adjacent wires. - 5
Test continuity or voltage to confirm heat signal
With power still off, set the multimeter to a low-voltage AC setting (around 24V). Measure between R and the heat terminal (W/AUX/W2) to confirm a recognizable circuit when heat is commanded. If the reading is absent or unexpected, reassess wiring.
Tip: Do not attempt continuity checks on live circuits; confirm power is off first. - 6
Reconnect, power up, and test heat function
Reconnect wires to their labeled terminals, reattach the thermostat cover, and restore power. Set the thermostat to heat and observe whether the furnace or heat pump engages correctly. If it doesn’t, re-check connections or consult a professional.
Tip: Keep a photo of the original wiring in case you need to revert changes.
Questions & Answers
Which wire in a thermostat is used for heating in a single-stage furnace?
For most homes with a standard furnace, the white wire on the W terminal is the heat call. If you have a heat pump, the heat call may be AUX or E, and W2 may indicate second-stage heat. Always confirm with the furnace diagram.
The white wire on W is typically the heat call for single-stage systems; heat pumps may use AUX or E, and W2 for second-stage heat.
Can I rely on wire color to identify the heat wire?
Color coding is not universal. Do not rely on color alone. Always verify by tracing the wire to the W, AUX, or W2 terminal on both the thermostat and the furnace control board.
Color alone isn’t reliable. Verify by tracing to the correct terminal on both ends.
What if there is no W terminal on my thermostat?
Some thermostats use different labels or the heat call is integrated into another terminal. Check the manual for your system; if necessary, consult an HVAC professional to avoid miswiring.
If there’s no W, check your thermostat manual and your system type; consider a pro if you’re unsure.
Is it safe to test wires with a multimeter after powering down?
Yes, but only after power is off. Use the multimeter on the correct setting (AC 24V) and avoid touching exposed conductors.
Yes—only with power off, and use the correct AC setting while keeping hands clear of wires.
Should I hire a professional to identify the heat wire?
If you’re unsure about wiring or dealing with a heat pump, it’s safer to consult an HVAC technician to prevent damage or safety risks.
If you’re unsure, it’s best to consult a professional.
What if heat doesn’t function after re-wiring?
Recheck all connections, ensuring R is linked to R and W to W (or AUX/W2 for heat pumps). Confirm the thermostat and furnace settings, then test again.
Double-check the wiring and settings; if it still fails, consider a pro.
Watch Video
What to Remember
- Identify the heat wire on the W terminal first and verify with the furnace label.
- Don’t rely solely on color codes; use terminal labels and equipment manuals.
- Heat pumps require recognizing AUX/E and W2 distinctions for accurate wiring.
- Always power down and document wiring before making any changes.