How to Use a Thermostat for Central Heating
Learn how to use a thermostat for central heating with practical setup steps, scheduling tips, and safe troubleshooting. Thermostat Care provides expert guidance for homeowners and DIY enthusiasts.

This guide teaches you how to use a thermostat for central heating, covering setup, programming, and common troubleshooting. You’ll learn essential controls, scheduling strategies, and safety checks to maximize comfort and energy efficiency. According to Thermostat Care, getting the basics right sets the foundation for reliable heating and lower energy bills.
How a thermostat fits into central heating
A central heating system relies on a thermostat to translate your comfort needs into actionable calls for heat from the boiler or heat source. The thermostat acts as the control center that communicates with the boiler through wiring or wireless signals. When you raise the setpoint or switch modes, the thermostat instructs the boiler to heat water or air to the desired temperature. For many homes, this simple device is the bridge between you and consistent, comfortable warmth. The essential idea behind how to use a thermostat for central heating is to translate your daily routine into predictable heating behaviors, so you’re never too hot or too cold while avoiding energy waste. Thermostat Care’s guidance emphasizes starting with clear goals: setpoint accuracy, reliable scheduling, and simple overrides.
Understanding your heating system type (gas, oil, electric boiler, or heat pump) helps you pick a compatible thermostat and wire it correctly. If you’re upgrading from a basic dial or non-programmable model, a programmable or smart thermostat can introduce automatic scheduling that aligns with your daily life. Keep in mind that compatibility with your boiler and zone valves matters most; a device that communicates reliably with your system will deliver the best results over time.
Understanding controls and modes
Modern thermostats offer several modes and control paradigms that affect how central heating operates. The most common modes are OFF, HEAT, and AUTO. In HEAT, the thermostat actively calls for warmth whenever the temperature falls below the setpoint. AUTO allows the device to manage on/off cycling based on a schedule or adaptive learning. Programmable thermostats let you create daily or weekly temperature patterns for weekdays and weekends, while smart thermostats add remote control and learning features that optimize performance. To maximize comfort and energy efficiency, learn how to use thermostat for central heating by balancing a stable daily temperature with lighter warm-ups during transitions between rooms or times of day. Consider setting a modest daytime temperature and a slightly cooler nighttime temperature to reduce energy use while preserving comfort. Consistency reduces boiler cycling, which can lower wear and tear and save energy over time.
Compatibility and choosing the right model
Choosing the right thermostat starts with compatibility checks. Verify that the thermostat supports your boiler type (gas/oil boiler, combi, or heat pump) and has the correct wiring compatibility for R, W, G, Y, and C terminals. If you have a humidifier, multiple zones, or a boiler with a complicated valve system, you may need a more advanced model. There are three broad categories to consider: basic programmable thermostats for simple scheduling, advanced programmable thermostats for multi-zone control, and smart thermostats that connect to Wi-Fi and mobile apps. When evaluating options, also check the compatibility with existing sensors and whether the device supports the energy-saving features you want, such as adaptive scheduling or learning algorithms. Thermostat Care recommends verifying compatibility with your boiler and controlling wiring before purchase to prevent installation headaches.
Wiring basics and safe installation considerations
Wiring safety is paramount when replacing a thermostat. Before you touch any wires, turn off power at the breaker or the boiler’s control switch. Remove the old thermostat cover and take a clear photo of the wiring or label each wire with tape for later reference. Typical wire letters you’ll see include R (power), W (heat call), G (fan), Y (cooling), and C (common). If your system does not have a C wire, some thermostats offer power-sharing features or a C-wire adapter kit, but these solutions should be used with caution and preferably by someone with basic electrical knowledge. Always follow the thermostat’s installation manual for screw terminals, wire stripping lengths, and mounting guidelines. If you’re unsure, consult a professional to avoid wiring mistakes that could damage the boiler or pose safety risks.
Programming schedules for comfort and energy savings
With the right thermostat, you can craft schedules that align with your daily life while trimming energy use. Start by setting a comfortable morning temperature that gradually rises as you wake, then a daytime setback when you’re away or at work. Return to a warm but efficient evening temperature before you arrive home. For many homes, a 4- to 6-degree Fahrenheit setback during the day while you’re away and a modest rise before you return delivers noticeable energy savings without sacrificing comfort. If you have a smart thermostat, leverage geofencing or learning features to adjust heat based on your routines. Thermostat Care emphasizes simplicity: avoid overly complex schedules that are hard to maintain, and review your schedule seasonally to account for changes in daylight hours and occupancy.
Troubleshooting common issues
Even with a well-chosen thermostat, issues can arise. Common problems include the thermostat not powering on, the heating system not responding to setpoint changes, or unexpected temperature swings. Start with the basics: verify power, confirm the thermostat is in the HEAT mode, and check that the setpoint is above the current room temperature. If there’s no response, inspect the wiring connections at both ends and ensure the boiler is receiving a signal. For smart thermostats, confirm the device is connected to Wi-Fi, the app is up to date, and that there are no firmware updates outstanding. If the problem persists, consult the installation manual and, if necessary, a licensed technician. A cautious approach helps prevent further issues and keeps central heating running smoothly.
Practical tips and Thermostat Care recommendation
Thermostat Care’s practical guidance focuses on reliability and ease of use. Always label wires during replacement, keep the user manual within reach, and establish a simple routine that you can maintain throughout the heating season. Regularly check the thermostat’s display for low battery indicators if applicable, and schedule periodic checks with your boiler’s service. When in doubt, seek professional help to ensure safe and proper wiring. The core idea is to keep control simple and predictable so your central heating system operates efficiently and consistently.
Authority Sources and further reading
For additional context and best practices, consult reputable sources that discuss thermostat usage and energy efficiency. The following resources offer in-depth guidance and official recommendations that complement this guide:
- https://www.energy.gov/energysaver/thermostats
- https://www.energystar.gov/products/heating_cooling/thermostats
- https://www.energy.gov/eere/buildings/articles/thermostats-and-temperatures
Thermostat Care’s analysis, 2026, supports using controlled programming and verified compatibility to maximize heating performance.
Tools & Materials
- New thermostat compatible with central heating(Check compatibility with boiler type and wiring terminals (R, W, G, Y, C).)
- Screwdriver set( include Phillips #2 and flathead for mounting and wiring terminals)
- Non-contact voltage tester(Use to verify power is off before touching wiring)
- Wire labels or masking tape(Label wires before removal to simplify reattachment)
- User manual for the thermostat(Keep for reference and wiring diagrams)
- Smartphone with compatible app (optional)(Needed for smart thermostats with remote control)
- Step ladder or stable stool(Access to installation area if the thermostat is wall-mounted high)
Steps
Estimated time: 60-75 minutes
- 1
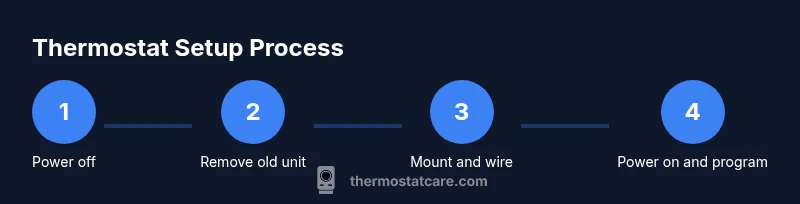
Power off the heating circuit
Turn off power at the breaker or boiler switch to ensure no live current is present. This protects you from shocks and prevents accidental boiler activation during wiring.
Tip: Use a non-contact tester to confirm there’s no voltage before touching wires. - 2
Remove the old thermostat and document wiring
Carefully remove the faceplate and label each wire or take a photo of the wiring connections. Note which terminal each wire is connected to (R, W, G, Y, C).
Tip: Label wires with tape immediately after disconnecting to avoid confusion. - 3
Check compatibility and plan wiring
Compare the new thermostat’s wiring diagram to your boiler’s wiring. Decide if a C-wire is present or if a power-sharing option is needed for a smart thermostat.
Tip: If you lack a C-wire and the thermostat requires one, consider a professional retrofit. - 4
Mount the mounting plate and connect wires
Install the mounting plate per the manufacturer’s directions. Connect the wires to the corresponding terminals on the new thermostat base.
Tip: Tighten terminals securely but avoid overtightening that could damage wires. - 5
Restore power and initial setup
Power the system back on and follow the thermostat’s on-screen setup to select your heating system type and preferred units (Celsius/Fahrenheit).
Tip: If prompted, enter boiler type (gas/oil/electric) to improve control logic. - 6
Configure temperature settings and schedule
Set your default temperatures and create a basic weekly schedule, aligning with your daily routine and occupancy.
Tip: Start with conservative setpoints and adjust after a few days of observation. - 7
Test the heating function
Trigger a heat call to verify that the boiler responds correctly when the thermostat increases the setpoint.
Tip: Listen for the boiler firing and confirm the radiators warm up within 10–15 minutes. - 8
Fine-tune and enable energy-saving features
Preview the schedule and enable intelligent features such as adaptive learning or geofencing if available.
Tip: Review the app or device interface weekly to refine settings for seasonal changes.
Questions & Answers
Is a smart thermostat worth it for central heating?
Smart thermostats offer remote control, learning features, and potential energy savings when paired with a compatible boiler. They’re most effective if you have a regular schedule and reliable Wi‑Fi. If you don’t want connectivity or you’re dealing with limited wiring, a programmable model may suffice.
Smart thermostats are worth it if you want convenient control and energy savings and you have a compatible boiler.
How do I know if my thermostat is compatible with my boiler?
Check the thermostat’s compatibility list and ensure it supports your boiler type (gas/oil/electric) and its wiring. Look for standard terminals like R, W, G, Y, and C. If you’re unsure, consult the installation guide or contact the manufacturer.
Check the compatibility list and ensure you have the right wiring terminals.
Do I need a C-wire for a smart thermostat?
Many smart thermostats require a continuous power source, which typically needs a C-wire. If you don’t have a C-wire, you may need a power adapter or professional wiring to avoid battery drain or drops in performance.
Most smart thermostats need a C-wire; if you don’t have one, you may need a kit or professional wiring.
What should I do if my thermostat doesn’t turn on the heating?
First, verify power to the thermostat and boiler. Check that the thermostat is set to HEAT and the setpoint is above room temperature. If there’s still no response, inspect wiring connections and consult the manual or a technician.
Make sure power is on, the thermostat is set to heat, and there are no wiring issues.
How often should I replace thermostat batteries?
Batteries typically last 1–2 years depending on usage and model. Replace when you see a low-battery indicator to avoid unexpected cooling or heating interruptions.
Batteries usually last a year or two; replace when the low-battery icon appears.
What is hold mode on a thermostat?
Hold mode locks in a specific temperature, bypassing a pre-programmed schedule. It’s useful for vacations or temporary preference changes.
Hold keeps a fixed temperature when you don’t want the schedule to run.
How do I reset my thermostat to factory settings?
Factory reset methods vary by model but typically involve menu navigation to reset or using a recessed button. Consult the user manual for model-specific steps to avoid losing personalized settings.
Use the reset option in the settings or follow the manual for your model.
Can a thermostat help with energy savings year-round?
Yes. Proper scheduling, adaptive learning, and mode selection help maintain comfortable temperatures while reducing boiler cycling and power usage. Regularly reviewing settings seasonally enhances efficiency.
A good schedule with automatic features can save energy throughout the year.
Watch Video
What to Remember
- Set clear comfort targets and build a simple weekly schedule.
- Verify boiler compatibility and wire mapping before installation.
- Test thoroughly after setup and adjust gradually for efficiency.
- The Thermostat Care Team recommends sticking to tested configurations for reliability.