How to Know When Your Thermostat Opens
Learn how to determine when your thermostat opens to call for heat or cooling. This step-by-step guide covers definitions, signs, safe testing, and troubleshooting for homeowners and DIY enthusiasts.

Knowing when the thermostat opens means confirming when the thermostat's switch/relay breaks or completes a circuit to energize or de-energize the HVAC. You can observe system behavior, compare setpoints to room temperature, and verify the control path with a multimeter during a call for heat or cooling. This guide provides safe testing steps and clear indicators.
What does it mean when a thermostat opens?
According to Thermostat Care, recognizing when the thermostat opens begins with mapping the signal path from the thermostat to the equipment. The Thermostat Care team found that many homeowners confuse an 'open' call with audible startup, so they misinterpret when the system actually begins heating or cooling. In HVAC terms, an 'open' state breaks a circuit, ending a call for heat or cool, while a 'closed' state completes a circuit to initiate the call. Understanding this distinction helps you diagnose where a problem lies—whether in the thermostat, wiring, or the equipment itself. This knowledge also clarifies why a system might not respond even when the display shows a setpoint that seems to require action. By thinking in terms of circuit continuity, you can reason about failures more effectively and plan safe checks.
How thermostats signal the HVAC to start
Most residential thermostats operate on a 24-volt control circuit. When the thermostat closes the R (power) path to a load terminal like W (heat), Y (cool), or G (fan), it completes the circuit and triggers the corresponding equipment. When the room temperature reaches or exceeds the setpoint, the thermostat opens the circuit to stop the call. Electronic thermostats may use solid-state relays, while mechanical thermostats rely on a bi-metallic strip that bends with temperature. Either way, the essential concept is the same: the thermostat makes or breaks a path that energizes the furnace, air conditioner, or heat pump.
Visual and audible clues that the thermostat has opened
You can often tell a call is ending or has ended by several signs: a click from the relay inside the thermostat or the control board, a brief pause in the furnace or AC, or the fan stopping shortly after the setpoint is reached. The thermostat’s display may show the room temperature rising toward the setpoint, then stabilize as the circuit opens. If you hear a familiar relay click when the system starts or stops, that’s a strong indicator that the thermostat is actively opening and closing a circuit. Keep in mind that some systems will run the fan independently of the heating or cooling call, which can mask what’s happening at the thermostat.
Safe electrical testing: using a multimeter to verify the switch
Electrical testing should be done with caution. Start by powering off the system at the breaker to avoid shock. Remove the thermostat cover and carefully document which wires connect to which terminals. For a low-voltage 24V circuit, you can measure continuity across the control circuit when the thermostat is in the calling state (heat or cool) and compare it to the open state. If comfortable, set the thermostat to call for heat, power the system, and use a multimeter to check for voltage across R and W; a closed call should show voltage present while the thermostat is calling. If you don’t see the expected behavior, the issue may lie in wiring or the HVAC relay rather than the thermostat itself.
Interpreting thermostat readings: setpoint vs actual
A common source of confusion is the difference between the thermostat’s setpoint and the actual room temperature. The thermostat opens when the actual temperature meets or surpasses the setpoint for cooling, or when it rises above the setpoint for heating, depending on the mode. Some thermostats display both the current room temperature and the target setpoint, while others show a single value. In electronic models, the user interface may blink or show a status indicator to reflect a calling state. Interpreting these readings alongside the wiring and relay status helps pinpoint where the signal path may fail.
Understanding different technologies: mechanical bi-metal vs electronic sensors
Mechanical thermostats rely on a bi-metal strip that bends with heat to open or close contacts, while electronic thermostats use solid-state sensors and relays. The mechanical design may feel slower or have more drift over time, whereas electronic thermostats can provide faster, more precise control but rely on internal power and sensor calibration. Knowing which technology your unit uses helps you interpret test results and anticipate common failure modes, such as contact pitting in mechanical units or sensor drift in electronic models.
Hydronic heating and valve opens
Some homes use hydronic boilers with zone valves, where opening a valve (or energizing a circulator) is the equivalent of calling for heat. In these systems, the thermostat may open a wireless or wired circuit that energizes a valve actuator. If the valve fails to open, you may still hear a furnace relay click, but the boiler won’t fire or the radiators won’t heat. Understanding whether your system uses a water-based circuit or a forced-air furnace is essential for accurate diagnosis and safe testing.
Troubleshooting checks: is it the thermostat or the system?
Isolating the thermostat from the equipment can reveal where the problem lies. Start by temporarily bypassing the thermostat only if you are qualified to do so and only for diagnostic purposes under safe conditions. A more practical approach is to test the thermostat’s calling state with the system and observe whether the circuit closes as expected when the setpoint crosses the room temperature. If the system responds to a direct connection but not through the thermostat, the thermostat or its wiring is the likely culprit. If neither responds, the issue may be with the HVAC equipment, wiring, or a fuse/cuse in the control board.
Maintenance tips to ensure accurate opens in the future
Regularly replace batteries in battery-powered thermostats and keep the thermostat clean and free of dust that can affect sensors. Check for loose terminal screws and corrosion on wire connections. Confirm that wires are firmly connected to the correct terminals and that the furnace or AC is properly wired to the thermostat. Scheduling a mid-season check with a professional can catch drift or wear in the control circuit before it becomes a larger problem.
When to call a pro and what to expect
If you’re uncomfortable with electrical testing or if the thermostat and HVAC system are not operating as expected after basic checks, it’s time to consult a professional. A licensed technician can verify wiring continuity, inspect control boards, check for 24V supply integrity, and test valve actuators or relays. They will provide a diagnostic report and discuss potential replacement parts, calibration, or thermostat upgrades that can improve accuracy and energy efficiency.
Tools & Materials
- digital multimeter (24V range)(Set for continuity/voltage as you test the thermostat circuit)
- non-contact voltage tester(Useful for a quick safety check without touching wires)
- screwdriver set (flathead + Phillips)(For removing thermostat cover and terminal screws)
- watch/clock for timing tests(To observe cycle durations and switching times)
- notepad and pen(Document readings and terminal labels)
- flashlight(Improve visibility inside the thermostat housing or furnace panel)
- insulated gloves(Optional safety gear when handling components near live terminals)
- wiring diagram/manual for your unit(Helpful to confirm terminal names and wiring colors)
Steps
Estimated time: 15-25 minutes
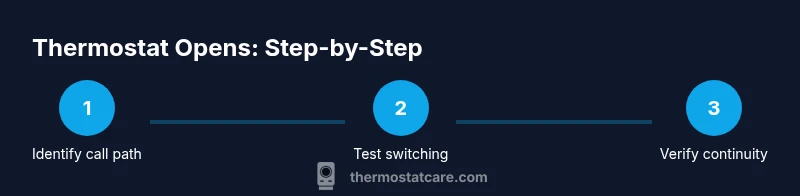
- 1
Power down safely
Switch off the HVAC circuit breaker and, if present, main power to the furnace or air handler. Verify no voltage is present with a non-contact tester before touching wires.
Tip: Always double-check power off before opening a panel. - 2
Access thermostat wiring
Remove the thermostat cover and document which wire color goes to which terminal (R, W, Y, G, C). Take a photo for reference.
Tip: Label wires if needed to avoid confusion later. - 3
Identify the call path
Note how the circuit should close when the thermostat calls for heat or cool. This is typically R to W for heat or R to Y for cooling.
Tip: If uncertain, consult the wiring diagram for your unit. - 4
Restore power and trigger a call
Reconnect power and set the thermostat to call for heat or cooling. Observe whether the system engages and the thermostat relay clicks.
Tip: Use a timer to capture the sequence and duration of the call. - 5
Test continuity with a meter
With the thermostat in the calling state, measure continuity between R and the call terminal (W/Y/G). A closed circuit should show continuity; an open circuit indicates the thermostat is not completing the call.
Tip: If you see no continuity, re-seat wires and re-test. - 6
Document results and next steps
Record which states showed proper closure and which did not. If the thermostat does not close when expected but the HVAC responds when directly wired, the thermostat or its wiring is the likely issue.
Tip: Consider replacement if the unit is old or frequently misbehaving.
Questions & Answers
What does it mean if my thermostat clicks but the system doesn't turn on?
A click usually means the relay is engaging, but if the HVAC doesn't start, the issue could be power to the furnace, a blown fuse, or a faulty relay on the control board. Verify voltage at the furnace control board and inspect fuses or breakers. If power is present but no call is reaching the equipment, re-check the thermostat wiring or consider replacing the thermostat.
If you hear a click but no startup, the issue may be with power to the furnace or a faulty relay; check the control board and wiring.
How can I tell if the thermostat is the problem and not the HVAC unit?
Isolate the thermostat by testing a known working thermostat or bypassing it for diagnostic purposes only with professional guidance. If the HVAC responds when wired directly to the power source, the thermostat or its wiring is at fault. If it still doesn't respond, the HVAC equipment or control wiring is likely the issue.
Test with a different thermostat or carefully bypass only under guidance to see if the HVAC responds.
Is it safe to test the thermostat with the cover off?
Only if you follow safety precautions: power off at the breaker, avoid touching live terminals, and use insulated tools. Many thermostats operate at low voltage, but there are risks around the control board and furnace connections. If you’re unsure, call a pro.
Only test after turning off power and with proper insulation; call a pro if unsure.
What maintenance helps ensure the thermostat opens reliably?
Regularly check wiring tightness, clean dust from the thermostat and return air pathways, replace batteries if applicable, and calibrate sensors per the user manual. Routine checks reduce drift and improve response time.
Keep wiring tight, clean dust, and calibrate sensors to improve response.
When should I replace my thermostat?
Consider replacement if the unit is older than 10-15 years, frequently misreads temperature, or lacks compatibility with your current HVAC system or smart home setup. Upgrading can improve energy efficiency and reliability.
If the thermostat is old or unreliable, upgrading can boost performance.
Watch Video
What to Remember
- Identify what opens means in your system.
- Differentiate setpoint vs actual temperature during tests.
- Use a meter to confirm circuit closure during calls.
- Know when to escalate to a professional.