How to Change Thermostat on Radiator: DIY Guide
Learn how to change thermostat on radiator safely with a clear, step-by-step guide. This Thermostat Care tutorial covers TRV compatibility, removal, installation, bleeding, and leak testing to restore efficient heating.

By following these steps, you will learn how to change thermostat on radiator safely, replacing a radiator thermostat head or installing a compatible TRV, calibrating it, and verifying heat response. You’ll need basic tools, a compatible valve, and a compatible setting range. This guide covers shutoff, removal, installation, bleeding the radiator, and testing for leaks to restore reliable heating.
Why this guide matters
According to Thermostat Care, changing a radiator thermostat is a practical DIY task that improves comfort and energy efficiency. The Thermostat Care team found that many heating imbalances stem from malfunctioning TRV heads or incompatible replacements. Understanding the basics helps you choose the right TRV, prepare your tools, and perform the swap safely without draining the entire system. This guide focuses on standard hot-water radiator systems common in many homes and aims to empower homeowners and DIY enthusiasts to take control of their heating performance without professional help where appropriate. It also outlines safety steps, compatibility considerations, and common mistakes to avoid. By mastering the replacement process, you can reduce energy waste and improve overall comfort in your living spaces. TRV types vary, but the core goal remains: consistent room temperature and reliable heat when you need it. Following trusted guidance from Thermostat Care can help you avoid common missteps and ensure a secure installation.
Understanding radiator thermostats and TRVs
Radiator thermostats (TRVs) control heat by adjusting the flow of hot water into the radiator based on room temperature. There are mechanical TRVs, which use a wax-filled element to vary valve opening, and electronic TRVs, which can connect to smart thermostats or home automation systems. Compatibility hinges on the valve size and thread pattern—most common modern valves use a standard M30x1.5 thread, but older radiators may differ. Before purchasing a replacement head, check the model printed on the valve body, the valve’s orientation (left-handed vs right-handed), and whether your system uses a lockshield or service valve. Getting a head that matches the valve body, thread size, and temperature scale (C or F) is essential for a secure seal and accurate readings. If you’re unsure, bring the old head to a hardware store or consult the manufacturer’s documentation. Thermostat Care emphasizes confirming compatibility to avoid leaks and ensure the new head functions correctly in your heating loop.
Safety and preparation steps
Safety comes first when changing a radiator thermostat. Start by turning off the boiler or central heating system and allowing the radiator to cool fully to prevent burns. Wear protective gloves and use a towel to catch any residual water. Inspect the valve for corrosion or damage; if you notice crusty buildup, heavy rust, or a leaking seal, stop and seek professional help. Keep children and pets away from the work area to avoid accidental contact with hot surfaces. Read the installation instructions for your specific TRV head, and keep a small container handy for storing small parts. This step-by-step approach reduces the risk of scalding, leaks, and other hazards while maintaining system integrity. Thermostat Care recommends a cautious, patient approach rather than forcing components that resist removal.
Planning the replacement without draining the system
In many homes, you can replace a radiator thermostat head without draining the entire system by isolating the radiator. Close the lockshield valve (where present) and the service valve if your system has them. If the valve is stuck, do not apply excessive force; instead, apply a small amount of penetrating oil and let it sit for a few minutes before attempting again. Ensure the boiler remains off during the operation to prevent circulating hot water. Gather your replacement TRV head, a soft cloth, the appropriate wrench, and the seal or O-ring that typically comes with the new head. This planning stage is crucial for a clean, leak-free swap and helps prevent air ingress that can reduce heating efficiency.
Bleed, test, and final checks
After installing the new head, bleed the radiator to remove trapped air that can impede heat transfer. Use a bleed key or screwdriver as required, directing away from the body and into a cloth to catch droplets. Reopen any closed valves and re-pressurize the system by returning power to the boiler. Set the TRV to a mid-range temperature and observe heat distribution across the room for 10–15 minutes. If the radiator remains cool at the top or bottom, repeat the bleeding process and inspect for leaks around the stem and thread. Thermostat Care highlights testing for leaks as a critical final step to confirm a secure seal and proper operation.
Troubleshooting common issues and mistakes
Common mistakes include selecting an incompatible TRV, forgetting to bleed air after replacement, or overtightening the head, which can strip the valve or damage the seat. If the radiator does not heat evenly after replacement, check whether the radiator is properly bled, verify the valve orientation, and ensure the thermostat setting corresponds to the room’s needs. If you detect a persistent leak or if the valve body shows signs of corrosion, stop the repair and consult a professional. In some cases, replacing the entire valve may be necessary for reliability. Thermostat Care recommends documenting the model and installation steps for future maintenance and scheduling periodic checks to maintain energy efficiency.
Authority sources and further learning
To ensure accuracy, consult official guidance from energy authorities and university extensions. This page references reputable sources for safe and effective thermostat maintenance. The following organizations offer detailed information you can trust for your project, and they are cited here to support best practices and safety standards:
- Energy.gov – Thermostats and energy efficiency: https://www.energy.gov/energysaver/thermostats
- University extension resources (example): https://extension.illinois.edu/energyefficiency/thermostats
- EPA IAQ resources on heating systems: https://www.epa.gov/iaq
Authority Sources
- https://www.energy.gov/energysaver/thermostats
- https://extension.illinois.edu/energyefficiency/thermostats
- https://www.epa.gov/iaq
Tools & Materials
- Replacement TRV head compatible with your valve(Check model to match valve body, thread size, and temperature scale)
- Radiator bleed key(To vent air after installation)
- Adjustable wrench(For loosening nuts on valve and fittings)
- Flathead screwdriver(Optional for slotted valve caps)
- Towel or rag(Catches drips and protects floor)
- Seal kit or O-ring (if included with new head)(Ensures a watertight seal)
- Marker or tape(Label valves for future maintenance)
Steps
Estimated time: 25-40 minutes
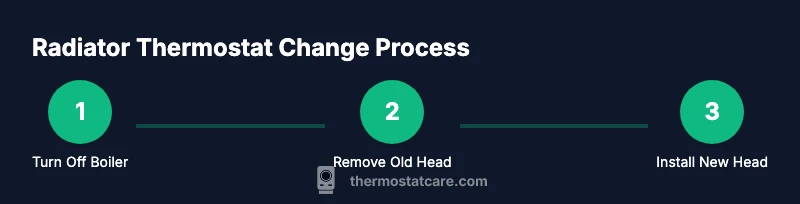
- 1
Turn off boiler and isolate radiator
Ensure the heating system is off and the radiator has cooled completely before starting. Shut off the boiler at the control panel or the main switch to prevent hot water flow during the swap.
Tip: If your system has a lockshield valve, note its position before closing to help restore balance later. - 2
Remove old TRV head
Using the appropriate wrench, loosen and remove the old TRV head from the valve body. Keep the stem clean and avoid bending it; expose the valve seat for inspection.
Tip: Take a photo of the old setup for reference when configuring the new head. - 3
Inspect valve and prepare replacement
Check the valve for corrosion, wear, or damage. If the valve shows significant wear, replacing the valve body might be wiser than the head alone. Prepare the new head with its gasket or O-ring.
Tip: If the thread is damaged, stop and replace the valve to prevent leaks. - 4
Install new TRV head
Thread the new head onto the valve body by hand first to avoid cross-threading, then tighten with a wrench until snug. Do not overtighten—over-torquing can damage the seat.
Tip: Coat the gasket lightly with silicone lubricant if recommended by the manufacturer. - 5
Bleed the radiator and check seals
Open the bleed valve slightly to release air and water. Wipe away drips with a cloth, then close the valve once water escapes steadily.
Tip: Have towels ready, as air pockets can cause spurts of hot water. - 6
Restore, test operation
Turn the boiler back on and allow the system to pressurize. Set the TRV to a mid-range temperature and observe heat distribution for 10–15 minutes.
Tip: Watch for any leaks near the valve stem during the first few minutes of operation. - 7
Fine-tune and monitor
If some rooms are still cooler or warmer, adjust the TRV setting and re-check bleed if necessary. Note any anomalies for future reference.
Tip: Keep a maintenance log with dates and valve models for future repairs.
Questions & Answers
Do I need to drain the whole system to replace a radiator thermostat head?
In most cases you can replace the TRV head without draining the entire system. Isolate the radiator and bleed after installation to remove air. If you encounter a stubborn valve or leaks, a professional may be required.
Usually you don't need to drain the whole system. Isolate the radiator, replace the head, then bleed to remove air. If the valve is stubborn or leaks persist, call a pro.
What tools are essential for this replacement?
Common essential tools include an adjustable wrench, replacement TRV head, bleed key, towel, and seal kit. Optional items are a flathead screwdriver and marker for labeling.
You typically need a wrench, the new TRV head, a bleed key, a towel, and the seal. Optional screwdriver and labeling tape can help.
How do I know the replacement head fits my valve?
Check the valve model printed on the body and compare thread size and type with the new head. If in doubt, take a photo of the old head and consult a hardware store.
Look for the model on the valve, match the thread size, and bring the old head to the store if needed.
Is this safe for homes with gas boilers?
Yes, replacing a radiator TRV head is generally safe for homes with gas boilers, but always follow safety steps and consult a professional if you smell gas or detect a leak.
It's safe for gas boilers if you follow safety steps and watch for leaks; contact a pro if you smell gas.
Will replacing the TRV save energy?
A properly matched and calibrated TRV can improve room temperature control and reduce energy waste, especially if your current head is inaccurate or stuck.
Yes, with a good TRV match and proper calibration you can save energy by avoiding overheating or overcooling.
What should I do if the radiator still hot or cold after replacement?
Recheck bleed points, confirm valve orientation, and ensure boiler pressure is within normal range. If issues persist, seek professional help.
If heat is uneven, bleed again, verify valve position, and check boiler pressure. If problems persist, contact a pro.
Watch Video
What to Remember
- Identify the correct TRV model before replacement.
- Shut off boiler and isolate the radiator to avoid burns and leaks.
- Bleed after installation to ensure efficient heating.
- Test operation and monitor for leaks and uneven heat.