How Do Two Thermostats Work Together
Learn how two thermostats work together in multi-zone and smart setups. From wiring basics to testing for harmony, Thermostat Care guides homeowners and DIY enthusiasts toward coordinated control, comfort, and energy savings.

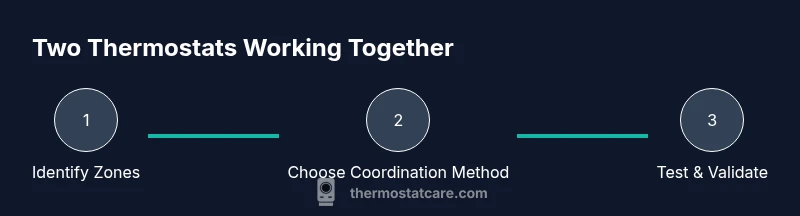
This guide explains how two thermostats work together in homes with multi-zone layouts or smart integrations. You’ll learn common configurations, wiring basics, and testing steps to ensure coordinated cooling and heating. By the end, you’ll know how to diagnose conflicts and optimize comfort and energy efficiency.
What does it mean when two thermostats work together?
If you’re trying to understand how do two thermostats work together in a home, this guide explains the core concepts clearly. Two thermostats can coordinate to manage heating and cooling across separate zones or to share control over a single HVAC system. In both cases, the goal is to maintain comfortable temperatures while avoiding conflicting commands from different devices. According to Thermostat Care, the key is to establish a common control framework, verify compatibility, and test each step of the setup. Whether you’re upgrading to a two-zone layout, installing smart thermostats that communicate over Wi‑Fi, or pairing older mechanical units with newer controllers, the underlying idea remains the same: coordinated setpoints, aligned schedules, and reliable feedback from temperature sensors. In practice, this means choosing one primary controller (the master) that sets the general temperature targets, while the second device (the secondary) follows or shares responsibility according to the chosen scheme. This lays the foundation for safe, predictable operation.
In real homes, you’ll often see two primary patterns: a shared-control approach where one thermostat acts as the main hub, and a zoning approach where each thermostat governs a different area. The distinction matters for comfort, energy use, and future upgrade paths. Thermostat Care emphasizes planning first, then wiring and configuration second. The goal is to create harmony rather than competition between devices.
Basic architectures: shared control vs. independent zones
Two thermostats working together rely on a clear architectural decision. In a shared-control setup, one thermostat becomes the master and the other mirrors its commands or follows a simplified rule (for example, “cool when the master cools” or “heat when the master heats”). This is common in homes with a single HVAC system but two wall controllers for convenience.
In an independent-zone arrangement, each thermostat controls a separate zone with its own sensors, dampers, and sometimes separate thermostatic controls. This is typical in multi-zone systems where each zone has a dedicated air handler or a zoning control panel. The advantages include stronger comfort in large homes and better load management, but the configuration is more complex and requires careful calibration of dampers and sensors.
Smart thermostats add another layer: they communicate over Wi‑Fi or a home automation hub, share occupancy data, and can coordinate schedules automatically. In this case, “master/slave” roles can be dynamic or defined by the system’s setup wizard. Thermostat Care notes that the reliability of coordination improves when devices are on the same network and when sensor data is trusted and centralized for decision-making.
Common configurations you’ll encounter
Configurations vary, but a few patterns recur:
- Two thermostats in one HVAC system with zoning: each thermostat zones one area, with zoning dampers controlled by a dedicated panel.
- A master/slave arrangement with one thermostat controlling overall targets and the other providing local refinement in a nearby room.
- Two smart thermostats connected to a hub or cloud service, coordinating via app or voice assistants.
- A multi-stage system where the primary thermostat handles staging decisions and the secondary thermostat only affects fan control or auxiliary functions.
In each case, the key concerns are alignment of setpoints, non-conflicting schedules, and reliable feedback from temperature sensors. Thermostat Care stresses documenting which device is master, which zones are governed, and how conflicts are resolved when weather or occupancy changes.
Wiring and communication basics
Wiring forms the backbone of two-thermostat coordination. With traditional hard-wired thermostats, you’ll typically see common HVAC terminals such as R, C, W, Y, and G. The C-wire provides a continuous 24V power return needed by many smart thermostats. In a basic two-thermostat setup, you must ensure each thermostat can access the power and that any shared wires don’t create backfeed issues. Some zones rely on a zoning panel with dampers and a dedicated transformer; others rely on two thermostats sharing a single R wire with diodes or relays to prevent feedback loops. For wireless or smart setups, the thermostats communicate over a home network—often using cloud services or local bridging hubs. In all cases, verify that both devices support the same control protocol and that the HVAC equipment is compatible with dual thermostats or zoned control. Always consult your manuals and, if unsure, seek professional help to avoid wiring mistakes that could damage the equipment.
Smart vs. traditional thermostats: how they coordinate
Traditional thermostats depend on direct wiring to HVAC equipment and discipline in manual configuration. They can coordinate through a wiring scheme but may require a zoning panel for true two-zone control. Smart thermostats, by contrast, use software-driven coordination. They can share occupancy data, weather information, and energy usage patterns via a hub or cloud-based service. When two smart thermostats are used, ensure they are on the same account or hub and configured for the same weather compensation logic. This helps prevent one device from triggering heating while the other cancels it, which can lead to comfort gaps and wasted energy. Thermostat Care highlights that software compatibility, regular firmware updates, and consistent sensor placement are as important as hardware compatibility—for reliable two-thermostat cooperation.
Step-by-step scenario: setpoint harmony
Creating harmony between two thermostats starts with a clear plan. First, decide the control model (master/slave or equal partnership). Then define the zones, setpoint ranges, and schedule windows. Align the occupancy and setback strategies so that neither thermostat fights for the same target at the same time. In practice, you’ll want a master thermostat with a default schedule and a secondary thermostat that mirrors or adapts to the master’s targets without exceeding comfort limits in its zone. This alignment reduces short-cycling, improves comfort, and minimizes energy waste. Thermostat Care recommends documenting each zone’s expected temperatures and the times when changes occur to simplify future maintenance and upgrades.
For example, a master thermostat might hold a 72°F during the day in the living area, while the secondary thermostat in a bedroom zone targets a cooler 68°F at night. The key is ensuring both devices respond to the same weather and occupancy cues without contradictory commands.
Troubleshooting misalignment between two thermostats
When two thermostats disagree on a target, you’ll notice comfort gaps, longer run times, or short cycling. Start by verifying wiring and zoning logic, confirm that the master device is indeed the controller for the other, and ensure there are no conflicting schedules. Check sensor placement—put sensors away from heat sources, drafts, or direct sunlight. If using smart thermostats, review the integration rules and ensure firmware is current. Some misalignment stems from different calibration baselines or misconfigured fan settings. Thermostat Care suggests re-calibrating one device to match the other’s sensor baseline and testing under typical daily conditions to validate coordination.
Document changes and test across a full day of heating and cooling to confirm the system maintains comfort and efficiency.
Testing and validation: ensure they truly cooperate
Validation begins with a controlled test plan. Set a baseline temperature and observe the response from both thermostats. Monitor the HVAC’s start-stop cycling, fan behavior, and whether the two devices converge on the same target within a reasonable time. Use a thermometer in each zone to verify actual temperatures. If you have a zoning panel, test damper motion and ensure zones react correctly to the programmed setpoints. For smart setups, perform a couple of occupancy-based tests—standing in a room should trigger adaptive changes in other zones if the system is designed to do so. Thermostat Care emphasizes testing during different times of day and weather, then documenting your results for future tweaks.
Energy implications and comfort tradeoffs
Coordinated thermostats can improve comfort by reducing temperature swings and avoiding competing commands. The energy impact depends on how well the zones are balanced, the efficiency of the HVAC system, and how effectively dampers or zoning controls modulate airflow. In many homes, two-thermostat coordination reduces wasted conditioning in unused spaces and allows more precise adherence to occupancy patterns. Thermostat Care notes that real-world results vary by home design, insulation, and climate, so set reasonable expectations and adjust over time as you gather data from your system’s performance.
Familiarize yourself with your system’s baseline energy use and track changes after configuring two thermostats. A simple way to start is to log daily temperatures and run times for a few weeks and compare against your prior setup.
Maintenance and long-term care
Regular maintenance keeps two-thermostat coordination reliable. Check for loose wires, ensure the zoning panel and dampers are functioning, and keep thermostat firmware updated. Inspect sensor placement every season and replace batteries in thermostats that rely on them. Keep a record of settings, especially changes to master/slave roles or joint schedules. If you upgrade either thermostat, verify that the new model supports your zoning or hub architecture. Thermostat Care stresses that ongoing calibration and periodic re-validation are essential to maintaining harmony between devices.
Real-world examples and planning a two-thermostat setup
In a typical two-story home, the living area might be paired with a master thermostat on the main floor and a secondary thermostat in the bedrooms. The master thermostat sets day-time comfort and energy-saving offsets, while the bedroom thermostat fine-tunes night-time cooling or heating. When planning a new setup, map each zone’s comfort priorities, check wiring feasibility, and select thermostats that offer clear documentation for zoning and integration. Keep in mind that some older systems may need a zoning panel or a professional assessment to ensure reliable operation. Thermostat Care’s guidance is to start with a simple, scalable plan and build from there as your needs evolve.
Tools & Materials
- Voltmeter or multimeter(Check supply and verify that the 24V control circuit is present)
- Non-contact voltage tester(Quickly verify power is off during wiring work)
- Screwdriver set (Phillips and flathead)(Remove and secure wall plates and thermostat bases)
- Wire strippers/cliers(Trim and prepare wires for connections)
- Wire nuts and extra thermostat wiring(Carry spare conductors for extension or re-routing)
- Compatibility checklists/manuals for both thermostats(Confirm zoning support and wiring requirements)
- Notebook or digital device to document wiring and settings(Record master/slave roles, setpoints, and schedules)
Steps
Estimated time: 1 hour 30 minutes
- 1
Verify system compatibility
Confirm your HVAC equipment supports two thermostats in the chosen configuration (shared control or zoning). Review zoning panel capabilities and confirm the presence of a C-wire if you plan to use smart thermostats. This step prevents incompatible hardware from causing issues later.
Tip: Check model numbers and consult manuals to confirm compatibility before opening walls. - 2
Power down the system
Turn off the HVAC power at the breaker panel to avoid electrical hazards during wiring or installation. When in doubt, test for voltage at the thermostat wires to confirm power is off.
Tip: Lockout/tagout the circuit if multiple people work on the system. - 3
Identify wires and zones
Label which wires go to each thermostat and which zone each thermostat will control. Map common terminals (R, C, W, Y, G) and note any shared wires or dampers in a zoning panel.
Tip: Take photos before disconnecting anything to help with reassembly. - 4
Decide master/slave or equal roles
Choose whether one thermostat will be the master controller or if both will operate in tandem as equals. Document the decision and intended setpoints for each zone.
Tip: In a shared-control setup, pick the device with the strongest network connection as master. - 5
Configure zoning or pairing
For zoning, align the zoning panel to designate the two thermostats per their zones. For smart integrations, ensure both devices are on the same network or hub and follow the setup wizard.
Tip: If you are wiring, keep thermostat bases off the wall while you finish connections. - 6
Set baseline setpoints
Set reasonable day and night targets for each zone. Avoid extremely divergent targets that could cause rapid cycling or conflicts between thermostats.
Tip: Establish a common reference temperature for comparisons between zones. - 7
Test basic operation
Power on the system and cycle through heat and cool tests. Verify that each thermostat commands the HVAC in its zone and that there’s no conflicting output.
Tip: Observe the first 20–30 minutes for stability and adjust as needed. - 8
Validate sensor placement
Ensure sensors are placed away from heat sources, drafts, and electronics that might skew measurements. Real-world temperatures should align with readings on both thermostats.
Tip: Relocate a sensor if it’s consistently off by more than a few degrees. - 9
Document and save settings
Record the master/slave roles, zone assignments, setpoints, and schedules. Save any firmware updates and note the current network configuration.
Tip: Keep a copy of the setup for future upgrades or troubleshooting.
Questions & Answers
Do I need two thermostats for one HVAC system?
Not always. A single thermostat can control a system, but two thermostats are common for zoned comfort or for smart room-level coordination. Your home and goals determine the best approach.
Two thermostats aren’t always required, but they’re often helpful for zoned comfort or smart coordination depending on your setup.
What’s the difference between master/slave and equal coordination?
In a master/slave setup, one device sets the overall target and the other follows. In an equal coordination model, both thermostats influence each zone more independently but still align to avoid conflicts.
Master/slave designates one as the main controller, while equal coordination allows shared influence with safeguards to prevent conflicts.
Can two old thermostats coordinate with new smart ones?
Yes, if the old devices support the same control method or if you use a common hub. Check compatibility and consider upgrading for reliable communication.
Two older thermostats can coordinate with smart ones if they share a common control method or hub.
Should I hire a professional for wiring two thermostats?
If you’re unsure about wiring, zoning panels, or wiring diagrams, a licensed technician can ensure safe installation and correct setup.
If you’re unsure about wiring or zoning, hire a professional to ensure safety and correct setup.
Are there energy savings with two thermostats?
Coordinated zoning can reduce energy use by avoiding conditioning in unused spaces and aligning with occupancy, though results vary by home and climate.
Coordinated zones can save energy by avoiding unnecessary heating or cooling in unused spaces.
What if my thermostats aren’t communicating?
Check network connections or wiring, update firmware, and confirm compatible protocols. If issues persist, revert to a simple configuration and re-try integration.
If they aren’t communicating, verify connections, update firmware, and ensure compatible protocols before retrying.
Watch Video
What to Remember
- Define the control model first (master/slave or equal).
- Verify compatibility before wiring; use a zoning panel if needed.
- Calibrate sensors and align setpoints to prevent conflicts.
- Test thoroughly across different times and weather conditions.
- Document every setting for future maintenance.