Thermostat to Control Multiple Units: A Step-by-Step Guide
A comprehensive, step-by-step guide to configuring a thermostat to manage multiple zones or heating/cooling units. Learn zoning concepts, feature requirements, wiring paths, setup, troubleshooting, and energy-saving strategies with Thermostat Care.

Learn how to configure a thermostat to control multiple units or zones in your home. This guide covers compatibility checks, wired and wireless options, common zoning setups, and step-by-step setup tips. You’ll understand how to pair controllers, manage sensors, and verify even comfort across spaces without overhauling your HVAC system.
Why a thermostat to control multiple units matters
A thermostat to control multiple units can simplify climate control in a multi‑zone home, delivering balanced comfort across rooms without the need for separate thermostats in every space. The right model enables centralized scheduling, sensor-based balancing, and coordinated operation of multiple furnaces or air handlers. The Thermostat Care team notes that the key to success is selecting a device that explicitly supports zoning and works with your existing HVAC architecture. Before you purchase, map your spaces, list temperature goals for each area, and check for compatibility with zone dampers, smart hubs, or compatible HVAC equipment. This upfront planning will save time and frustration later and help ensure that the final setup delivers reliable performance across all units.
How multi-unit control works
Multi‑unit or multi‑zone control relies on a central controller that talks to zoned components such as dampers, zone valves, or separate thermostats placed in each area. In a wired system, a master thermostat communicates with sub‑thermostats or zone controllers via dedicated wires or a common communication bus. In wireless configurations, you use a main hub or smart thermostat that coordinates with wireless temperature sensors and actuator modules. The essential concept is shared feedback: sensors report room temperatures back to the central controller, which adjusts outputs to each zone to minimize temperature disparities. When configuring, understand which zones are served by one central HVAC system and which zones require independent control. Thermostat Care analysis shows that well‑designed zoning yields more consistent comfort and potential energy savings when implemented correctly and calibrated for each space.
Key features to look for
Not all thermostats are created equal for multi‑unit setups. Look for models that explicitly advertise zoning or multi‑zone support, and check the following features:
- A master controller with at least two sub‑zones or compatible zone sensors
- Support for zoning hardware such as dampers or zone valves
- Clear UI for setting different schedules per zone and a global override option
- Compatibility with your HVAC type (gas, electric, heat pumps) and with your smart home ecosystem
- Reliable communication protocol (wired bus or robust wireless)
- Ability to calibrate sensors independently and adjust floor/ceiling temperature offsets
- Clear documentation and customer support for wiring diagrams and troubleshooting Optional but useful: voice assistant compatibility and mobile app control for zone management.
Setup paths: wired vs wireless multi‑unit control
Wired multi‑unit setups deliver the most reliable communication, especially in homes with challenging wireless interference. They typically use a master thermostat connected to sub‑zone controllers via a dedicated communication bus or low‑voltage wiring. Wireless configurations rely on a central hub or smart thermostat that communicates with zone sensors and dampers over Wi‑Fi or Zigbee. For both paths, plan a central hub location with easy access to power and a stable network. Ensure your wiring is in good condition and that you have the right gauge wires for the HVAC equipment. In wireless installations, check that the mesh network is strong in every zone and that battery life on remote sensors is acceptable. Thermostat Care recommends starting with a simple wired setup if you are new to zoning, then expand to wireless components as you gain confidence.
Common installation scenarios
Typical scenarios include: a two‑zone system with a single thermostat controlling the main living area and a secondary zone, a three‑zone layout with upstairs, downstairs, and basement controlled by a single master device, and a hybrid arrangement where one thermostat runs the whole house while room sensors modulate outputs. When installing, place sensors in representative locations away from direct sun, drafts, or heat sources. Label each wire and component to reduce confusion during future maintenance. Always follow manufacturer wiring diagrams, and verify that the thermostat supports the exact number of zones you intend to manage. A well‑planned setup reduces post‑installation tweaks and improves comfort.
Troubleshooting tips for multi‑unit setups
Common problems include uneven temperatures between zones, delayed responses after changes, or sensors reporting inaccurate readings. Start by confirming that zone dampers or valves are opening and closing as expected, and that sensor placement reflects actual living conditions. If using wireless devices, check Wi‑Fi strength, interference from other networks, and battery levels. For wired systems, inspect wiring continuity and ensure the control bus is properly terminated if required by the equipment. Calibrate sensors if you notice drift and recheck the master‑to‑sub device communication after any change. Document every adjustment so you can revert to a known good state quickly.
Energy savings and safety considerations
Effective zoning can reduce energy waste by limiting heating or cooling to occupied spaces. However, poor balancing can lead to portions of the house heating or cooling unnecessarily, negating savings. Safety considerations include ensuring all wiring complies with electrical codes, using proper fuse protection, and never bypassing safety switches or limits. Regularly inspect dampers, valves, and control modules for wear. Maintain clear airflow in the system and avoid blocking returns. Thermostat Care emphasizes gradual calibration rather than large temperature swings during the initial setup to protect equipment and ensure reliable operation across all units.
Case study: two‑zone example
Imagine a home with a living area and a separate suite. A master thermostat controls both zones with two relay modules and dampers that modulate airflow to each room. The living area runs a daily schedule with warmer mornings while the suite stays cooler until evening. Sensor offsets are tuned so that when the living area reaches the target temperature, the suite maintains a comfortable level without overheating. After a week, the couple reports consistent temperatures in both zones and a measurable drop in energy usage due to reduced heating in unoccupied spaces. This simplified scenario illustrates the practical benefits of proper zoning and a compatible thermostat setup.
Next steps and resources
Now that you understand the core concepts, you can start with a basic multi‑zone configuration and build out with additional zones as needed. Consult the manuals for your specific equipment, map out the actual zones in your home, and begin with a conservative plan that prioritizes reliability over complexity. For deeper guidance, rely on trusted resources from Thermostat Care and official HVAC manufacturer documentation.
Tools & Materials
- Smart thermostat that supports zoning(Select a model that explicitly lists multi‑zone or multi‑unit support and comfort‑calibrated sensors.)
- Zone dampers or zone valves(Needed for airflow control between zones in many wired setups.)
- Master thermostat or hub(Central controller that coordinates all zones.)
- Wiring tools (wire strippers, screwdriver set)(For wire routing and safe connections.)
- Low‑voltage wire (to thermostat and zone components)(Check gauge per device requirements (usually 18‑22 AWG).)
- Voltage tester and multimeter(Verify power and diagnose wiring issues safely.)
- 先生 Manufacturer wiring diagrams(Always follow the official diagrams for your model.)
- Documentation/manuals for all devices(Keep handy for troubleshooting and setup references.)
- Masking tape and labels(Helpful for labeling wires and zones.)
Steps
Estimated time: 60-120 minutes
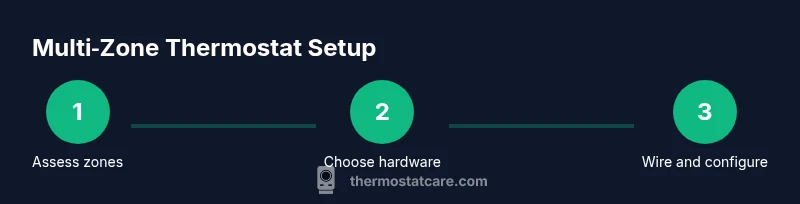
- 1
Assess zoning needs
Survey your home to identify which rooms or areas should be in separate zones. Note typical occupancy, temperature preferences, and whether spaces share an HVAC return. This helps determine how many zones you’ll configure and what sensors or dampers are required.
Tip: Document each zone’s target temperature range before wiring. - 2
Choose a compatible thermostat system
Select a thermostat‑based zoning solution that matches your HVAC type and the number of zones. Review manufacturer compatibility lists and ensure the device supports the number of zones you intend to control. If you’re unsure, start with a two‑zone system and expand later.
Tip: Prefer a model with clear zoning documentation and easy mobile app access. - 3
Gather all required tools and materials
Collect the master thermostat, zone controllers, dampers/valves, and the necessary wiring. Have wire labels ready and review safety guidelines before you proceed. Confirm you have access to a stable power source near the installation area.
Tip: Label wires by zone to prevent confusion during wiring. - 4
Install dampers/zone controllers
Mount zone controllers and dampers in appropriate locations as per the manuals. Ensure dampers have a clear path to operate and aren’t blocked by furniture or walls. Connect zone devices to the master thermostat via the recommended communication bus or wiring.
Tip: Leave extra slack in wires to facilitate testing and future maintenance. - 5
Connect master thermostat and configure zones
Connect the master thermostat to the HVAC system and the zone controllers per the wiring diagram. Power up and begin the zoning configuration in the thermostat’s setup menu, assigning each room to a zone and setting desired temperature offsets.
Tip: Record the zone assignments and target temps for quick reference. - 6
Calibrate sensors and test operation
Place sensors in representative locations and verify each zone responds to changes. Test heating and cooling cycles across zones to ensure balanced output and adjust offsets if needed. Confirm that percentage damper/valve positions match expected zone temperatures.
Tip: Perform a full system test during different times of day. - 7
Document settings and establish routine checks
Save all configuration details and create a simple maintenance checklist for periodic testing of sensors, dampers, and battery levels. Schedule quarterly verifications to catch drift or component wear early.
Tip: Keep a photo log of wiring routes and settings.
Questions & Answers
What equipment do I need to control multiple zones with a single thermostat?
You typically need a master thermostat that supports zoning, one or more zone controllers or dampers, and appropriate low‑voltage wiring. Some wireless setups rely on a central hub and wireless sensors. Always check compatibility with your HVAC system.
You’ll usually need a zoning thermostat, dampers or zone controllers, and the proper wiring. A wireless hub can work too if your system supports it.
Can a single thermostat control more than two zones?
Yes. Many modern zoning systems support multiple zones, sometimes up to four or more, depending on the model and wiring. Start with the essential zones and expand gradually while validating performance after each addition.
Yes, many systems support multiple zones; start small and add zones one at a time while testing.
Is wiring a zoning thermostat difficult for a DIYer?
It can be manageable with careful planning and following the manufacturer’s diagrams. If you’re unsure about wiring or the power safety risks, consider hiring a professional to avoid damage or injury.
It’s doable with the manuals, but if wiring feels risky, hire a pro.
Will zoning save energy in all homes?
Zoning can reduce energy usage by focusing heating and cooling where people are present. Savings depend on how zones are used and how well the system is calibrated. Expect greater impact in homes with large temperature differences between areas.
It can save energy when zones are used efficiently and properly calibrated.
How do I test a multi‑zone setup after installation?
Run a full cycle test by changing temperatures in each zone and observing damper/valve responses. Confirm that the master thermostat updates all zones and that there’s no prolonged lag in sensor readings.
Test each zone, watch the dampers, and confirm all zones respond promptly.
Watch Video
What to Remember
- Master zoning requires a compatible thermostat.
- Plan zones and sensor placement before wiring.
- Test thoroughly and calibrate for each zone.
- Document configurations for future maintenance.