Honeywell Thermostat Manual Guide: Setup, Troubleshooting, and Maintenance
A comprehensive Honeywell thermostat manual guide from Thermostat Care. Learn installation, troubleshooting, and maintenance with step-by-step instructions and safety tips.

Learn how to read a Honeywell thermostat manual guide and perform essential tasks like installation, configuration, troubleshooting, and maintenance. This quick answer highlights the key steps, required safety checks, and the tools you’ll need. With clear instructions and cautionary notes, you can safely install, test, and optimize your Honeywell thermostat without unnecessary service calls.
What a Honeywell Thermostat Manual Covers
A Honeywell thermostat manual guide provides the essential map for setup, configuration, troubleshooting, and safe operation. It typically includes wiring diagrams, compatibility notes for HVAC systems, installation steps, safety warnings, and maintenance tips. The manual also explains how to navigate menus, set schedules, connect to Wi‑Fi, and interpret error codes. According to Thermostat Care, a well-used manual reduces misconfiguration and helps homeowners avoid common mistakes during installation and daily use. Thermostat Care's guidance emphasizes verifying compatibility with your furnace or heat pump before swapping devices. By reading the manual, you’ll understand which terminals correspond to R, C, W, Y, G, and how to label wires for later reference. The goal is to empower homeowners to perform safe, correct, and durable thermostat work, with clear warnings about live wires, backstabs, and wall anchors. For those upgrading from older models, the Honeywell manual also highlights differences in backplate designs and mounting heights, which affect fit and accessibility. If you’re working with a smart Honeywell model, the manual then expands into app pairing, voice control, and cloud features, including security considerations. Throughout, remember that a meticulous reading saves time and reduces needless replacement parts.
Common Wiring and Power Issues Explained
Most thermostat problems trace back to wiring and power. Loose wires at the backplate, a disconnected C wire, or a tripped breaker can mimic more serious failures. The Honeywell manual explains how to identify common wire color codes (R, C, W, Y, G) and verify they land on the correct terminals. If your display is blank or the screen flickers, first confirm the unit has power. Check the circuit breaker, the furnace transformer, and the battery (for non‑powered models). The Thermostat Care team emphasizes testing for 24 VAC presence between R and C with a multimeter, then checking for continuity across the thermostat’s internal fuse if present. If the reading is out of spec, you may have a failing transformer or a damaged wire running to the stat. For wired upgrades, ensure the wires are stripped cleanly and inserted fully to avoid intermittent contact. The Honeywell manual also covers common issues with heat-only or cool-only setups, which can occur if the system mode is misconfigured in the menu. When in doubt, consult the compatibility table in the manual to confirm your equipment supports the chosen model.
Quick Setup: Installing a Honeywell Thermostat
Setting up a Honeywell thermostat begins with safety and accuracy. Start by turning off power to the HVAC system at the breaker panel. Remove the existing thermostat and carefully detach the wires, labeling each before disconnecting. Compare the old wiring against the new Honeywell base plate to determine terminal mapping. Mount the new base securely using the supplied screws, ensuring it is level for an even display. Reconnect wires to their corresponding terminals on the Honeywell base (R to R, C to C, W to W, Y to Y, G to G), making sure each wire is fully seated. Attach the thermostat body and restore power. Finally, follow the on‑screen prompts to set date/time, language, and your preferred schedule. If your system includes a heat pump or multi‑stage configuration, refer to the model‑specific wiring diagram in the manual. The key is to avoid forcing wires into the wrong terminals and to recheck all connections before testing.
Using Features: Scheduling, Learning Modes, and Smart Home Integration
Modern Honeywell thermostats offer scheduling, adaptive recovery, and smart home integration with voice assistants and apps. The manual explains how to set week‑long schedules, configure hold settings, and enable auto‑learn features that adjust to your lifestyle. You’ll learn how to link the thermostat to Wi‑Fi, pair it with a mobile app, and authorize voice control through compatible ecosystems (e.g., Alexa or Google Assistant). When using smart features, pay attention to security prompts and update prompts to keep devices protected. If you’re upgrading from an older model, check whether your HVAC system supports the additional sensors and whether recalibration is necessary after wiring changes. The manual also covers energy saving modes, vacation settings, and reminder alerts for filter changes. Thermostat Care’s guidance is to test all modes in a controlled manner to ensure comfort remains stable while energy use is optimized. Regular software updates from the manufacturer can improve performance and reliability, so keep an eye on update notifications within the app.
Troubleshooting Steps: No Display, Unresponsive, or Inaccurate Temps
If your Honeywell thermostat shows no display, is unresponsive, or reads incorrect temps, start with the basics: power, wiring, and battery status (for battery‑powered units). Confirm the device has power at the circuit and, for wired models, verify a solid R to C connection with a multimeter. Check for loose wires or corrosion at the terminals and reseat them if necessary. If the display is dim or flickering, replace the batteries or check the internal fuse if your model includes one. For inaccurate temperatures, verify the sensor location and ensure the thermostat is mounted away from direct sunlight, drafts, or heat sources. Resetting to factory defaults may resolve persistent programming issues, but back up settings first. Always consult the manual’s troubleshooting table for model‑specific codes like “E1” or “F1,” and use the recommended remedy steps. If codes persist after basic checks, contact support or a licensed technician; some issues stem from faulty sensors or HVAC components beyond the thermostat itself. Thermostat Care recommends documenting your steps and outcomes to help rapid diagnosis by professionals.
Maintenance and Safety Tips for Longevity
Routine maintenance prolongs your thermostat’s life and keeps it functioning reliably. Clean the touchscreen or display with a soft, dry cloth, avoiding moisture that could seep into electronics. Periodically inspect wires for wear or discoloration and replace damaged cables promptly. Keep the unit free from dust by gently blowing air from a can or using a soft brush. Ensure the thermostat is firmly mounted to resist vibrations and keep the wall plate level. When replacing batteries, do so only with recommended types and dispose of old cells properly. Avoid DIY electrical work in areas with exposed wiring or uncertain power supplies; use a licensed professional if you’re unsure. The manual recommends periodic firmware updates and app syncing checks to prevent security or compatibility issues. Finally, store your manual in a safe place as a quick reference for future troubleshooting or part replacement.
How to Read the Manual: Symbols, Codes, and FAQs
The manual uses symbols and codes to quickly convey meaning. Learn the legend for safety icons, electrical warnings, and warranty notes. Common troubleshooting codes appear in the diagnostics section along with step‑by‑step remedies. A well‑indexed manual helps you jump straight to the relevant page, whether you’re looking for installation diagrams, wiring color codes, or app configuration steps. Pay attention to footnotes about model variants, as some features or wiring colors may differ between Honeywell models. FAQs summarize frequent questions with concise answers; use the index or search feature if you’re reading a digital copy. As you become familiar with the manual structure, you’ll save time by locating the exact guidance you need during a home installation or a quick repair job. Thermostat Care’s approach is to encourage deliberate reading before any hands‑on work to minimize risk and errors.
Tools & Materials
- Phillips head screwdriver(For wall plate screws)
- Flathead screwdriver(For terminal screws)
- Wire labels(Label wires before disconnecting)
- Voltage tester or multimeter(Optional to confirm live power)
- Level(Ensure base plate is straight)
- New wall plate screws and anchors(If mounting requires different hardware)
- Owner's manual / Honeywell installation guide(Keep for reference during wiring)
Steps
Estimated time: 45-60 minutes
- 1
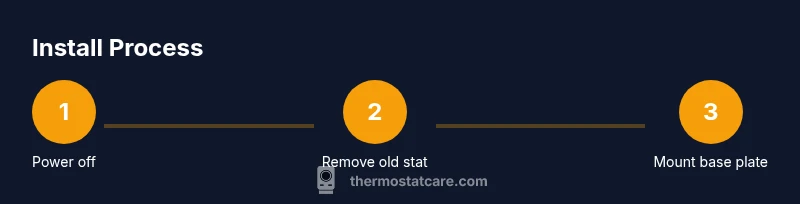
Power down the system
Turn off power to the HVAC system at the main breaker. This prevents electric shock and protects the control circuitry during removal and wiring. If you’re unsure about the power state, use a voltage tester before touching any wires.
Tip: Double‑check the breaker label to ensure you cut the correct circuit. - 2
Remove the old thermostat
Carefully remove the faceplate and detach the old wiring from the terminals. Take a photo if possible to reference terminal positions. Label each wire as you disconnect to avoid confusion during reassembly.
Tip: If a backplate is attached, unscrew it gently and preserve mounting hardware. - 3
Label and verify wires
Label wires with the standard R, C, W, Y, G designators. Confirm there are no exposed conductors at the terminals. If a wire is frayed or damaged, trim and re‑strip with proper length to ensure solid contact.
Tip: Use a clean, precise wire stripper to avoid nicking copper. - 4
Mount the new base plate
Position the Honeywell base plate on the wall and level it. Mark the drill holes, then install anchors if needed. Secure the base plate with screws and ensure it sits flat against the wall.
Tip: A level helps prevent misalignment that can affect display and button access. - 5
Connect wires to the new terminals
Insert each labeled wire into its matching terminal on the Honeywell base – R to R, C to C, W to W, Y to Y, G to G. Make sure wires are fully seated and there’s no stray copper bridging adjacent terminals.
Tip: If a wire doesn’t reach the terminal, trim and re‑strip to improve contact. - 6
Attach the thermostat and restore power
Mount the thermostat onto the base plate. Reconnect the power at the breaker and watch for the display to illuminate. If the device doesn’t power on, recheck the wiring and look for loose connections.
Tip: Keep the fan switch in off while powering up for the first test to avoid unexpected operation. - 7
Configure basic settings
Use the on‑screen prompts to set date/time, language, and basic heating/cooling preferences. If your model supports scheduling, configure your first week of programs. Link the device to Wi‑Fi if you plan to use app features.
Tip: Start with a simple schedule and expand once you verify comfort levels. - 8
Test operation and finalize
Test heat, cool, and fan modes to confirm proper responses. Check that the system responds to temperature changes and that readings stabilize within a few degrees. Document the results for future reference.
Tip: Keep a log of test results and any adjustments you make.
Questions & Answers
What should I do first when my Honeywell thermostat won't turn on?
Start with power, check batteries (if applicable), and verify the HVAC breaker is on. If the display remains blank, inspect wiring connections for looseness and test for voltage at the R terminal. Consult the manual’s troubleshooting table for model‑specific codes.
First check power and batteries, then inspect the breaker and wiring connections. If the display is blank, refer to the troubleshooting table in the manual.
How do I reset a Honeywell thermostat to factory settings?
Access the settings menu, locate the reset option, and choose Restore Factory Settings or Reset All. Some models use Reset under Advanced Settings. Back up your preferences before performing a reset.
Go to Settings, find Reset, and choose Restore Factory Settings. Back up settings first.
Can I install a Honeywell thermostat myself?
If you are comfortable with basic wiring and your HVAC is compatible, you can install a Honeywell thermostat yourself by following the manual. If you encounter unfamiliar wiring or multi‑stage systems, consider professional help to avoid hazards.
Yes, if you’re confident with wiring and your system is compatible. Otherwise, hire a pro.
Where can I find model-specific codes in the manual?
Model‑specific codes appear in the Diagnostics or Troubleshooting sections, with a legend referencing common error codes. Use the index or search feature to jump to the relevant page.
Check the Diagnostics and Troubleshooting sections, then use the index to find codes.
Is it safe to replace a thermostat in an older electrical system?
Power must be cut at the breaker before handling wiring. If the wiring age or condition is uncertain, or if you encounter unfamiliar configurations, consult a licensed electrician.
Always cut power first. If you’re unsure about older wiring, get a pro.
Watch Video
What to Remember
- Read the Honeywell manual before starting work
- Label wires and verify compatibility with your HVAC
- Follow step‑by‑step installation to avoid miswiring
- Test all modes after installation and document results