Honeywell TH8110U1003: Troubleshooting and Installation Guide
A practical, step-by-step guide to installing, wiring, programming, and troubleshooting the Honeywell TH8110U1003 thermostat. Learn safe practices, compatibility checks, and common fixes to improve HVAC comfort and reliability.

With the Honeywell TH8110U1003, you can replace or install a standard 24V programmable thermostat. This quick guide covers wiring basics, compatibility checks, and a safe, step-by-step path to wire and program the unit for reliable comfort. Includes safety tips and common troubleshooting checkpoints.
Overview of the Honeywell TH8110U1003
The Honeywell TH8110U1003 is a widely used 24-volt programmable thermostat that provides simple control for heating and cooling systems. For homeowners and DIY enthusiasts, it offers a straightforward interface and proven compatibility with most 24VAC HVAC setups. According to Thermostat Care, this model remains a reliable entry point for basic programmable comfort without smart-networking features. The Thermostat Care team finds that many users appreciate the clear display and familiar Honeywell wiring scheme, which makes replacement and troubleshooting approachable for non-professionals.
Wiring basics and compatibility
The TH8110U1003 uses standard low-voltage (24 VAC) wiring. Typical terminals you may encounter include R (or RC/RH), W (heat), Y (cool), G (fan), and C (common) if your system provides one. If your existing thermostat lacks a C-wire, you may still operate the TH8110U1003 using power-stealing methods or a C-wire adapter in some setups. Ther most important step is to verify that the current wiring matches the terminal layout on the TH8110U1003 and that your HVAC system supports the 24V control signal. Thermostat Care analysis, 2026 shows wiring compatibility and C-wire availability are the main concerns homeowners face during installation.
Installing or replacing the TH8110U1003: what you need to know
Before you begin, turn off power to the HVAC at the breaker. Gather a Phillips screwdriver, a label or masking tape, and a photo reference of the old wiring. Remove the old thermostat, label each wire by color, and note which terminal it connected to. Check compatibility with your furnace/air handler and ensure you have access to a mounting location with a stable wall. If you lack a C-wire, plan for a common wire addition or a compatible adapter. Safety first: never work on live wires unless you have confirmed power is off.
Programming and daily use
The TH8110U1003 provides a straightforward way to set a daily schedule. Start with a simple wake/leave/home/sleep sequence and adjust gradually. Use temporary holds and vacation settings as needed, and verify that the thermostat calls for heat or cooling when you expect. If your home has separate zones, you may need to configure each zone individually or rely on a compatible system. Regularly review and adjust programs for seasonal changes to maximize comfort and energy savings.
Troubleshooting common issues with TH8110U1003
If the display is blank or the thermostat seems unresponsive, start by checking the HVAC breaker and ensuring wires are firmly connected to the correct terminals. Inspect the C-wire status or battery compartment (if the unit uses batteries) and replace batteries if applicable. Miswired terminals can cause inaccurate readings or improper operation; recheck the labeling and confirm R, W, Y, G, and C are correctly placed. For inconsistent temperature readings, verify the sensor placement and ensure no drafts or heat sources are influencing the thermostat.
Maintenance and safety reminders
Keep the thermostat clean from dust and debris, and replace batteries (if used) on a recommended schedule. Avoid exposing the device to moisture or direct sunlight, and inspect wall integrity if you notice loose mounting. If you experience persistent issues after following the steps above, consult a licensed HVAC technician. Regular checks help prevent false readings and extend the life of your system.
Tools & Materials
- Phillips head screwdriver (size #1 or #2)(for mounting plate and housing)
- Flathead screwdriver(for terminal screws if needed)
- Wire stripper/cutter(to tidy wires)
- Multimeter (optional)(to verify voltage during troubleshooting)
- Replacement C-wire adapter (optional)(if no C-wire present)
- Masking tape and a pen(label wires and mark settings)
- Thermostat base mounting screws(provided with unit or compatible with wall)
Steps
Estimated time: 40-60 minutes
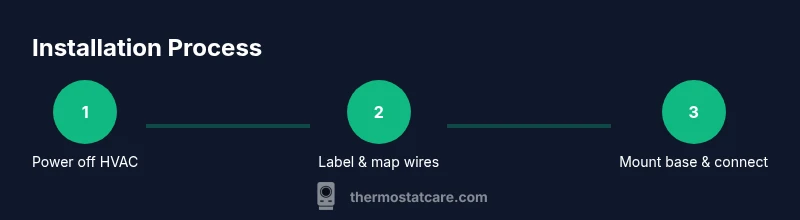
- 1
Power down the system
Turn off the HVAC breaker and switch off the furnace or air handler. This prevents shocks and protects electronics during wiring.
Tip: Always verify power with a non-contact tester before touching wires. - 2
Remove old thermostat and photo wires
Carefully detach the old unit and photograph each wire connected to terminals. Label wires by color and terminal to avoid miswiring.
Tip: Take a high-resolution photo showing the backplate and cable labels. - 3
Check compatibility and C-wire needs
Compare existing wiring to the TH8110U1003 terminal layout. If you lack a C-wire, plan to add a common wire or use a power extender kit.
Tip: If unsure, consider hiring a pro for C-wire installation. - 4
Mount new base and connect wires
Attach the new TH8110U1003 base to the wall. Connect each wire to the matching terminal (R, W, Y, G, etc.) according to the labeling.
Tip: Double-check wire gauge and terminal tightness. - 5
Attach the display and restore power
Snap the display on and restore power at the breaker. Observe the screen wake up and run a quick test cycle.
Tip: If the display stays blank, re-check battery compartment if applicable. - 6
Program a basic schedule
Set a simple wake/away/home/sleep sequence or use quick-fill presets if available. Confirm the thermostat is calling for heat or cool as needed.
Tip: Keep initial program simple and adjust after 24 hours.
Questions & Answers
Is the TH8110U1003 compatible with older heating systems?
Most standard 24VAC systems are compatible, but check your wiring and terminals first. If you have unconventional equipment, consult a professional.
Most standard 24-volt systems are compatible; verify your wiring first.
Does TH8110U1003 require a C-wire?
The TH8110U1003 can operate with batteries in some setups, but a C-wire improves reliability. If missing, consider a C-wire adapter or professional wiring.
It can run without a C-wire in some cases, but a C-wire helps.
How do I program the TH8110U1003?
Use the display to set daily schedules, selecting wake/leave/home; start with a simple schedule and refine as needed.
Set a simple daily schedule and adjust as needed.
What should I do if the display is blank?
Check power at the HVAC breaker, verify the C-wire status, and ensure batteries (if applicable) are fresh. If unresolved, call a pro.
Check breakers, wires, and batteries; call a pro if it stays blank.
How do I reset the TH8110U1003 to factory settings?
Navigate to settings and select reset to factory defaults; this clears schedules and restores original wiring mappings.
Go to settings and reset to factory defaults.
Can I upgrade from TH8110U1003 to a smart thermostat?
Yes, many setups can be upgraded; you may need a C-wire or a compatible hub and ensure your HVAC supports smart thermostats.
You can upgrade; check C-wire and compatibility first.
Watch Video
What to Remember
- Power off before starting tasks
- Label wires and photograph connections
- Verify compatibility and C-wire needs
- Test system after wiring and programming
- Keep safety as priority