How to Wire a Thermostat Without a C Wire: A DIY Guide
Learn how to wire a thermostat without a dedicated C wire, including PEK options, power-sharing tips, and safety steps to keep your HVAC system running smoothly.

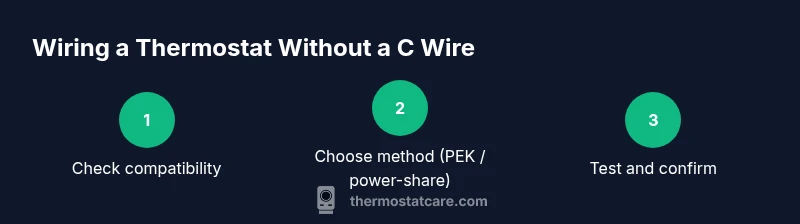
To wire a thermostat without a C wire, start by confirming your thermostat supports power-stealing or PEK (Power Extender Kit) options. If compatible, install the PEK or use a spare wire to borrow power from G, Y, or W terminals, then configure the thermostat accordingly. If not compatible, you may need to run a new C wire.
Understanding the No-C Wire Challenge
The lack of a dedicated C wire means your thermostat has to draw power from the existing conductors, which can impact reliability if not managed correctly. According to Thermostat Care, the most important first step is to confirm whether your specific thermostat model supports no-C-wire operation or a Power Extender Kit (PEK). If it does, you can often preserve your current wire bundle and still achieve stable operation. If not, you’ll face trade-offs between complexity, cost, and long-term reliability. This section explains why some setups work smoothly while others require a different strategy, helping you set realistic expectations before you begin.
Verify Compatibility Before You Start
Knowing your thermostat's capabilities saves time and frustration. Check the installation manual, the manufacturer’s support site, or contact customer service to confirm whether power-stealing, PEK, or a no-C-wire mode is officially supported. Some brands are designed to work without a C wire using shared power across the R, G, Y, and W circuits, while others rely on a dedicated C conductor for consistent performance. If your model isn’t compatible, plan alternatives up front to avoid mid-project roadblocks.
What Are Your Wiring Options?
There are several paths when you don’t have a C wire: using a Power Extender Kit (PEK) provided by the thermostat brand; using power-sharing features that borrow power from G/Y/W wires; or running a new C wire from the HVAC control board. Each method has trade-offs in reliability, complexity, and cost. This section lays out when each option makes sense and what you should expect in terms of results.
Using a Power Extender Kit (PEK)
Many modern thermostats include a PEK that substitutes for a dedicated C wire. The PEK sits at the furnace or air handler and connects to the control board wires, providing a stable 24V supply to the thermostat over existing conductors. This option preserves the existing wiring while delivering reliable power. Not all systems require it, and installation steps vary by brand, so consult your manual for exact wiring diagrams and safety precautions.
Installing the PEK: A Practical Overview
To install the PEK, power down the HVAC system first, then remove the thermostat from the wall. Connect the PEK to the furnace or air handler control board: match the existing wires (G, Y, W, R) to the PEK terminals as directed by the manufacturer. Then connect the PEK to the thermostat backplate. Reattach the thermostat, restore power, and test the functions. This planning step helps you avoid mistakes and ensures you have the right tools on hand.
Running a New C Wire: When It’s Worth It
If a PEK isn’t supported or you want the most robust solution, running a dedicated C wire is the most reliable approach. Evaluate your home’s wiring path, risk, and cost. If the run is feasible and you’re comfortable with low-voltage wiring, this option eliminates power-sharing uncertainties and ensures full thermostat functionality. A proper C wire also reduces the chance of intermittent power issues that can affect smart features.
Safety First: Power, Disconnects, and Codes
Always shut off power at the breaker before touching any HVAC wiring. Use a non-contact tester to confirm wires are dead. Keep low-voltage wiring separate from high-voltage components, and follow local electrical codes. If you’re uncertain, pause and consult a licensed technician. This protects equipment and reduces the risk of shock or fire.
Tools, Materials, and Prep Checklist
Prepare a clean workspace and gather the essential tools. A screwdriver set, wire stripper, multimeter, non-contact voltage tester, and electrical tape are typically required. If you plan to install a PEK, have the kit on hand and follow the brand instructions. A spare wire can help with a C-wire run if needed. Keeping a tidy workspace minimizes accidental shorts and helps you stay organized.
Testing and Configuring Your Thermostat Without C Wire
After wiring, power on the system and verify all functions: display brightness, temperature readings, heat/cool operation, and fan control. Some thermostats may need to reconfigure settings to use the no-C-wire power method. Check the device’s status indicators and run a short temperature swing to confirm responsiveness. If problems arise, recheck the PEK connections or wiring map.
Common Pitfalls and Troubleshooting
Power issues, weak Wi-Fi connectivity, or inconsistent temperatures can signal improper PEK installation or an unsupported no-C-wire setup. If you notice flickering display, the thermostat may be starved for power or drawing from the wrong conductor. Revisit wiring diagrams or revert to a known-good wiring state if problems persist. Document any changes to aid future troubleshooting.
Battery-Powered Alternatives and Smart Features
If you’re frequently facing power issues, consider a battery-powered thermostat that doesn’t rely on HVAC power, or a thermostat designed for power-stealing operations with smart features. Keep in mind that battery life may affect performance, and some energy-saving features may be limited. Some models offer energy-saving modes that optimize power use when a C wire isn’t present.
Next Steps and What to Expect
With the right approach, you can operate a thermostat without a dedicated C wire and maintain reliable performance. Document changes, monitor power usage, and consider a professional evaluation if you’re uncertain about wiring safety or compatibility. Regularly update firmware and schedule a reassessment if you replace the thermostat or HVAC components.
Tools & Materials
- Screwdriver set (Phillips and flat-head)(Small and medium sizes fit most thermostats)
- Non-contact voltage tester(Verify power is off before touching wires)
- Multimeter(Check voltage and continuity across terminals)
- Wire stripper/crimper(Prepare and trim low-voltage conductors)
- Electrical tape(Insulate connections safely)
- Wire nuts(Secure wire splices)
- Power Extender Kit (PEK)(Only if your thermostat and system require it)
- Extra thermostat wire (conductor)(Useful for C-wire runs if needed)
- Low-voltage thermometer-safe contact cleaner(Optional for terminals)
Steps
Estimated time: 60-120 minutes
- 1
Power down and verify safety
Shut off power at the HVAC breaker and double-check with a non-contact tester. This prevents shock and accidental short circuits while you work.
Tip: Always confirm power is off at both the thermostat and the furnace side before touching any wires. - 2
Identify existing wires and model compatibility
Note which wires are connected to R, G, Y, and W on the thermostat. Check the manual or manufacturer site to determine if a no-C-wire configuration is supported.
Tip: Take a photo of the current wiring for reference during reassembly. - 3
Decide on a no-C-wire method
Choose between PEK, power-sharing, or running a new C wire based on your thermostat model, control board, and home wiring path.
Tip: PEK is often simplest when supported by your thermostat brand. - 4
Prepare the PEK or harness
If using a PEK, review the installation guide and lay out tools. Ensure the PEK will reach the furnace or air handler without forcing wires.
Tip: Read the entire PEK guide before handling any connections. - 5
Install the PEK at the furnace/air handler
Connect the PEK to the control board according to the manufacturer, matching terminals G, Y, W, and R. Keep wires neat and avoid crossing low/high-voltage paths.
Tip: Power must remain off during connections; verify each terminal is secure. - 6
Connect the thermostat and backplate
Attach the thermostat to the wall and connect to the PEK as directed. Reinsert the cover and ensure the base sits flush.
Tip: Label wires if needed to prevent misattachment. - 7
Restore power and test basic operation
Turn the breaker back on and run through a quick test: heat, cool, fan, and display responsiveness. Observe any error indicators.
Tip: Perform a small temperature swing to confirm responsive control. - 8
Evaluate performance and finalize
If the thermostat maintains stable power and accurate readings, document the configuration. If issues arise, reconsider the PEK or plan a C-wire run with a professional.
Tip: Keep a repair log for future reference and maintenance.
Questions & Answers
Do I really need a C wire for my thermostat?
Not always. Some thermostats support power-stealing or PEK options, but compatibility varies by model and HVAC system.
Not always. Some models can run without a C wire, but check your manual.
Can I install a PEK myself?
Yes, if you carefully follow the manufacturer’s instructions and power is disconnected. Some systems are more complex and may require professional help.
Yes, but follow the manual and ensure power is off.
Will no-C-wire affect smart features?
Power delivery can impact certain smart features in some models. Review your thermostat’s documentation for any limitations.
Some features might be limited when no C wire is used.
What signs indicate power issues after wiring?
Dim display, incorrect readings, or unexpected resets are common indicators that power delivery isn’t stable.
Dim display or random resets can signal power problems.
When should I call a professional?
If you’re uncertain about wiring paths, running new wires, or interfacing with the control board, a licensed technician is recommended.
If in doubt, it’s wise to call a pro.
Watch Video
What to Remember
- Check compatibility before changing wiring.
- Choose PEK or C-wire run based on system support.
- Test thoroughly after wiring and configuration.
- If uncertain, consult a licensed technician.