Home Depot Thermostat Wire: Troubleshooting and Wiring Guide
A comprehensive guide to selecting, wiring, and troubleshooting thermostat wires from Home Depot, with C-wire considerations, common configurations, and safety tips for DIY homeowners.

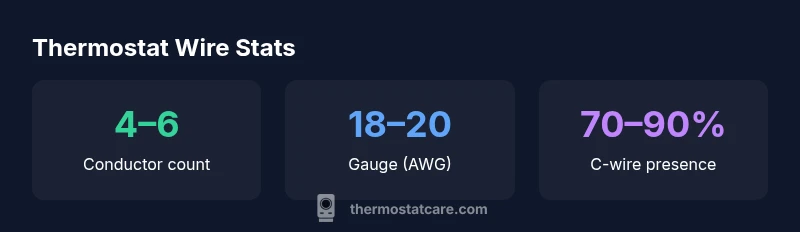
When evaluating home depot thermostat wire, homeowners should prioritize wire gauge, conductor count, and compatibility with their thermostat's power requirements. In most residences, 18- or 20-gauge low-voltage cable with 4–6 conductors covers basic heating and cooling setups. Make sure the cable is UL-listed for low-voltage use and that it meets local electrical codes before installation. If a C-wire is required, ensure a dedicated conductor is present. According to Thermostat Care, this approach reduces common DIY mistakes and helps ensure reliable thermostat operation.
Understanding what 'home depot thermostat wire' means
Home Depot is a common source for low-voltage thermostat cable. According to Thermostat Care, 'home depot thermostat wire' describes standard 24-volt, UL-listed cables used for thermostats. These cables come in gauges like 18 and 20 AWG and in 4, 5, or 6 conductor configurations. They are designed for in-wall runs and should be rated for low-voltage use. Always verify the thermostat's power requirements and choose a cable that matches those needs, ensuring safety and compatibility. For DIY projects, stick to cables rated for indoor use and avoid trying to repurpose mains-rated wiring for thermostat control.
Common configurations you’ll see at Home Depot
In most homes, the classic thermostat cable is 4-conductor, but 5- and 6-conductor options are widely available for additional controls like fans or humidifiers. The four- or five-wire variants typically cover essential functions such as R (24V hot), C (common), W (heat), Y (cool), and G (fan). Color codes can vary by manufacturer, so always verify terminal labels on your thermostat and furnace control board. When shopping at Home Depot, look for cables advertised as UL-listed for low-voltage use and designed for in-wall installation; avoid generic cables that aren’t rated for indoor HVAC wiring.
How to identify wiring needs at the thermostat and furnace
Start by turning off power at the furnace and thermostat to prevent shocks and equipment damage. Remove the thermostat cover and note each connected wire color and terminal letter. Check the furnace control board for a matching terminal strip and confirm that you have enough conductors to support all functions you plan to use. If your thermostat requires a C-wire but your existing cable lacks a spare conductor, you’ll need to pull a new run from the thermostat to the furnace or install an external power adapter. Always test with a multimeter to confirm 24VAC between R and C before relying on the system.
Choosing the right wire from Home Depot: gauges, counts, and insulation
Select wire with the appropriate conductor count for your thermostat’s needs. For most standard setups, 18- or 20-gauge cable is sufficient, but multi-stage systems or smart thermostats may benefit from 5- to 6-conductor cables. Ensure the insulation and jacket are rated for indoor use and that the wire is UL-listed for low voltage. If routing through walls, choose in-wall rated cable and consider using wall plates and grommets to reduce wear on the conductors. Always keep the wire length to a minimum to reduce voltage drop and interference.
Installing or running new wire: best practices and safety
When running new wire, plan a straight, unobstructed path from the thermostat to the furnace, avoiding parallel runs with large power cables. Use fish tape or a wire puller to minimize damage to studs and insulation. Install low-voltage wall plates or conduit where required by local codes, and seal any penetrations to prevent drafts. Label each conductor at both ends so future maintenance is straightforward. If you encounter resistance when pulling wire, stop and reassess; forcing cable can damage insulation and create electrical hazards.
C-wire and power for smart thermostats
Smart thermostats often require a C-wire for consistent power, particularly in cooling-dominated climates. If your existing cable has a spare conductor, repurpose it for C-wire with care, ensuring terminals are correct on both the thermostat and the furnace control board. If no spare conductor exists, consider running a new wire or using a manufacturer-approved power extender kit. For many homes, a properly wired C-wire eliminates common issues like dim displays or frequent rebooting.
Troubleshooting wiring issues and common mistakes
Common mistakes include using too few conductors, mismatching terminal labels, or removing the jumper between RC and RH on some older systems. Never splice thermostat wires to extend a run; instead, pull a new section or replace the cable with an appropriate multi-conductor option. Always verify the 24VAC supply at the thermostat and confirm continuity between the furnace and thermostat wires. Keep unused conductors tied and tucked away to avoid accidental contact with live terminals.
Testing, labeling, and documenting your wiring
After installation, label each wire with its terminal and function for easy future maintenance. Create a simple diagram showing which color corresponds to R, C, W, Y, G, and any additional lines. Use a multimeter to confirm voltage between R and C and inspect for any short circuits. Maintain an up-to-date wiring guide stored near the thermostat or within your home project notes. Regular checks can prevent wiring-related failures during peak heating or cooling seasons.
Maintenance and future-proofing: upgradings and replacements
Plan for future expansion by installing extra conductors if space allows. When upgrading to a smart thermostat, ensure you have a compliant C-wire and that your wiring can handle potential power needs. Periodically inspect the cable jacket for signs of wear or moisture intrusion, especially in basements or garages. If you notice frayed insulation or corrosion at terminals, replace the entire cable rather than patching it.
Quick recap and practical takeaways
Selecting the right home depot thermostat wire comes down to gauge, conductor count, and correct insulation. Always verify compatibility with your thermostat and furnace. When in doubt, buy a multi-conductor, UL-listed indoor-rated cable with extra conductors for future expansion and label all wires clearly for easier maintenance.
Overview of common thermostat wiring configurations
| Wiring Aspect | Description | Typical Range/Example |
|---|---|---|
| Conductor count | Number of separate conductors in the cable | 4–6 |
| Conductor gauge | Common wire gauge for thermostat cable | 18–20 AWG |
| C-wire availability | Presence of a dedicated power conductor | Common in modern installations |
| Insulation/jacket | Low-voltage, indoor-rated jacket | UL-listed for indoor use |
Questions & Answers
What is the most common wire gauge for thermostat wiring?
Most residential runs use 18 or 20 gauge low-voltage wire. Check the thermostat’s compatibility and the existing cable before buying.
Most homes use 18 or 20 gauge low-voltage thermostat wire, but confirm with your thermostat manual.
Do I need a C-wire for a smart thermostat?
Many smart thermostats require a C-wire for consistent power. If absent, consider a power extender kit or running a new conductor.
A C-wire is often needed for smart thermostats; if you don’t have one, consider options from the thermostat maker.
Can I run thermostat wire through a wall without conduit?
Low-voltage thermostat cable can run in walls in many areas, but follow local codes and use in-wall rated cable with proper protection.
You can route inside walls in many places, but follow local rules and use in-wall rated wire.
What should I do if the existing wire is damaged?
Replace the damaged segment rather than splicing. Inspect insulation and test continuity before reconnecting to power.
If the wire is damaged, replace it rather than patching.
Is thermostat wire interchangeable between brands?
Thermostat wire is generally universal for low-voltage systems, but confirm compatibility with your thermostat terminals and conductor gauge.
Low-voltage thermostat wire is usually interchangeable, but double-check your thermostat's terminals.
“Whether you’re replacing a broken wire or adding a C-wire for a smart thermostat, use UL-listed low-voltage cable and follow local codes to ensure safe, reliable operation.”
What to Remember
- Choose 4–6 conductor cables for most setups
- Prefer 18–20 AWG for ease of installation
- Ensure the wire is UL-listed for low-voltage use
- Label wires and keep a simple wiring diagram
- The Thermostat Care team recommends verifying C-wire needs before wiring