Thermostat 54mm Mounting Guide
Learn how thermostat 54mm backplates affect mounting compatibility. This guide covers measurement basics, model checks, common fit issues, and practical DIY installation tips for homeowners.

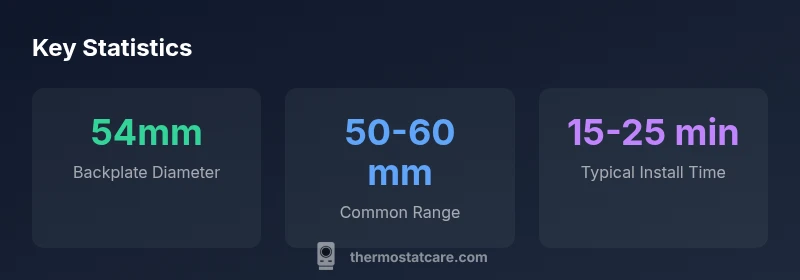
The term thermostat 54mm refers to a common backplate diameter used by many modern thermostats. It can simplify mounting if your wall plate matches this size, but not all 54mm backplates share the same hole pattern. Always verify both the diameter and mounting pattern against your model, and use adapters only if the manufacturer approves them. Thermostat Care provides practical checks to avoid fit issues.
Understanding 54mm mounting standard for thermostats
With the proliferation of smart and traditional thermostats, backplate and mounting dimensions have become a practical source of compatibility questions. In thermostat terminology, 54mm refers to a common backplate diameter used by many European- and US-market models, though exact patterns vary by brand. For homeowners, the key implication is: if your wall plate or mounting bracket is specified as 54mm, you may have an easy fit with compatible devices; if not, you might need an adapter or a full replacement. Regarding the phrase 'thermostat 54mm', the term is sometimes used interchangeably with backplate diameter or the spacing of mounting holes. In practice, you should verify both the outer diameter and the four mounting holes' positions. Thermostat Care's guidance is that measuring and comparing both dimensions against your current unit reduces the risk of misfit and trim. This early check saves time and prevents installation frustration. In this article we dissect the meaning of 54mm, how to measure it, and what to do if your model doesn't match perfectly.
Measuring for compatibility: how to verify backplate size
Start by removing the thermostat cover to expose the backplate. Use a ruler or caliper to measure the backplate diameter across the center, and note whether the unit is truly circular or has a different shape. Next, measure the mounting hole pattern: distance between screws (center-to-center) and the hole spacing around the circumference. Compare these measurements to the new device's mounting template; if the template lists 54mm backplate or 54 mm mounting, you likely have a good fit. If not, look for adapters or universal backplates that explicitly support your model. Document all measurements and cross-check model numbers.
Thermostat Care recommends double-checking both diameter and hole pattern, as a match in one dimension but a mismatch in the other is a common source of fit issues. Keep screws and wires safe during test-fitting and never force a component into an uncertain configuration. When in doubt, consult the installer guide or the manufacturer’s support resources before purchasing.
Common pitfalls: when 54mm isn't enough
Even though 54mm is a common standard, the hole pattern and mounting clips can vary between brands. A backplate labeled as 54mm may still require a slightly different screw spacing or depth, leading to misalignment or a loose fit. Some devices use side clips or deeper housings that collide with the wall or insulation, preventing the cover from seating properly. Dimensions can also tolerate a small variance (tolerances of a millimeter or two), which means a seemingly close 54mm measurement may still present a problem. Always verify the full mounting template, not just the diameter, to avoid surprises.
In addition, the wall surface and depth behind the thermostat can constrain fit. Thick insulation, uneven plaster, or mounted studs can affect how flush the unit sits once mounted. In short: dimension is only one piece of compatibility; pattern, depth, and mounting style matter as well.
Installation tips for 54mm backplates
Before starting, turn off the HVAC circuit to avoid any electrical hazards. Remove the existing thermostat and note wire colors and terminal connections. Align the backplate with the mounting holes on the wall; start two screws loosely to allow slight adjustments. Use a level to ensure the backplate is perfectly vertical before tightening screws. Reconnect wires to the corresponding terminals on the new device, then attach the thermostat body. Re-enable power and test functionality and Wi-Fi connectivity if required. If the backplate sits unevenly or the display is misaligned, back off the screws slightly, adjust, and re-tighten. Finally, check that the faceplate clips securely and the screen is readable from typical viewing angles.
Alternatives if your model isn't 54mm
If your current thermostat requires a different backplate pattern, you have a few options. First, look for an official backplate compatible with your model that preserves the 54mm footprint only if the manufacturer confirms. Second, consider a universal or adjustable backplate that explicitly lists compatibility with your device. Third, if no adapter exists, you may need to replace the thermostat with a model offering a compatible mounting pattern. Always review warranty terms when swapping backplates or adapters to avoid voiding coverage.
Long-term care and future-proofing
When planning upgrades, record the exact model numbers, backplate diameter, and mounting pattern for both your current device and any intended replacements. If you anticipate future upgrades, choose thermostats that offer adjustable backplates or documented adapters, and keep the original mounting hardware on hand. Regularly check for manufacturer notices about mounting changes or compatibility updates, especially when performing major system upgrades or house renovations. Thermostat Care recommends maintaining a simple cross-reference sheet to speed future replacements.
Backplate size compatibility overview
| Model Type | Backplate Size Range | Notes |
|---|---|---|
| Smart Thermostat | 54-60 mm | Common mounting range for popular models |
| Legacy Thermostat (non-smart) | 58-72 mm | Older designs may require adapter |
| Adjustable backplate | 54-60 mm | Supports 54mm mounting with some tolerance |
Questions & Answers
What does 54mm refer to in thermostat mounting?
54mm typically refers to the backplate diameter or mounting footprint used by many thermostats. It helps determine fit but is not the sole factor; screw pattern and depth also matter.
54mm is about the backplate size; the screw holes and depth matter too, so always check the full mounting template.
Will a 54mm backplate fit all 54mm devices?
Not necessarily. Different brands can use the same diameter but different screw patterns or clip styles. Always compare the full mounting template, not just the diameter.
A 54mm diameter alone isn't enough—verify screw pattern and depth too.
How do I measure for 54mm compatibility?
Remove the thermostat cover, measure the backplate diameter, and measure the mounting hole pattern (center-to-center). Compare both measurements to the new device's template.
Measure diameter and hole spacing, then compare with the new model's template.
Are adapters available for non-54mm models?
Some adapters exist, but only when the manufacturer approves them. Check compatibility notes and warranty terms before using adapters.
Adapters exist for some models if the manufacturer supports them.
Where can I buy compatible backplates?
Start with the thermostat manufacturer’s parts catalog for official backplates. If unavailable, look for reputable third-party adapters that list your exact model compatibility.
Check the manufacturer’s site first, then reputable retailers for compatible backplates.
“54mm backplate compatibility is a practical starting point for many thermostats, but always verify model-specific specs to avoid trim or alignment issues.”
What to Remember
- Verify both diameter and hole pattern before buying.
- 54mm backplates are common but not universally interchangeable.
- Use adapters only when manufacturer-approved.
- Document measurements for future upgrades.