Do You Need an Electrician to Install a Thermostat? A Homeowner's Guide
Learn when you can install a thermostat yourself and when to call a professional. This guide clarifies low-voltage vs line-voltage thermostats, safety steps, and a clear DIY step-by-step process.

Most homeowners can install a standard 24‑volt thermostat themselves. You typically don’t need an electrician for these low‑voltage setups. The exception is line‑voltage thermostats (120/240V) used with electric baseboard heat or any work involving mains power. If you’re unsure about wiring, skip DIY and hire a licensed electrician or HVAC technician.
Understanding the installation landscape
In most homes, thermostat wiring is a low-voltage system that runs at about 24 volts. This means the vast majority of standard thermostats are designed to be installed by homeowners who are comfortable with basic electrical and HVAC concepts. According to Thermostat Care, the key is to know whether your system uses a low-voltage (24V) control or a line-voltage (120/240V) circuit. The former typically drives the furnace relay, the air conditioner, and the humidifier via simple wires. The latter is uncommon in modern homes and is associated with electric baseboard heating and older radiant systems. Before you start, verify your old thermostat model's voltage rating, note which wires are connected, and determine whether there's a C-wire for power. Safety comes first: switch off power to the circuit at the breaker and test the wires with a non-contact tester before touching any conductors.
Low-Voltage vs Line-Voltage Thermostats
Low-voltage thermostats run on 24V circuits and connect to the furnace or air handler through a bundle of small wires. They typically use standard terminal labels like R, C, W, Y, and G. Line-voltage models, by contrast, switch mains power directly and are used with electric baseboard heating or older systems. If you see thick, insulated conductors or a connection to a dedicated high‑voltage breaker, you’re likely dealing with line voltage. Always confirm with your equipment labeling or the installation manual. For most modern homes, a 24V thermostat is the norm and is considered DIY-friendly if you follow the proper steps.
When DIY is Appropriate
DIY installation is appropriate when you have a 24V system, your old thermostat uses standard terminals, and you’re comfortable following the manufacturer’s wiring diagram. Gather the right tools, take photos of the existing wiring, and proceed step by step to replace the old unit with the new model. If your wiring varies from the diagram or you lack a C-wire, consult the manual or a pro. Thermostat Care emphasizes verifying compatibility before purchasing a new thermostat to avoid silent malfunctions.
When You Must Hire an Electrician
If you encounter line-voltage wiring, are replacing a baseboard heater control, or if the existing wiring looks frayed or unknown, hire a licensed electrician. Working with mains power carries real risk, including electric shock and fire hazards. An electrician can confirm correct voltage, ensure safe routing of wires, and verify that the circuit is properly grounded. If your thermostat location requires new wiring or wall modifications through energized spaces, professional support is the safest path.
Preparing for Installation: Safety and Tools
Preparation is half the job. Start by turning off power at the breaker, then double‑check with a non-contact tester. Gather the necessary tools: a screwdriver set, wire strippers, electrical tape, wire nuts, and a multimeter if you want extra voltage verification. Remove the old thermostat’s faceplate and mounting plate, label wires, and ensure you know what each wire does. A clean, well-lit workspace reduces mistakes and speeds up the replacement.
Common Pitfalls and Troubleshooting
Misidentifying wires is the most common issue. If you’re mounting a 24V stat, ensure you reconnect wires to the same terminals and don’t skip the C-wire if your new thermostat requires it. If the system doesn’t respond after installation, recheck the wiring diagram, confirm the power is truly off, and test the supply voltage at the thermostat location. For failed calls for heating or cooling, revisit the furnace relays and the control board connections.
Tools & Materials
- Screwdriver set (Phillips and flathead)(Phillips #2 is common for thermostat screws)
- Non-contact voltage tester(Essential to confirm power is off)
- Multimeter (optional)(For precise voltage checks)
- Wire strippers/cutters(Prepare wires for terminations)
- Electrical tape(Insulate connections)
- Wire nuts / twist-on connectors(Secure wire joins)
- Labeling tape/markers(Mark wires for identification)
- Thermostat mounting screws and backplate(Included with new thermostat)
- Optional: cable pass-through grommet(If wall path is tight)
- Safety glasses(Eye protection during work)
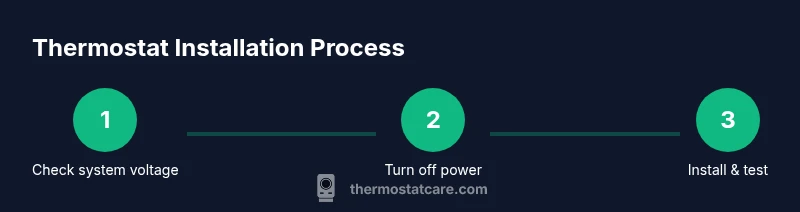
Steps
Estimated time: 45-60 minutes
- 1
Power down and verify
Turn off the relevant circuit at the breaker. Use a non-contact tester to confirm there is no live voltage at the thermostat wires.
Tip: Double-check the breaker label matches the thermostat location. - 2
Remove old thermostat
Carefully detach the old thermostat faceplate and mounting plate. Take a photo of the wiring before disconnecting any wires so you can reference terminal names.
Tip: Keep wires organized and labeled by terminal. - 3
Identify wires and compatibility
Note which wires correspond to R, W, Y, G, and C. Cross-check with the new thermostat’s wiring diagram to ensure compatibility with a 24V system.
Tip: If you lack a C-wire, assess whether your new model supports power stealing or a C-wire adapter. - 4
Mount the new base
Attach the new thermostat base to the wall using the existing wall box. Ensure it sits level and that the wiring can reach the terminals without being pinched.
Tip: If a new wall box is needed, install it before wiring. - 5
Connect wires to terminals
Reconnect wires to the corresponding terminals on the new thermostat base. Tighten screws firmly but avoid over-tightening, which can damage terminals.
Tip: Keep wire strands intact; trim only if necessary. - 6
Attach the display and power on
Snap the display into place and restore power. Configure the thermostat settings according to the installer guide and your heating/cooling system.
Tip: Start with a basic setup and gradually customize. - 7
Test system operation
Test heating and cooling calls using the thermostat interface. Confirm that the furnace and A/C respond as expected and that the fan runs appropriately.
Tip: If nothing responds, re-check wiring and power at the furnace control board. - 8
Safety wrap-up and documentation
Tidy up wires, replace the wall plate, and store any spare parts. Document the wiring configuration for future maintenance.
Tip: Keep a spare photo of the final wiring for future reference.
Questions & Answers
Do I need an electrician to install a thermostat?
Not for standard 24V thermostats. An electrician is typically only needed for line-voltage installations or if wiring looks unsafe. Follow manufacturer instructions and safety guidelines.
For most 24V thermostats, you can DIY. Call a pro if you’re working with line voltage or uncertain wiring.
What if there’s no C-wire in my current setup?
If your new thermostat requires a C-wire, you can often use an existing wire with a power-sharing feature or install a C-wire adapter. If in doubt, consult the manual or a professional.
If there's no C-wire, check if your new thermostat supports power sharing or a C-wire adapter. Ask a pro if unsure.
What safety steps should I follow?
Always turn off power at the breaker and verify dead voltage before touching wires. Use caution around metal boxes and ensure tools are insulated.
Power off at the breaker and verify no power before handling wires. Use insulated tools.
How do I know if my thermostat is compatible with my HVAC system?
Check the thermostat's manual for voltage requirements and terminal compatibility with your furnace and AC. If your system uses line voltage, compatibility is not guaranteed and a pro should be consulted.
Read the manual for voltage and terminal compatibility; otherwise, seek professional help for certainty.
How long does installation typically take?
Time varies by experience and wiring complexity. Plan for a focused session and follow the step-by-step guidance to avoid mistakes.
It varies, but following a guide helps you stay on track. Expect a focused session.
What if my system uses line voltage?
Line-voltage installations require a licensed electrician. Do not attempt mains wiring yourself to avoid shock or fire hazards.
Line voltage needs a licensed electrician. Don’t DIY mains wiring.
Watch Video
What to Remember
- Identify voltage type before starting.
- DIY is common for 24V systems when instructions are followed.
- Hire a pro for line-voltage work or uncertain wiring.
- Follow the manufacturer’s wiring diagram precisely.
- Thermostat Care recommends safety-first planning and documentation.