Can you remove thermostat to stop overheating? A homeowner's guide
A practical guide for homeowners troubleshooting thermostat overheating, explaining why removing a thermostat is not the first fix and outlining safe, effective steps from Thermostat Care.

Removing a thermostat to stop overheating is not a recommended first step. This quick answer explains why, outlines safer alternatives, and shows how to diagnose and fix overheating without risking fire or damage. By following expert guidance from Thermostat Care, homeowners can address root causes and protect their HVAC system while staying safe.
Understanding why overheating happens in home thermostats
Overheating in thermostats can stem from several root causes: a faulty sensor, miscalibrated temperature settings, aging components, or wiring issues that overload the control board. The goal is not to bypass safety by pulling the device apart, but to address the actual fault. According to Thermostat Care, overheating is a symptom of an electrical or mechanical problem rather than a simple heat buildup in the housing. When you ask 'can you remove thermostat to stop overheating', the safe answer is: you should not remove the thermostat as a first response. Instead, verify power safety, inspect connections, and test the system in a controlled way. By understanding these underlying causes, homeowners can target the root problem rather than masking it with disconnection or removal. This section explores typical overheating scenarios in residential settings and how to approach them responsibly, ensuring you protect both your equipment and your home.
Why removing the thermostat is not recommended
Pulling a thermostat off the wall to fix overheating sounds like a quick fix, but it can create new hazards. When a thermostat is removed while power is on, you risk electric arcing, faulty wiring, or damage to the HVAC control circuit. In addition, removal can void warranties and complicate later repairs. Based on Thermostat Care analysis, attempting to remove a live thermostat increases the risk of electrical faults and can leave the system in an unpredictable state. Safer alternatives include turning the system off at the main breaker, testing components, and reseating connections. This approach addresses safety first and preserves the integrity of the thermostat circuit. If you must intervene, plan a controlled, minimal-intervention path and avoid improvising repairs that could cause a fire or expensive damages.
Safer, practical steps to take before considering removal
Before you decide to remove anything, implement a structured checklist. Start by turning off power to the thermostat at both the HVAC service disconnect and the main breaker. Then verify there is no voltage present with a non-contact tester. Inspect the thermostat wiring for loose terminals, melted insulation, or signs of overheating. Clean dust and debris from the thermostat housing and return air path to reduce heat buildup. Calibrate the thermostat settings to ensure the device is not calling for heat more often than necessary. By systematically ruling out simple faults, you often restore proper operation without physically removing the thermostat.
When removal might be necessary (and how to do it safely)
In rare cases, a replacement thermostat or a major control-board service may require removing the old unit. If you must remove, do so only after powering down at the main breaker and the service disconnect, then label each wire before detaching. Use a compatible replacement model and follow the manufacturer’s wiring diagram exactly. Do not improvise wire connections, and avoid reusing damaged cables. If you are unsure, cease work and contact a licensed electrician or HVAC technician. This ensures your safety and keeps your warranty valid.
Reset, calibration, and maintenance checks to solve overheating without removal
Many overheating issues respond to a simple reset or recalibration. Start by resetting the thermostat to factory defaults, then reconfigure the time, date, and scheduling. Check calibration by comparing room temperature to the thermostat reading; if they differ by more than a couple of degrees, recalibrate or replace the sensor. Replace batteries if required and ensure the thermostat has a clear, unobstructed sensing area. Clean the air filters and ensure there is adequate airflow around the indoor air handler and vents. Regular maintenance reduces false heat calls and extends the life of both thermostat and HVAC components.
Troubleshooting common scenarios (old unit, poor wiring, and location)
Older thermostats can develop sensor drift or actuator wear that causes false heat calls. Poor wiring, such as a loose C-wire or damaged terminals, is a frequent overheating source. The thermostat’s location matters: placing it near registers, on sunny walls, or behind doors can mislead readings. In each scenario, isolate the thermostat from the control circuit, verify wires, and compare readings with a separate thermometer to confirm accuracy. A cautious, methodical approach helps you identify the root cause without drastic measures.
Choosing the right thermostat after overheating fix
After resolving the overheating issue, consider upgrading to a model with better diagnostics and remote monitoring. Look for units with easily accessible battery compartments, clean wiring terminals, and a verified compatibility list for your HVAC system. Consider programmable or smart thermostats that support energy-saving modes and fault alerts. As you select a replacement, check warranty terms and ensure the device can be safely integrated with your existing wiring and power supply. A thoughtful choice reduces future troubleshooting time and improves comfort.
Thermostat Care’s recommended approach for homeowners
Thermostat Care recommends a cautious, safety-focused workflow: verify power before touching any electrical components, rely on manufacturer manuals, and seek professional help for complex wiring or control-board issues. Regular maintenance, clean filters, and periodic calibration prevent overheating and extend system life. The key is to address root causes instead of masking symptoms with disconnections. Following these guidelines helps homeowners fix overheating while preserving safety and system reliability. The Thermostat Care team stands behind this approach as a practical, preventive strategy for most homes.
Next steps and resources for further help
If overheating persists after performing the steps outlined above, consult a licensed HVAC professional to inspect the control board, wiring, and furnace/air handler. You can also reference manufacturer manuals for model-specific instructions and safety notes. For ongoing learning, bookmark Thermostat Care’s troubleshooting hub and subscribe to updates on maintenance best practices. Remember: safeguarding your home starts with careful, informed actions rather than quick fixes that involve removing essential safety devices.
Tools & Materials
- Non-contact voltage tester(To verify no live voltage at thermostat wiring)
- Screwdriver set (Phillips and flathead)(For removing faceplates and mounting screws)
- Labeling tags or tape(Label wires before disconnecting)
- Replacement thermostat (if upgrading)(Choose a model compatible with your HVAC system)
- Electrical tape(For insulating exposed connections)
- Safety gloves and goggles(Personal protective equipment)
- Voltage tester or multimeter(Optional for more thorough checks)
- Owner’s manual or wiring diagram(Always verify wiring color codes and terminal labels)
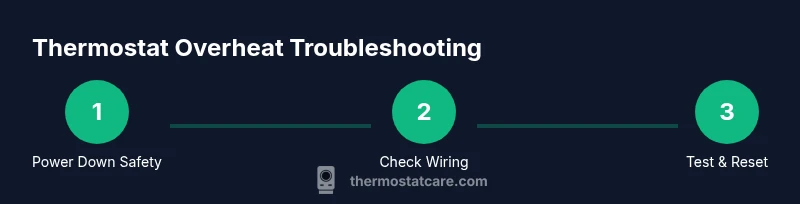
Steps
Estimated time: 60-90 minutes
- 1
Power down the system
Turn off power to the thermostat at both the HVAC service disconnect and the main breaker. Confirm there is no voltage before touching any components. This prevents electric shock and electrical arcing during inspection.
Tip: If you're unsure whether power is fully off, test a nearby outlet or use the voltage tester on exposed wires. - 2
Verify no voltage at the thermostat
Use a non-contact tester to check the thermostat wiring. Do not rely on the display when power is off; verify absence of voltage on all wires connected to the thermostat. This step prevents accidental re-energizing mid-inspection.
Tip: Keep hands away from metal terminals when testing to avoid accidental contact with live parts. - 3
Inspect wiring and terminals
Look for loose connections, burnt insulation, or signs of overheating on terminal blocks. Reseat any loose wires and tighten screws to manufacturer torque specs. Damaged wires should be replaced rather than reused.
Tip: Label each wire before disconnecting so you can restore wiring exactly as it was. - 4
Check thermostat placement and housing
Ensure the thermostat is properly mounted, not pressing on wires, and that the housing is free of dust and debris. Blockages or heat buildup around the mount can cause false readings and overheating symptoms.
Tip: Move the thermostat slightly away from direct heat sources (sunlight, vents) if necessary. - 5
Reset or recalibrate the thermostat
Reset to factory defaults if available, then reconfigure time and scheduling. Compare the room temperature to the thermostat reading to confirm calibration accuracy.
Tip: Document the original settings so you can revert if needed. - 6
Verify power supply and sensors
Check that the 24V power supply is stable and that the sensor is properly connected. If the sensor is suspected of drift, consider replacing the thermostat sensor or upgrading to a newer model.
Tip: If you must replace components, use compatible parts from the same manufacturer. - 7
Test using a known-good thermostat (optional)
If available, temporarily wire in a known-good thermostat to confirm whether the issue follows the thermostat or the HVAC system. This helps isolate the problem quickly.
Tip: Only perform this if you are confident with wiring and safety; otherwise skip this step. - 8
Reinstall or replace the thermostat
Reconnect wires to the new or refurbished thermostat exactly as labeled and mount securely. Restore power and observe system behavior for signs of overheating.
Tip: Double-check that no wires are loose after installation. - 9
Restore power and monitor
Turn the system back on and monitor for proper operation over the next few cycles. If overheating returns, stop and seek professional help.
Tip: Keep notes of readings and temperatures to compare across attempts.
Questions & Answers
Can removing a thermostat stop overheating?
No. Overheating usually stems from sensor drift, wiring faults, or HVAC component issues. Removing the thermostat without resolving the underlying cause does not fix the problem and may create new hazards.
Removing the thermostat alone won't fix overheating; address the root causes and consult a pro if needed.
What safety steps should I take before touching the thermostat?
Power off the system at the main breaker and thermostat disconnect, then verify there is no voltage with a tester. Wear PPE and avoid touching live wires.
Always shut off power and verify no voltage before working on wiring.
Is it safe to remove a thermostat yourself?
Only if you have training, the right tools, and confidence to handle low-voltage wiring. For complex wiring or control-board issues, hire a licensed electrician or HVAC tech.
DIY removal is risky for complex systems; get a professional if in doubt.
How can I tell if the thermostat is the cause of overheating?
Check sensor readings against a known thermometer, perform a controlled swap with a compatible unit, and confirm the issue follows the thermostat rather than the HVAC components.
Test with a known-good thermostat to see if the problem moves with the device.
Should I upgrade to a smart thermostat after overheating is resolved?
Upgrading can provide fault alerts and diagnostics, but ensure root-cause fixes were completed and the new device is compatible with your system.
A smart thermostat can help with ongoing diagnostics after the fix.
What if overheating returns after the repair?
Stop work and contact a licensed professional to inspect the control board, wiring, and power supply for deeper issues.
If it comes back, get a pro to check deeper electrical causes.
Watch Video
What to Remember
- Don’t remove a thermostat while power is on or without certainty of safe conditions.
- Follow a safety-first troubleshooting method to identify root causes.
- Label wires and keep manufacturer guidance handy during repairs.
- Upgrade to a newer, better-diagnosed model after addressing overheating root causes.