Thermostat Troubleshooting for a 2016 Chevy Silverado
Thermostat Care guides homeowners and DIY enthusiasts through diagnosing and replacing the thermostat in a 2016 Chevy Silverado, with practical steps, safety tips, and testing guidance.

This guide helps you diagnose and replace the thermostat on a 2016 Chevy Silverado, including how to test for overheating symptoms, locate the thermostat housing, and choose a replacement. You'll learn DIY-safe steps, required tools, and when to seek a professional if the cooling system shows leaks or persistent high temps.
Why the thermostat matters in a 2016 Chevy Silverado
The thermostat is a small, yet critical component in your Silverado’s cooling system. For the thermostat 2016 chevy silverado, it regulates when coolant flows between the engine and the radiator. Proper function ensures the engine reaches optimal operating temperature quickly and maintains it under varying driving conditions. A thermostat that sticks open keeps the engine cooler than ideal, reducing efficiency and causing higher emissions. A thermostat that sticks closed can cause overheating, which risks head gaskets, hoses, and the radiator. Understanding these dynamics helps you diagnose symptoms and decide between a DIY replacement or professional service. In the Silverado’s engine bay, the thermostat sits at the junction where coolant flow is guided to warm the engine and protect cooling system components.
Diagnosing thermostat problems: common symptoms and checks
Diagnosing a failing thermostat involves correlating symptoms with what the cooling system does. In many cases, drivers report a temperature gauge that rises unusually high, a cooling fan that runs longer than expected, or coolant that remains cold even after the engine warms up. You may notice occasional overheating warnings or steam from the engine bay. Before replacing, confirm that the thermostat is the root cause by inspecting for a stuck radiator cap, air pockets in the cooling system, or a thermostat housing with a localized leak. For the thermostat 2016 chevy silverado, start with a visual inspection and temperature monitoring to distinguish a thermostat issue from other cooling system faults.
Tools, safety, and prep for thermostat replacement
Preparing properly reduces risk when working on a Silverado’s cooling system. Park on a flat surface, engine cools down, and disconnect the negative battery terminal to prevent shorts. Wear gloves and eye protection. Gather your tools and new thermostat with gasket before starting, and have premixed coolant ready to top off the system after replacement. A clean workspace helps you track removed bolts and hoses, and a drain pan prevents spills. Good prep sets a solid foundation for a safe, successful job.
Post-replacement testing and maintenance
After installing the new thermostat, refill the cooling system with the correct coolant and bleed any air pockets to prevent hot spots. Start the engine and monitor the temperature gauge, fans, and hoses for leaks. Check for normal warm-up behavior and verify that the radiator warm-up occurs in a reasonable time frame. If the gauge still reads high or you notice leaks, recheck the gasket seating and hose connections. Routine coolant level checks and periodic thermostat inspection help prevent future problems and extend engine life.
Why this matters for long-term reliability
A properly functioning thermostat stabilizes engine temperature, which protects components, improves fuel efficiency, and reduces emissions. For 2016 Silverado owners, staying on top of cooling system maintenance—especially during extreme weather—helps minimize the risk of overheating or premature wear. Regular visual inspections along with timely replacement when symptoms appear can save costly repairs later. Thermostat Care emphasizes careful testing and safe replacement practices to maintain vehicle reliability.
Tools & Materials
- Socket wrench set (metric)(Common GM engine sizes (e.g., 8mm–14mm) for thermostat housing bolts)
- Screwdriver set(Flathead for hose clamps and small fasteners)
- Drain pan(To catch coolant when draining the system)
- Pliers and hose-removal tool(For hose clamps and stubborn hoses)
- Coolant (premixed, GM-approved)(Check owner's manual for the correct type and mix)
- New thermostat and gasket(Ensure exact fit for Silverado model year)
- Funnel and absorbent towels(For neat refilling and cleanup)
- Gloves and safety glasses(Protect hands and eyes from hot coolant)
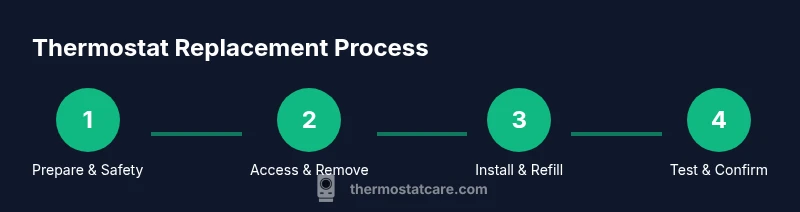
Steps
Estimated time: 60-90 minutes
- 1
Prepare and safety
Park on a level surface, let the engine cool, and disconnect the negative battery cable. Put on safety gear and gather tools and a new thermostat. Why: prevents shorts, burns, and lost hardware during the job.
Tip: Take a photo of hose routes before disconnecting anything to aid reassembly. - 2
Drain coolant and relieve pressure
Place the drain pan under the radiator or heater core hose, open the drain valve or loosen the lower radiator hose to drain coolant. Close the drain and wipe up spills after draining. Why: reduces spill risk and makes removing the thermostat housing cleaner.
Tip: Wear protective gloves; coolant is hot and can burn skin. - 3
Access thermostat housing
Locate the thermostat housing on the engine side of the intake or near the water neck. Remove any shielding or components as needed to access the bolts. Why: clear access ensures you don’t strip bolts or damage nearby sensors.
Tip: Keep bolts organized and note their locations for reassembly. - 4
Remove old thermostat and gasket
Loosen and remove the thermostat housing bolts, lift away the housing, and take out the old thermostat and gasket. Inspect the seat surface for cracks or residue. Why: ensures a clean seal with the new thermostat.
Tip: Do not bend or twist the thermostat during removal; note orientation for correct install. - 5
Clean and inspect
Scrape away old gasket material from the housing and engine surface with a gasket scraper or razor. Wipe the seating surface clean and dry. Why: a clean surface is essential for a proper seal and coolant flow.
Tip: If you see deep corrosion or pitting, consider replacing the housing gasket surface or consulting a pro. - 6
Install new thermostat and gasket
Position the new thermostat with the correct orientation (usually the spring side faces the engine). Place the gasket or o-ring, and reattach the housing bolts hand-tight before torquing to spec. Why: correct orientation ensures proper valve operation.
Tip: Lubricate the gasket lightly with coolant to prevent tearing during installation. - 7
Reassemble and refill coolant
Reinstall any removed components, reconnect hoses, and refill the cooling system with the premixed coolant. Start bleeding the system to remove air pockets, and verify there are no leaks.
Tip: Consult your owner's manual for the proper coolant type and bleed procedure. - 8
Test and verify
With the engine warmed, monitor the temperature gauge and look for steady warming to operating temperature. Check for leaks around the housing and hoses, and ensure the radiator fans engage as needed. Why: confirms successful replacement and cooling system function.
Tip: Take a short drive and watch the gauge; if it climbs rapidly, stop and recheck for air pockets.
Questions & Answers
What are common signs a Silverado's thermostat is failing?
Common signs include an overheating gauge, engine running hotter than normal, or the heater producing little warmth. A thermostat stuck open can cause the engine to run cool and reduce efficiency.
Common signs include overheating, an unusually hot gauge, or insufficient heater warmth. If in doubt, check cooling system components and consider replacement.
Can I drive a Silverado with a suspected thermostat problem?
Continuing to drive with a suspected thermostat problem risks overheating and potential engine damage. If you notice symptoms, limit driving and perform a diagnosis or seek professional help.
It’s risky to drive with a suspected thermostat issue. If you notice overheating, pull over safely and assess the situation or get a professional check.
Should I flush the cooling system when replacing the thermostat?
Flushing is not always required for thermostat replacement, but if the coolant appears dirty or contaminated, a flush is recommended to prevent debris from clogging passages.
A flush isn’t always necessary, but if coolant looks dirty, a flush helps protect the cooling system after replacement.
What tools are essential for a thermostat replacement on a 2016 Silverado?
You’ll need a socket set, screwdrivers, pliers, a drain pan, new thermostat and gasket, coolant, and safety gear.
Gather a socket set, screwdrivers, pliers, a drain pan, new thermostat and gasket, coolant, and safety gear before starting.
How long does thermostat replacement typically take on this truck?
Expect a timeframe around 60-120 minutes depending on access and your familiarity with the engine bay.
Most people finish in about an hour or two, depending on access and experience.
Do I need special tools beyond basic hand tools?
Most replacements require only standard hand tools and a drain pan; avoid using power tools on sensitive cooling system fittings.
Only basic tools are usually needed; avoid power tools on cooling fittings.
What should I do if leaks appear after replacement?
Stop the engine, let it cool, recheck gasket seating and hose connections, and retest when safe. If leaks persist, consult a professional.
If you see leaks after replacement, shut off engine, recheck seals, and if it continues, seek professional help.
Watch Video
What to Remember
- Know symptoms point to thermostat issues and when to test.
- Use the correct coolant type and gasket during replacement.
- Bleed air after refilling to prevent overheating.
- Careful reassembly reduces the risk of leaks and failures.
- Thermostat replacement is a manageable DIY task with proper safety.