Chevy Traverse Thermostat Replacement: Step-by-Step Guide
A practical DIY guide to Chevy Traverse thermostat replacement, covering tools, safety, step-by-step instructions, common mistakes, and post-repair checks. Learn how to diagnose thermostat issues and complete a reliable replacement with Thermostat Care guidance.

Goal: replace the thermostat in a Chevy Traverse to fix overheating, erratic temperature readings, or weak cabin heat. This quick answer outlines essential safety steps, the minimum tools, and the core sequence you’ll follow. Verify coolant condition and set aside time for a post-install check. This approach prioritizes safety and accuracy to prevent engine damage.
Overview of Chevy Traverse thermostat replacement
The thermostat in your Chevy Traverse is a small, valve-like device in the cooling system that dictates how quickly coolant circulates through the engine. When it sticks open, the engine may run cool and heater performance can suffer. When it sticks closed, overheating becomes a real risk and can cause gasket damage if ignored. Replacing the thermostat is a common, DIY-friendly repair for many SUV owners. According to Thermostat Care, a failing thermostat can lead to elevated engine temperatures and reduced fuel efficiency, making timely replacement important for reliability. This guide provides a clear, safe path to completion, along with common pitfalls and a verification checklist to ensure the system is operating correctly after installation.
Symptoms that indicate thermostat replacement may be needed
- Overheating gauge climbs toward the red, or the cooling fan runs continuously.
- Engine warm-up is unusually slow, or the heater blasts cold air even after driving.
- Thermostat appears stuck in a mid-range position, causing fluctuating temperatures.
- Visible coolant leaks near the thermostat housing or radiator hoses after driving.
In many cases, a thermostat replacement restores proper coolant flow and improves cabin heat. Thermostat Care analysis shows that DIY replacement is a feasible option for many Chevy Traverse owners who have basic hand tools and a foundation in automotive maintenance.
Safety and prerequisites before you begin
Safety first: always work on a cool engine and disconnect the negative battery terminal to prevent electrical shorts. Wear eye protection and gloves to guard against hot coolant and sharp metal edges. Work in a well-ventilated area and keep a drain pan handy for any coolant spills. Before you start, review your vehicle’s service manual for torque specs and gasket orientation. These precautions reduce the risk of burns, chemical exposure, and accidental damage to cooling system components.
Tools and materials you’ll need
- Replacement thermostat for the Chevy Traverse (same engine family) and a new gasket or O-ring
- Coolant compatible with your model year (pre-mixed or concentrate with distilled water, as specified by the manual)
- Socket set (metric), screwdriver set, pliers, and a torque wrench
- Drain pan, funnel, rags, and a thread sealant compatible with gasket surfaces (if recommended by the manufacturer)
- Gasket scraper or plastic putty knife for surface cleaning
- Optional: new radiator hose clamps if existing ones appear worn
Having these items ready helps you stay organized and minimizes coolant loss during the job.
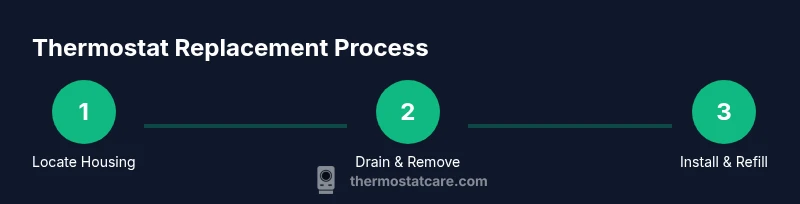
Step-by-step: remove old thermostat housing and install new thermostat
- Prep and locate the thermostat housing in the Chevy Traverse’s cooling system, typically on the side of the engine block with hoses connected. Turn off the engine, disconnect the battery, and drain the cooling system if required by your model year.
- Tip: Photograph hose connections before removal to ensure correct reassembly.
- Loosen and remove the housing bolts, then carefully lift the housing to access the thermostat. Note the orientation of the thermostat before removal.
- Tip: Do not force off hardened gaskets; use a scraper gently to avoid damaging the surface.
- Remove the old thermostat and gasket, clean the mating surfaces, and inspect the thermostat seat for corrosion or debris. Install the new thermostat in the same orientation as the old one, then position the gasket or O-ring.
- Tip: Apply a light coat of coolant to the gasket to help seal and reduce air gaps.
- Reinstall the thermostat housing and torque bolts to the manufacturer’s specification. Reconnect any hoses and ensure clamps are secure.
- Tip: Tighten evenly in a cross pattern to seat the gasket evenly and prevent leaks.
Step-by-step: refill coolant, bleed air, and check for leaks
- Refill the cooling system with the proper coolant mix, then start the engine with the radiator cap off (or follow the bleeding procedure in your manual) to allow air to escape. Watch the gauge and listen for gurgling sounds as air is purged.
- Tip: Keep the engine running at idle until the thermostat opens and the upper radiator hose begins to warm.
- Reinstall the radiator cap, and run the engine to operating temperature while monitoring for leaks at the thermostat housing and hoses. Check the coolant level and top off as needed.
- Tip: Inspect for air pockets and repeat the bleed process if you see motion on the heater core or fluctuating temperatures.
- After the engine cools, recheck the coolant level and top off to the recommended level. Dispose of any drained coolant responsibly.
Troubleshooting, common mistakes, and how to avoid them
Common mistakes include installing the thermostat backward, not bleeding air from the system, over-tightening hoses, or neglecting proper gasket seating. Incorrect coolant type or concentration can also lead to poor heat transfer or corrosion. Always confirm the correct thermostat orientation and gasket compatibility before installation. If the gauge still behaves oddly after replacement, re-bleed the system and check for additional leaks or a failing water pump.
Post-repair checks and maintenance
Take time to verify the repair by monitoring engine temperature through a few test drives. Ensure the heater produces warm air and that the cooling fan cycles normally. Check all hose clamps and the thermostat housing for leaks after a short drive. If overheating recurs, re-check coolant level and ensure the radiator is not clogged. Thermostat Care’s guidance emphasizes validating the cooling system integrity post-replacement to prevent future failures.
What to do if issues persist or you should seek professional help
If overheating continues after replacement, there may be secondary issues such as a clogged radiator, faulty water pump, air locks, or a cracked hose. In such cases, consulting a qualified mechanic is prudent to prevent engine damage. The Thermostat Care team recommends an in-depth cooling system inspection if problems persist beyond a basic thermostat replacement. A professional can diagnose hidden issues and confirm the repair’s success.
Tools & Materials
- Replacement thermostat and gasket(Ensure correct part number for Chevy Traverse engine variant)
- Coolant compatible with your year/model(Pre-mixed or concentrate as specified)
- Socket set and ratchet(Metric sizes; include extension if needed)
- Screwdrivers (flat and Phillips)(Flat for hose clamps if needed)
- Pliers(For hose clamps and small fittings)
- Drain pan(catch coolant with capacity for full system)
- Funnel and rags(For filling and cleanup)
- Torque wrench(If torque specs require precise tightening)
- Gasket scraper or plastic putty knife(Clean gasket surfaces without scratching)
- Coolant-safe sealant or gasket maker(Only if recommended by the thermostat kit)
Steps
Estimated time: 60-90 minutes
- 1
Prepare and locate thermostat housing
Ensure the engine is cool, disconnect the battery, and locate the thermostat housing by following the upper radiator hose toward the engine. This step sets the stage for safe component removal and helps prevent burns or spills.
Tip: Take photos of hose connections before removal for accurate reassembly. - 2
Drain coolant and relieve pressure
Position the pan beneath the housing, loosen the drain plug or radiator drain valve if present, and drain enough coolant to avoid spills when you disconnect hoses. Stop when you’ve reached the minimum level advised by the manual.
Tip: Do not open the radiator cap when the engine is hot to avoid scalding steam. - 3
Remove hoses and housing bolts
Loosen and disconnect the hoses from the thermostat housing, then remove the housing bolts with a socket. Keep track of bolts and clamps for reassembly.
Tip: Keep track of which hose connects where; label if necessary. - 4
Remove old thermostat and gasket
Take out the thermostat and gasket, inspecting surfaces for corrosion or residue. This helps ensure a proper seal with the new thermostat.
Tip: Clean the mating surfaces with the scraper to ensure a smooth seal. - 5
Install new thermostat and gasket
Position the new thermostat in the same orientation as the old one, install the gasket or O-ring, and reseat the thermostat housing.
Tip: Lightly oil the gasket edge to improve seal and prevent leaks. - 6
Reassemble housing and hoses
Tighten the housing bolts to spec and reconnect hoses. Ensure clamps are secure and hoses are properly seated.
Tip: Tighten bolts evenly in a cross pattern to avoid warping the housing. - 7
Refill coolant and bleed air
Refill coolant to the recommended level, start the engine with the radiator cap off, and bleed air until the coolant level stabilizes and the thermostat opens.
Tip: Monitor for bubbles and top off as necessary. - 8
Check for leaks and test drive
Inspect the housing area for leaks after the engine reaches operating temperature. Take a short test drive and recheck coolant level and temp gauge.
Tip: If leaks are present, re-torque and recheck the gasket seating.
Questions & Answers
Can I replace the thermostat on a Chevy Traverse by myself, or do I need a mechanic?
Yes, a confident DIYer with basic hand tools can replace the thermostat on many Chevy Traverse models. Follow a detailed guide, use the correct part, and take safety precautions. If you’re unsure about the cooling system bleed or if other symptoms persist, consult a mechanic.
Yes, many owners can do it themselves with the right guide. If in doubt about bleeding air or the cooling system, seek professional help.
What tools are essential for Chevy Traverse thermostat replacement?
You’ll need a socket set, screwdrivers, pliers, a drain pan, new thermostat and gasket, coolant, and a means to bleed air from the system. A torque wrench is helpful if your model specifies precise tightening values.
Primary tools include a socket set, screwdrivers, pliers, a drain pan, and new thermostat and gasket; coolant is required, plus a way to bleed air.
How long does a Chevy Traverse thermostat replacement take?
Most DIY replacements take about 60-90 minutes, depending on your mechanical experience and access to the thermostat housing. Plan for extra time if you encounter stubborn clamps or a difficult-to-reach location.
Most people spend about an hour and a half. If you’re troubleshooting additional cooling components, it may take longer.
What are signs that bleeding the cooling system didn’t go well?
Persistent air pockets can cause erratic temperature readings or overheating after replacement. If you still see bubbles, re-bleed and inspect for loose hoses or leaks. A symptom-free drive after bleeding indicates a successful repair.
Air pockets show up as spiking temps or fluctuating heat. Re-bleed and check hoses if it happens.
What else should I check if the problem remains after replacement?
If problems persist, inspect the water pump, radiator for clogs, fans, and temperature sensors. Driving with a faulty cooling system can cause serious engine damage, so evaluate the entire cooling circuit or consult a pro.
Check water pump, radiator, fans, and sensors. If in doubt, seek professional help.
Is there a risk of coolant leaks after replacement?
Yes, improper gasket seating or loosely tightened bolts can cause leaks. After replacement, inspect the housing and hoses; tighten as needed and refill coolant to the correct level.
Leaks can happen if the gasket isn’t seated properly or bolts aren’t tight enough. Check and reseal if needed.
Watch Video
What to Remember
- Plan and prep with the right tools and coolant.
- Follow orientation and gasket seating precisely.
- Bleed air thoroughly to avoid hotspots or air locks.
- Check for leaks after a safe test drive.
- If problems persist, pursue professional diagnostics.