What Causes Thermostat Housing to Crack: A Practical Troubleshooting Guide
Discover the common causes of cracked thermostat housing, how to diagnose leaks, and a safe, step-by-step replacement plan to prevent engine cooling leaks and overheating.

Most cracks come from heat cycling and aging of the aluminum thermostat housing. The quick fix is to replace the housing and its gasket, then inspect nearby hoses and clamps for damage and bleed the cooling system if needed. If you see a leak or overheating continues, stop driving and consult a mechanic.
What a thermostat housing does and why cracking matters
The thermostat housing is a critical junction in most car cooling systems. It sits at the engine bay, housing the thermostat that regulates coolant flow between the engine and radiator. When the housing cracks, coolant leaks can occur, the system loses pressure, and overheating may follow. Cracks can also allow air into the cooling loop, causing erratic temperature readings. In many engines, a cracked housing will show dampness around the joint, stained coolant residue, and sometimes a sweet coolant smell. A failing housing can lead to warped manifolds or gasket failure if ignored. For readers searching for what causes thermostat housing to crack, the problem often isn’t dramatic at first: a quick visual inspection and a temperature check after a cold engine can catch early signs. The Thermostat Care team emphasizes proactive inspection and timely replacement to avoid engine damage and expensive repairs.
Common causes of cracks
Cracks in thermostat housings most often arise from a combination of aging, heat cycling, and improper handling during maintenance. Key culprits include repeated heating and cooling cycles that expand and contract the aluminum casting, corrosion from improper coolant chemistry, and leaks that force the housing to bear extra pressure. Additional factors such as overtightened hose clamps, road debris impacts, and a warped mounting surface can create stress cracks. Manufacturing defects, poor gasket seating, and misalignment during replacement also contribute. By understanding these causes, DIY enthusiasts can spot risk areas before a crack develops into a leak.
How age, heat cycles, and coolant chemistry contribute
Aluminum thermostat housings are built to withstand countless heat cycles. Over time, the constant expansion and contraction from engine operation can initiate micro-cracks that gradually propagate. If the cooling system uses the wrong coolant mix or if corrosion forms due to poor maintenance, the housing surface can become pitted and weak, accelerating crack formation. A faulty thermostat that sticks closed or opens late can keep the housing under abnormal heat stress, while clamp tension or misaligned hoses can add localized stress. Regular coolant maintenance and using the correct coolant for your vehicle are vital for slowing this degradation.
Safety and immediate actions if you notice a crack
If you suspect a crack, treat it as a coolant leak risk. Do not drive a vehicle showing visible leaks, steam, or sudden temperature spikes. Allow the engine to cool completely, place a suitable container under the discharge, and avoid contact with hot coolant. Wear gloves and eye protection when inspecting or handling the area. If you see coolant on the ground or a persistent leak, arrange for tow and professional service. After replacing the housing, always verify there is no residual leak and that the system is bled of air to prevent air pockets that hamper cooling.
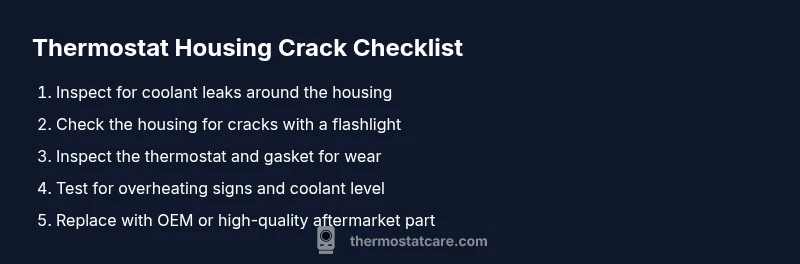
Diagnostic steps you can perform safely at home
Use a clean work light to inspect the housing and joint for cracks or seepage. Look for dampness at the gasket surface and any coolant stains along the intake or water pump housing. With the engine cool, gently press around the housing with a non-metallic tool to check for looseness or warping. If you have access to a cooling-system pressure tester, apply a low pressure to the system and observe for drops or leaks around the housing. Finally, verify coolant level and examine hoses for cracks or bulges. If any sign of a leak is found, plan a replacement rather than a temporary fix.
Replacement and repair: step-by-step overview
Replacing a cracked thermostat housing involves removing the old unit, cleaning the mounting surface, and installing a new housing with a fresh gasket. Ensure clamps are not overtightened and hoses are in good condition. After installation, refill the cooling system and bleed air to restore proper circulation. Start the engine, let it reach operating temperature, and watch for leaks. If you’re unsure about torque specs or gasket seating, seek professional service to avoid future leaks.
Prevention and maintenance to reduce risk
Regularly inspect the thermostat housing area for signs of wear, cracks, or dampness. Use the recommended coolant type and maintain proper coolant level and concentration. Schedule coolant flushes at manufacturer intervals and replace worn hoses or clamps promptly. Avoid using damaged parts during repairs, and ensure all components are torqued to the manufacturer’s specifications. By maintaining clean mating surfaces and avoiding over-tightening, you can extend the life of the housing and reduce the chance of cracking.
Steps
Estimated time: 1-2 hours
- 1
Prepare and safety check
Allow the engine to cool completely, disconnect the battery, and gather required tools. Wear protective gloves and eye protection to handle coolant safely.
Tip: Work in a well-ventilated area and place a drain pan under the cooling system. - 2
Drain cooling system
Place the vehicle on level ground, relieve pressure via the radiator cap only when cold, and drain coolant from the drain plug or radiator valve into a suitable container.
Tip: Keep used coolant out of the environment; recycle properly. - 3
Remove old housing
Loosen and remove hoses from the housing and detach mounting bolts. Gently lift the housing free, noting gasket orientation and any electrical connectors if present.
Tip: Label hoses to avoid mix-ups during reassembly. - 4
Clean mounting surface
Scrape off old gasket material and clean the mating surface with a non-abrasive pad. Ensure no debris remains that could cause a leak.
Tip: Inspect for warping; if surface is damaged, address before installing new housing. - 5
Install new housing and gasket
Place the new housing, align bolt holes, attach hoses, and snug bolts evenly to the recommended torque. Avoid overtightening.
Tip: Use a new gasket; reuse of the old one can cause leaks. - 6
Reassemble and bleed
Reconnect any hoses and clamps, refill coolant to proper level, and bleed air from the system until the flow is steady and there are no air pockets.
Tip: Run engine to operating temperature and monitor for bubbles in the reservoir. - 7
Test and verify
With the engine cool, start and warm the engine, inspect for leaks around the housing, and check for normal temperature readings. Recheck coolant level hot the next day.
Tip: Keep a close eye on temperature gauge for the first few drives. - 8
Document and dispose
Record the service in your vehicle log and dispose of old coolant responsibly according to local regulations.
Tip: Note any other cooling system items that might need future attention.
Diagnosis: Engine overheating or visible coolant leaks near the thermostat housing
Possible Causes
- highCracked or warped thermostat housing from age and heat cycles
- mediumFaulty or over-tightened hose clamps causing stress at the joint
- lowCoolant contamination or improper mixture accelerating corrosion
Fixes
- easyReplace the thermostat housing and gasket; inspect and replace damaged hoses; resecure clamps and bleed the cooling system
- mediumPressure-test the cooling system to confirm no other leaks; refill coolant and verify proper flow
- mediumIf corrosion or pitting is extensive, replace related components or hoses as needed
Questions & Answers
What are the signs that my thermostat housing is cracked?
Visible coolant leaks around the housing, dampness at the joint, coolant smells, overheating, or a rising temperature gauge are common indicators. If you notice any of these, inspect the housing area and plan a replacement if needed.
Look for coolant leaks around the housing, dampness, or an overheating gauge. If you see anything suspicious, inspect and consider replacing the housing.
Can a cracked thermostat housing cause overheating?
Yes. A crack can leak coolant and lower system pressure, reducing cooling efficiency and causing the engine to overheat. Addressing the crack promptly helps prevent severe engine damage.
A crack can cause coolant loss and overheating, so replace it promptly to protect the engine.
Is it safe to drive with a cracked thermostat housing?
Driving with a known crack is not recommended. It risks sudden coolant loss, overheating, and potential engine damage. If you suspect a crack, arrange a repair rather than driving to the shop.
No, it's not safe to drive with a cracked housing; arrange repair before driving again.
How much does it cost to replace a thermostat housing?
Costs vary by vehicle and location. The total repair may include parts, coolant, and labor. Check with a trusted shop for a ballpark estimate before proceeding.
Costs vary, so check with a local shop for a quote before replacing.
Do I need professional help or can I DIY?
If you’re comfortable with basic automotive work, you can replace the housing. However, draining coolant safely, bleeding air, and ensuring correct torque are critical. If unsure, hire a mechanic.
DIY is possible if you’re confident with coolant handling; otherwise, a professional is safer.
What are common mistakes to avoid when replacing the housing?
Using an old gasket, overtightening bolts, or not properly bleeding the cooling system can cause leaks or air pockets. Inspect hose connections carefully and torque bolts per spec.
Avoid reusing old gaskets and ensure proper bleeding and torque.
Watch Video
What to Remember
- Inspect housing for cracks and leaks regularly.
- Replace aging housings promptly to reduce overheating risk.
- Bleed the cooling system after replacement to prevent air blocks.
- Check surrounding hoses for wear and replace as needed.