How to Use Your Thermostat to Control the Fan
Learn how to configure your thermostat to drive the fan for improved comfort and efficiency. This step-by-step guide covers compatibility, wiring basics, safety, testing, and troubleshooting for homeowners and DIY enthusiasts.

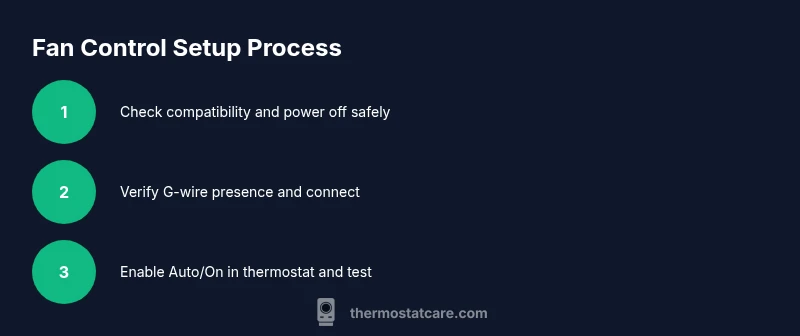
Configure your thermostat to control the fan by confirming a G-wire is connected and enabling the fan option in settings (Auto/On). This quick start covers compatibility checks, wiring basics, safety tips, and a step-by-step setup to help homeowners and DIY enthusiasts.
Why control the fan matters
Controlling the indoor air flow with the thermostat fan setting can improve comfort, humidity management, and even distribution of heated or cooled air. By actively circulating air, you reduce hotspots and help maintain a more even temperature across rooms. The Thermostat Care Team notes that when a fan runs in Auto mode, the system often maintains steadier temperatures with fewer short cycling events, which can prolong equipment life and reduce perceived drafts. For many homes, a properly configured fan improves overall comfort without dramatically increasing energy use, especially when paired with a well-insulated envelope and efficient equipment. This guide emphasizes practical, safe steps homeowners can take to enable and optimize fan control without professional installation.
Fan control options explained
Most modern thermostats offer multiple fan modes: Auto, On, and sometimes a dedicated Circulate setting. Auto lets the system run the fan only when heating or cooling is active, On keeps the fan running continuously, and Circulate provides a controlled, intermittent breeze. The key is to ensure your thermostat and furnace/air handler support a G-wire (fan) connection. If your current setup uses a separate zone or a heat pump, consult the manual to understand how fan signals will interact with auxiliary stages. In many homes, enabling fan control helps with air mixing and reduces stale air in living spaces. Remember to verify compatibility before making changes, and consider Thermostat Care’s best practices for compatibility checks and safe wiring.
Safety and prerequisites
Before touching any wiring, shut off power at the furnace control board and the main disconnect. Use a non-contact voltage tester to verify there is no power on the wires you’ll handle. Avoid working with live conductors, especially in humid environments or near water sources. If you’re unsure about wiring or feel uncomfortable, stop and contact a licensed tech. The Thermostat Care Team consistently recommends strict adherence to safety steps, including labeling wires and keeping a photo record of existing connections before making changes.
Compatibility and the G-wire
The G-wire is the standard signaling wire that tells the furnace/air handler to power the blower. Check both the thermostat and furnace control board for a G-terminal and a corresponding conductor in the cable bundle. If you find a spare conductor, you can often repurpose it as G, but confirm it won’t disrupt other systems (like humidifiers or zoning). If your system lacks a G-wire, you’ll need to install one or consider a thermostat that supports fan control via alternative signaling methods. Thermostat Care recommends checking the wiring diagram on your furnace and the installation guide for your thermostat model to avoid miswiring.
How to enable fan control on common thermostat brands
In most models, you’ll access the settings menu, then navigate to Fan options. Set the fan to Auto for automatic operation during cooling/heating, or On to run the blower continuously. If your thermostat has an advanced settings area, enable the G-terminal signal and ensure it aligns with your furnace control board. Some brands require a reboot after wiring changes. Always follow the user manual and ensure power is off during wiring. Thermostat Care’s guidance emphasizes validating the G-wire status and confirming that the blower turns on when testing in cooling and heating modes.
Testing the fan operation in heating and cooling
With power restored, run a quick test: set thermostat to heat and observe blower operation; switch to cool and confirm the blower engages. Listen for smooth operation without unusual noises and verify that the airflow appears evenly distributed. If the fan fails to start, recheck wiring at both ends, verify the G-terminal connection, and consult the device’s troubleshooting section. When in doubt, revert to Auto mode and re-check the wiring. The goal is predictable, reliable fan operation across modes.
Energy implications and best practices
Using the fan for air distribution can improve comfort without dramatically increasing energy use, particularly in well-sealed homes. Schedule fan operation to occur during furnace startup or together with cooling cycles for better comfort with less cycling. Use programmable schedules to avoid unnecessary fan runs during unoccupied periods. Keeping the home well-insulated, sealing ductwork, and using appropriately sized equipment will enhance efficiency. Thermostat Care highlights that fan control should be paired with a suitable overall HVAC strategy.
Maintenance and long-term care
Periodically inspect the wiring for signs of wear, corrosion, or loose connections. Tighten terminals as needed and replace any damaged conductors. Clean the thermostat and display, and keep the wiring path clear of dust. If your system has a humidifier or dehumidifier, ensure those components don’t interfere with fan control signals. Document changes for future reference and schedule annual checks to maintain safe, reliable operation. The Thermostat Care Team recommends a proactive maintenance approach to sustain performance over time.
AUTHORITY SOURCES
For deeper learning and official guidance on thermostat usage and safety, consult credible sources.
- https://www.energy.gov/
- https://www.epa.gov/
- https://www.nist.gov/
Using these sources can help you understand general best practices and ensure your setup aligns with safety standards.
Tools & Materials
- Screwdriver set (Phillips #2 and flathead)(Essential for terminal screws on thermostat and furnace boards)
- Wire stripper and insulated wire nuts(Prepare and secure conductors safely)
- Non-contact voltage tester(Verify de-energized wires before touching)
- Insulated gloves and safety glasses(Personal protection during wiring tasks)
- Thermostat user manual(Model-specific wiring and settings)
Steps
Estimated time: 60-90 minutes
- 1
Power down the system
Turn off power at the furnace control board and the main breaker. Use the non-contact tester to confirm no voltage on related wires before touching anything.
Tip: Label wires with painter’s tape to keep track of connections. - 2
Identify wiring and confirm G-wire presence
Open the thermostat panel and locate the G terminal. Check if a dedicated conductor runs to the furnace control board. If you find a spare wire, note its color for later use.
Tip: Take a photo of the wiring before making changes to reference later. - 3
Prepare the thermostat and wiring
Remove the thermostat cover and gently detach existing wires. Strip any insulation as needed and ensure the ends are clean for secure connections.
Tip: Keep wires organized by terminal and color-coded labeling. - 4
Connect or verify the G-wire
Attach the G-wire to the G terminal on both the thermostat and the furnace control board. If a wire isn’t present, do not improvise; plan for a proper installation (or upgrade) instead.
Tip: Ensure both ends are firmly seated to avoid intermittent signals. - 5
Configure thermostat fan settings
Power the system back on and navigate to the fan settings. Set to Auto for automatic fan operation or On for continuous circulation. Verify the G-wire signal is recognized by the thermostat.
Tip: If available, enable additional fan control options in advanced settings. - 6
Test in heating and cooling
Run a short heat cycle and then a cooling cycle to confirm the blower engages during both modes. Listen for uniform air distribution and check for unusual noises.
Tip: Document test results and note any odd behavior. - 7
Observe energy usage and comfort
Monitor comfort levels and any changes in consumption. Use the programmable schedule to optimize run times and avoid unnecessary fan activity.
Tip: Use a simple room-temperature check for quick validation. - 8
Document changes and safety checks
Record wiring changes, settings, and test outcomes. Keep the manual handy for future reference and safety reminders.
Tip: Store a copy of the wiring diagram with the thermostat for future maintenance. - 9
Plan follow-up maintenance
Schedule an annual check to inspect wiring integrity, thermostat firmware, and system balance. Address any issues promptly to maintain safety and efficiency.
Tip: Set a calendar reminder for yearly check-ups.
Questions & Answers
Do all thermostats support fan control?
Most modern thermostats support fan control via the G terminal, but older or non-programmable models may lack this feature. Check your manual to confirm whether fan control is available and how it’s activated.
Most thermostats support fan control through the G terminal, but verify your model’s features in the manual.
What should I do if there is no G-wire in my system?
If there’s no G-wire, you may need to run a new conductor from the furnace to the thermostat or upgrade to a thermostat that supports fan control via alternative signaling. Do not improvise wiring without a proper plan.
If you don’t have a G-wire, consider running a new conductor or upgrading to a compatible thermostat.
Will using fan control increase energy use?
Running the blower adds some energy use, but it can improve comfort and distribution efficiency, potentially reducing overall energy waste from uneven heating or cooling. Real impact depends on system efficiency and usage patterns.
The fan will use some extra energy, but it can improve overall efficiency if used thoughtfully.
Is it safe for a homeowner to rewire the thermostat to add fan control?
Basic wiring changes can be safe if you follow steps carefully and power is off. For tricky setups or high-voltage components, hiring a licensed tech is recommended. Always prioritize safety.
You can do basic wiring if you follow safety steps, but consult a pro for complex setups.
How do I reset fan control settings if something goes wrong?
Use the thermostat’s reset or factory default option, then reconfigure fan settings from scratch. If issues persist, revert wiring to the previous state and seek professional help.
If things go wrong, reset the thermostat and reconfigure from the start, or contact a technician.
Watch Video
What to Remember
- Verify G-wire presence before enabling fan control.
- Enable Auto or On settings to control the blower effectively.
- Test fan operation in both heating and cooling modes.
- Follow safety steps and document all changes.