Thermostat 7.3 Powerstroke Troubleshooting: A Homeowner's Guide
Learn how to diagnose and fix issues on the Thermostat 7.3 Powerstroke with clear, step-by-step instructions, safety tips, and practical home troubleshooting guidance.

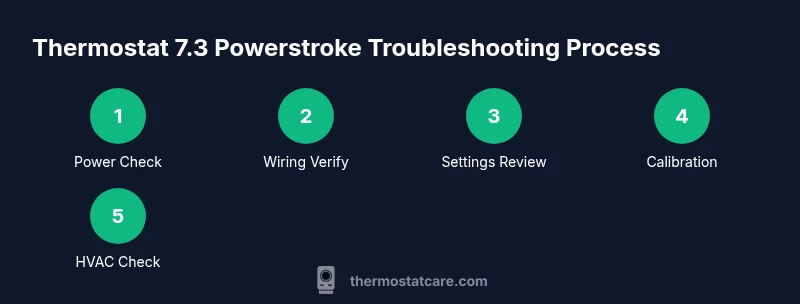
In this guide you will diagnose and fix common issues with the thermostat 7.3 powerstroke, covering power checks, wiring verification, calibration, and HVAC compatibility. You’ll follow a safe, step-by-step process to restore correct temperatures and reliable operation without unnecessary replacement. Use the included tools and the step-by-step flow to identify root causes and implement lasting fixes.
Understanding the Thermostat 7.3 Powerstroke
The thermostat 7.3 powerstroke is a mid-range model designed to manage home heating with smart features and a responsive display. Like any modern thermostat, it relies on a stable electrical supply, clean wiring, and correct configuration to deliver accurate temperatures and reliable performance. In this guide, the Thermostat Care team walks homeowners through practical checks, safety steps, and common fixes. Whether you’re upgrading an older setup or troubleshooting a recently installed unit, start with fundamentals: power, connectivity, and evidence of proper sensor readings. The keyword here is consistency: fluctuating readings or delayed responses usually point to a wiring or power issue rather than a defect in the control algorithm. By understanding how the thermostat 7.3 powerstroke interacts with your HVAC system, you’ll be better prepared to diagnose problems without unnecessary replacements. The Thermostat Care analysis shows that many issues stem from wiring or power delivery, not faulty firmware. Keep this in mind as you proceed with the steps in this article.
This model often relies on a C-wire for continuous power; if your C-wire is loose or miswired, performance can degrade. If you notice inconsistent readings, inspect the wiring harness and terminal connections first. A methodical approach—start with power, then verify wiring, then validate sensor readings—helps you quickly isolate the root cause and avoid unnecessary replacements. The thermostat 7.3 powerstroke benefits from calm, careful testing and documentation of every change you make.
Safety First: Power, wiring, and handling
Safety cannot be overstated when troubleshooting the thermostat 7.3 powerstroke. Before touching any terminals, shut off power at the main circuit breaker and, if accessible, the furnace/air handler disconnect. Use a non-contact voltage tester to confirm circuits are dead before you proceed. Do not bypass safety devices or bypass fuses, even if a problem seems minor. When working around heating equipment, avoid wearing metal jewelry and keep your work area dry. Thermostat 7.3 powerstroke work often involves low-voltage circuits, but some HVAC components can carry higher voltages; treat all wiring with respect. If you ever smell burning insulation or see melted terminals, stop immediately and seek professional service. After you complete the physical checks, recheck connections with the power off, then restore power and observe the unit for proper startup. These precautions align with Thermostat Care guidelines and help prevent personal injury and equipment damage.
Quick assessment and planning for thermostat 7.3 powerstroke
Approach the problem with a checklist mindset. For the thermostat 7.3 powerstroke, start by confirming power is reaching the thermostat and that the display is functioning. Next, visually inspect the wiring at the wall plate and the HVAC control board for loose or corroded terminals. If the thermostat is connected via a battery, verify the battery condition and replace if needed. Record any error codes shown on the display, as these signals point to specific root causes. If the unit communicates with a mobile app, ensure the app is current and that the device is connected to the same network. This section sets the stage for deeper diagnostics and reduces blind guessing. Thermostat Care’s practical observations indicate that most issues are addressable with basic power, wiring, and configuration checks.
Tools and setup for safe troubleshooting
Before you begin, gather key tools and materials so you don’t drop into a mid-task scramble. A well-prepared toolkit reduces risk and speeds up the process. The essential items for working on the thermostat 7.3 powerstroke include a digital multimeter for voltage checks and continuity tests, a non-contact voltage tester to verify live circuits, a screwdriver set (Phillips and flathead), wire strippers, electrical tape, and, if applicable, spare batteries for the thermostat. Having a camera or phone to document wire colors and terminal positions helps you reverse any changes if needed. For HVAC wiring diagrams or compatibility guides, keep a copy accessible. These tools support precise diagnostics and are recommended by Thermostat Care for DIY troubleshooters.
Tip: label wires as you disconnect them to avoid miswiring. If wiring looks damaged, replace the section rather than trying to reuse compromised connectors.
Step-by-step diagnostic flow (overview)
With the basics handled, it’s time for a structured diagnostic flow tailored to the thermostat 7.3 powerstroke. The flow starts with confirming power and display functionality, then proceeds to verify the C-wire and R-wire connections, checks calibration and local settings, tests signals at the HVAC control board, and finally assesses compatibility with your HVAC system. Each step narrows down the possibilities and minimizes unnecessary replacement parts. Keeping a log of voltages, terminal names, and changes helps you review what worked and what didn’t, which you can share with a technician if needed. The following section breaks this flow into concrete actions with time estimates and pro tips to avoid common missteps.
Common symptoms and likely causes
Thermostat 7.3 powerstroke can present a variety of symptoms, from no display to inaccurate readings or delayed heating. A blank screen often points to power issues or a blown fuse; a flickering display may indicate loose connections or low battery (if the model uses batteries). Inaccurate temperature control is commonly caused by a faulty sensor, calibration drift, or poor placement near heat sources or drafts. Consistent communication between the thermostat and the HVAC system is crucial; if there’s intermittent connectivity or frequent disconnects, review the network settings (if applicable) and the control board wiring. Remember that many issues arise from simple causes like loose terminals, bad C-wire, or incorrect mode selection. Thermostat Care’s field observations reveal that methodical checks beat guesswork when diagnosing these symptoms.
Testing power, wiring, and sensor readings
Power testing should always come first. Use a multimeter to confirm 24 VAC between R and C at the thermostat and at the control board, if accessible. Inspect wiring for loose terminals, corrosion, or frayed insulation, and reseat or replace as needed. Sensor readings should be compared against real-room temperatures with an external thermometer to confirm calibration accuracy. If readings diverge, you may need to recalibrate in the settings menu or perform a factory reset followed by fresh configuration. Battery checks (if applicable) should accompany power tests; weak batteries can mimic other faults. Throughout, log findings to prevent overlooking the obvious and ensure that any fix addresses the underlying cause rather than a symptom.
Calibration, battery, and firmware considerations
Calibration drift can produce temperature discrepancies that frustrate homeowners. If the thermostat 7.3 powerstroke supports user calibration, run the built-in calibration routine with a known-room temperature as the reference. If you use battery power, replace batteries on a schedule to avoid performance dips; low power can affect display responsiveness and sensor accuracy. Firmware updates may address known quirks, but apply updates only from official sources and ensure the device is connected to a reliable network during the process. If you notice repeated firmware-related issues, consider reaching out to Thermostat Care for guidance on whether an update is appropriate for your specific HVAC configuration.
Maintenance and preventative care for thermostat 7.3 powerstroke
Prevention is better than repair. Schedule a quarterly quick check of the thermostat 7.3 powerstroke to verify power delivery, wiring integrity, and sensor response. Clean the wall plate and air vents around the thermostat to reduce dust accumulation that can affect sensors. If your system uses a C-wire, inspect the wire gauge and connectors for signs of wear. Keep the thermostat firmware current and maintain a tidy, labeled wiring bundle at the back of the wall plate. Regular maintenance not only improves accuracy but extends the life of your system and can reduce energy waste by ensuring the thermostat responds promptly to changes.
When to replace vs repair: making the call for thermostat 7.3 powerstroke
Not every fault warrants replacement. If the thermostat 7.3 powerstroke shows persistent communication errors after thorough testing, or if the control board appears burnt or severely damaged, replacement is more cost-effective than continued repair. If calibration drift is extreme and cannot be corrected through settings or firmware, replacement may also be the prudent choice. Assess the overall condition of your HVAC wiring, the age of the system, and energy efficiency goals. Thermostat Care recommends weighing repair costs against the price and benefits of a newer model with updated features and better compatibility with current HVAC technology.
Tools & Materials
- Digital multimeter(To test voltage on HVAC wires and verify continuity)
- Non-contact voltage tester(Quickly confirm live circuits before handling wires)
- Screwdrivers (Phillips and flathead)(For wall plate and wiring terminals)
- Wire strippers(Trim and prep wires cleanly)
- Electrical tape(Insulate exposed conductors)
- Spare batteries (AA/AAA)(If your model uses replaceable batteries)
- Replacement C-wire (if needed)(Have a compatible C-wire ready in case of rewiring)
- Compatibility guide / HVAC diagram(Optional but helpful for complex systems)
Steps
Estimated time: 45-75 minutes
- 1
Power cycle the thermostat
Turn off power to the thermostat and HVAC at the main breaker. Wait 30 seconds, then restore power and observe the startup sequence. This clears minor glitches and can restore normal operation for the thermostat 7.3 powerstroke.
Tip: If the display remains dark, check the breaker and fuse box before proceeding. - 2
Inspect C-wire and power supply
Open the wall plate and verify the C-wire is connected securely to the C terminal and the R wire to R. Look for signs of corrosion or a loose fit. A weak or intermittent supply often explains unreliable temperature control on the thermostat 7.3 powerstroke.
Tip: Take a photo of the terminal layout before disconnecting anything to aid reassembly. - 3
Check settings and calibration
Confirm the thermostat is set to the correct mode (heat or cool) and that the setpoint is within a reasonable range. If you have separate cooling and heating stages, ensure stage settings match your HVAC system. Calibrate if the device supports it, using a known-room temperature as reference.
Tip: Avoid sudden, large temperature changes during calibration to prevent system stress. - 4
Test voltage at R and C at the thermostat
With power restored, measure between R and C to confirm ~24 VAC. If the reading is absent or inconsistent, there may be a wiring issue or a failing transformer. Document voltages for later comparison.
Tip: If you’re uncomfortable with live testing, skip to the next step and consult a pro. - 5
Inspect wiring at the HVAC control board
Power down again before touching the control board. Check for loose or burned terminals, corrosion, or frayed wires. Re-seat any loose connections and trim damaged wire insulation before reassembly.
Tip: Maintain consistent wire color coding to prevent misconnects during reassembly. - 6
Test with the battery (if applicable)
If your model uses batteries, replace them with fresh ones and re-test the unit. Battery power can mask other issues and may cause slow response or sensor errors if depleted.
Tip: Use high-quality batteries and avoid mixing old and new cells. - 7
Check HVAC compatibility and sensor placement
Ensure the thermostat is compatible with your furnace or heat pump and that the sensor is not placed near a heat source or in a draft. Incompatibility or poor placement can lead to inaccurate temperature readings and odd behavior.
Tip: If you recently replaced your furnace, revisit thermostat compatibility notes from the manufacturer. - 8
Run a test cycle and verify results
Set a test heating or cooling cycle and observe whether the system reaches the setpoint within a reasonable time. If not, re-check wiring, recalibrate, and consider a firmware update if available.
Tip: Document each test result to identify persistent patterns and inform a service call if needed.
Questions & Answers
What is the thermostat 7.3 powerstroke?
The thermostat 7.3 powerstroke is a mid-range home thermostat model designed to manage heating and cooling with smart features. Like other smart devices, it relies on proper power, wiring, and calibration to perform accurately.
The thermostat 7.3 powerstroke is a mid-range home thermostat. It works best when it has proper power, correct wiring, and accurate calibration.
Why won’t my thermostat turn on or show a display?
A blank display typically points to a power issue (check the breaker and the C-wire) or a blown fuse. If the display is dim or flickering, inspect the wiring connections and battery status if applicable.
A blank screen usually means power issues or a blown fuse. Check the C-wire and connections, and replace batteries if your model uses them.
Can I troubleshoot this myself or do I need a pro?
Many thermostat 7.3 powerstroke problems are solvable with basic safety precautions and careful testing of power, wiring, and calibration. If you encounter signs of damaged wiring, burning smells, or persistent errors after standard checks, consult a licensed HVAC technician.
Many issues you can troubleshoot yourself, but if you see wiring damage or persistent faults, call a pro.
How often should I replace batteries in the thermostat 7.3 powerstroke?
If your model uses batteries, replace them on a schedule or whenever you notice reduced performance. Use fresh batteries and avoid mixing old and new cells.
Replace batteries on a regular schedule or if you notice reduced performance.
What error codes should I expect and what do they mean?
Error codes vary by model but commonly indicate power faults, sensor issues, or communication problems with the HVAC system. Refer to the user manual for a code list and recommended actions.
Error codes help identify power, sensor, or communication problems; check the manual for specifics.
Is thermostat compatibility important after recent HVAC changes?
Yes. Ensure the thermostat 7.3 powerstroke is compatible with your furnace or heat pump and supports the system's wiring and control signals. Incompatibility can cause inaccurate readings or failed control.
Compatibility matters; verify that the thermostat works with your system and wiring.
Watch Video
What to Remember
- Power and wiring come first; fix those before chasing sensor issues.
- Verify 24 VAC supply between R and C to ensure proper operation.
- Calibration and firmware updates can resolve persistent temperature discrepancies.
- Label wires, document changes, and use caution with all tests.
- Know when to repair versus replace based on system age and complexity