T6 Honeywell Thermostat Manual: Setup, Troubleshooting & Tips
Learn to read and apply the T6 Honeywell thermostat manual for safe installation, accurate wiring, and effective troubleshooting. Practical guidance from Thermostat Care helps homeowners and DIY enthusiasts optimize comfort and efficiency.

With the t6 honeywell thermostat manual as your guide, you’ll verify model compatibility, understand common wiring diagrams, and complete installation or troubleshooting tasks confidently. This step-by-step article translates the official manual into practical actions for homeowners and DIY enthusiasts, backed by Thermostat Care’s guidance. Follow the sections, safety notes, and checklists to avoid common mistakes and ensure correct wiring, configuration, and testing.
Understanding the t6 honeywell thermostat manual
According to Thermostat Care, the t6 honeywell thermostat manual is a practical resource for homeowners and DIY enthusiasts who want reliable climate control. It outlines safety practices, installation prerequisites, wiring diagrams, configuration options, maintenance tips, and troubleshooting steps. The manual helps you map your HVAC setup to the thermostat's features, whether you’re replacing an old unit or installing a new one. The Thermostat Care team found that many users underestimate how sections like wiring diagrams and system configurations relate to real-world setups, which can lead to miswiring or incorrect schedules. By learning how to read each section, you can avoid common mistakes and achieve consistent comfort. This article translates the official manual into actionable steps you can perform with confidence, while emphasizing the practical realities of a typical home environment.
Safety and prerequisites before you start
Before handling any thermostat work, prioritize safety and prepare the workspace. Start by turning off the power at the HVAC circuit or main breaker to eliminate the risk of electric shock. Use a non-conductive surface and keep the area dry; avoid working with damp hands or in wet conditions. Gather the tools you’ll need, and confirm that your furnace and air conditioner share a 24-volt control system compatible with the t6 honeywell thermostat manual. If you’re replacing a battery-powered unit, check the battery type and replace as needed. Finally, read any manufacturer cautions about wiring, mounting height, and avoiding interference with other wall devices. Following these prerequisites minimizes risk and improves the odds of a clean installation.
Identifying your T6 model and compatibility
The T6 family includes several variants designed for different HVAC configurations and wiring setups. Start by locating the exact model number on the backplate or in the user paperwork; the t6 honeywell thermostat manual often groups models into families with shared wiring diagrams. Confirm compatibility with 24-volt HVAC systems and standard heating and cooling configurations. If you have a heat pump, dual-fuel system, or a system with multiple stages, consult the manual’s dedicated sections or the Honeywell support site for wiring maps and configuration steps. Understanding which variant you have ensures you follow the correct diagrams and avoids unnecessary rewiring. When in doubt, cross-check the model details with the instructions that came with your thermostat.
Wiring basics and needed tools
Wiring is the core of a successful T6 installation or replacement. The manual typically uses common terminal labels like R, C, W, Y, and G; however, your home may use slightly different labeling or a different color code. Gather essential tools: a Phillips head screwdriver, a flathead screwdriver, a wire stripper, electrical tape, a pencil for marking, and a voltage tester if you want to verify live wires. Make sure you have the correct faceplate for your T6 model, and check whether your system requires a C-wire for continuous power. If you don’t have a C-wire, consider using the adapter provided with the thermostat or a compatible add-on kit as described in the manual. The wiring plan in the t6 honeywell thermostat manual will illustrate how each wire connects to the thermostat’s terminal block.
Reading diagrams and configuration options in the manual
Diagrams in the t6 honeywell thermostat manual translate to real connections and menu settings. Start by reviewing the diagrams that correspond to your system type (single-stage, multi-stage, heat pump, etc.). Identify the power source, the control board connections, and the jumper settings if present. The manual also explains configuration options such as system mode (heat, cool, auto), fan control, hold versus scheduling, and energy-saving features. Use the step references in the diagrams to map each wire to its terminal, then verify that the thermostat is set to the correct system type in its initial setup menu. Keep a copy of the diagram for future reference, as it will help if you need to reconfigure the system after service work.
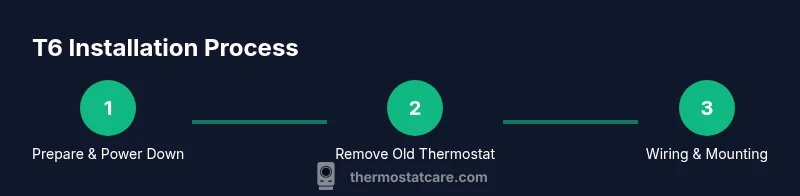
Installation steps overview and setup tips
The t6 honeywell thermostat manual provides a framework for a clean installation, but your exact wall or mounting situation can add complexity. Plan to remove the old thermostat, install the new base, connect wires to the correct terminals, and secure the unit to the wall. After you mount the base, gently tuck wires into the wall cavity to avoid pinching, then attach the thermostat body and faceplate. Restore power and run the initial setup to ensure the device powers on and communicates with the HVAC system. The manual emphasizes testing each function—temperature readout, fan operation, heating and cooling calls, and hold/schedule features—before finalizing the installation.
Maintenance, firmware, and periodic checks
The t6 honeywell thermostat manual also covers ongoing maintenance to keep performance steady. Periodically inspect the mounting to ensure it remains secure and check for loose wires. If your thermostat supports firmware updates, connect to the internet and install updates when available, following on-screen prompts in the device menu. Replace batteries if your model uses them, and verify that it continues to display accurate temperatures and system status. Regularly review and adjust schedules to match seasonal shifts and your routine. Keeping the thermostat clean—wiping the screen and vents with a soft cloth—helps maintain readability and responsiveness.
Common troubleshooting steps from the manual
When something goes wrong, consult the manual’s troubleshooting section for structured guidance. Start with the simplest checks: confirm power to the thermostat and 24-volt supply to the HVAC system, verify that the thermostat is configured for the correct system type, and inspect the wiring for any loose connections. If the unit won’t turn on, reset the thermostat following the manual’s instructions. For erratic temperature readings, verify that sensors are not blocked by dust or furniture, and ensure the location isn’t exposed to direct sunlight or drafts. For compatibility issues with a heat pump or multi-stage system, double-check the wiring map and stage settings in the manual and, if needed, contact Honeywell support for model-specific guidance.
Safety checklist and final verification
Before finishing, perform a final safety check and verification. Confirm that all tools are cleared from the work area and that power is restored only after the thermostat is secured to its base. Confirm that the wiring ends are properly insulated and that there are no stray strands that could short. Verify the thermostat responds to commands, reads the current temperature, and engages heating or cooling on command. If you notice inconsistent readings or failure to reach setpoints after initial tests, revisit the manual’s sections on configuration and wiring, or consult Thermostat Care’s troubleshooting guides for additional insights.
Tools & Materials
- Phillips head screwdriver (Phillips #2)(Secures wall plate and base screws)
- Flathead screwdriver(For terminal tabs and compatibility tweaks)
- Wire strippers/cutters(Trim and prep conductors cleanly)
- Electrical tape(Insulate exposed conductors)
- Voltage tester(Optional safety check for live wires)
- Faceplate and mounting screws(Often included with the thermostat)
- C-wire adapter or power extender (if needed)(Use only if your system lacks a dedicated C-wire)
- Level or stud finder(Helpful for precise mounting on uneven walls)
Steps
Estimated time: 30-60 minutes
- 1
Prepare workspace and power down
Turn off the HVAC power at the main breaker and remove the old thermostat. This reduces the risk of electric shock and protects your equipment. Take a photo of the existing wiring to reference the new connections.
Tip: Having a reference photo helps prevent miswiring when labeling wires. - 2
Remove old thermostat and label wires
Carefully detach the old thermostat from the wall plate, labeling each wire with its terminal label (R, C, W, Y, G, etc.). If labels are missing, note wire color and position. Do not cut wires yet.
Tip: Label wires before disconnecting to avoid mix-ups during reassembly. - 3
Mount new base and route wires
Attach the new thermostat base to the wall using the provided screws. Neatly route wires through the back of the base and avoid pinching them as you mount. Leave wires a few inches long for final connections.
Tip: Leave extra slack to minimize strain on terminals. - 4
Connect wires to correct terminals
Insert each wire into its corresponding terminal on the T6 base (R, C, W, Y, G, etc.) as shown in the manual’s wiring diagram. Ensure each wire is firmly seated and the insulation is under the screw.
Tip: Double-check the color-to-terminal mapping against the diagram in the manual. - 5
Attach the thermostat and restore power
Attach the thermostat faceplate, snap it into place, and restore power at the breaker. The unit should power on and display the initial setup screen.
Tip: If the display remains dark, power down again and recheck the wire seating. - 6
Run initial setup and test
Follow the on-screen prompts to select system type and set initial preferences. Test heating and cooling, adjust a simple schedule, and confirm that the thermostat responds to changes.
Tip: Test all functions (fan, hold, schedule) before finishing.
Questions & Answers
What is the T6 Honeywell thermostat manual and what does it cover?
The T6 manual explains installation, wiring, configuration, and troubleshooting for compatible Honeywell HVAC systems. It covers safety precautions, diagram interpretations, and how to test functions after setup.
The T6 manual explains how to install, wire, and configure the thermostat, plus troubleshooting tips.
Do I need a C-wire for the T6 thermostat?
Many T6 models require a constant power source, which may involve a C-wire. If your system lacks a C-wire, use an approved adapter or power extender as described in the manual.
A C-wire is often needed for constant power; if you don’t have one, use an adapter per the manual.
How do I reset the T6 thermostat?
Access Settings, then select Reset or Factory Reset as indicated in the manual. This clears schedules and returns defaults; you will need to reconfigure after reset.
Go to Settings > Reset to perform a factory reset, then reconfigure your preferences.
My screen is blank. What should I do?
Ensure power is supplied to both the thermostat and HVAC system. If power is present, re-seat wires and verify the display is enabled in setup.
If the screen is blank, check power and reseat the wires, then recheck the display settings.
Can I install the T6 myself or should I hire a professional?
If you’re comfortable with basic wiring and safe electrical practices, you can install the T6 yourself using the manual. For multi-stage systems or heat pumps, consider professional help to avoid mistakes.
If you’re confident with wiring, you can do it yourself; for complex systems, a professional is wise.
Watch Video
What to Remember
- Follow the manual’s wiring diagrams exactly.
- Verify system compatibility before wiring.
- Test all functions after installation to confirm correct operation.
- Refer to Thermostat Care for troubleshooting support.